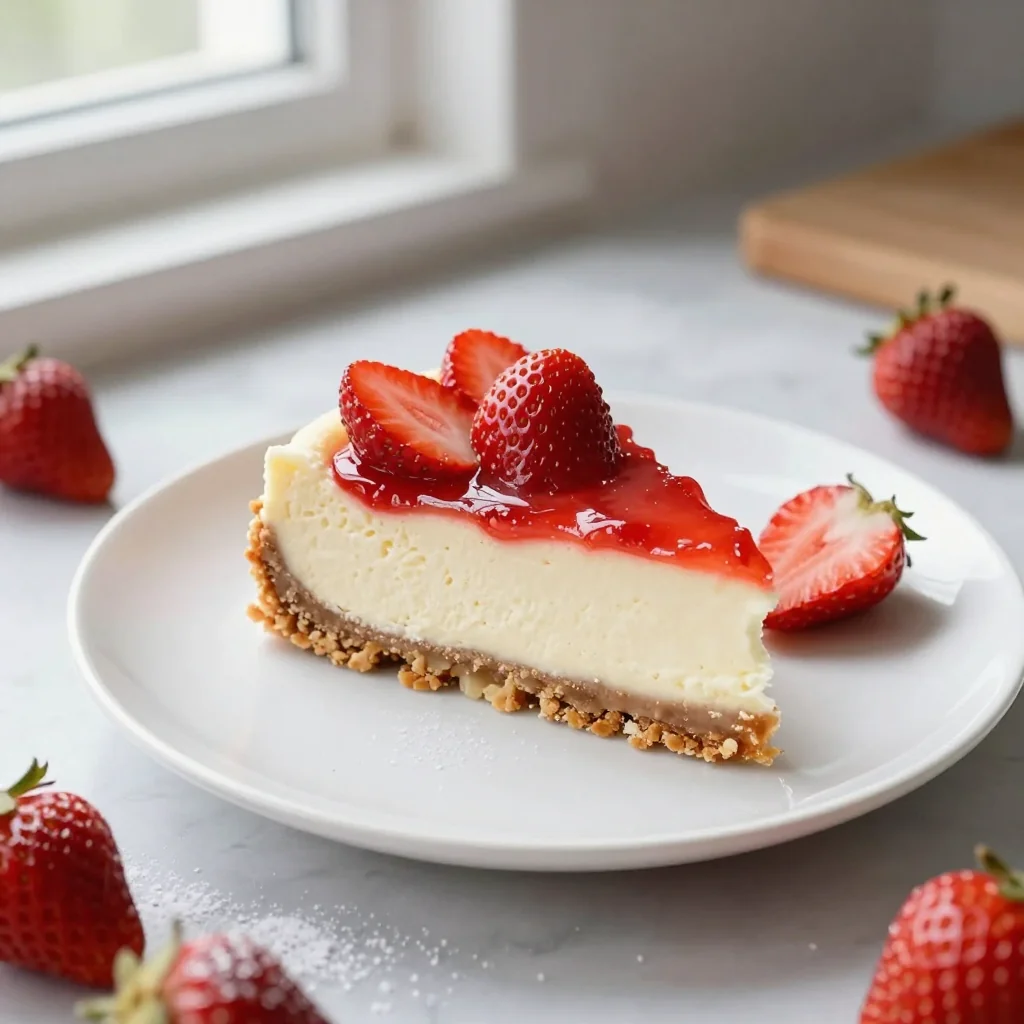
A luscious, no‑bake strawberry cheesecake that dazzles with a buttery graham crust and fresh berry topping.

Personal Story
When I was a teenager, my grandmother would pull out a chilled strawberry cheesecake from the freezer during hot summer evenings, and the whole house would fill with the sweet scent of fresh berries and buttery crust. I remember sitting at the kitchen table, eyes wide with anticipation, as she sliced a perfect piece and handed it to me on a delicate porcelain plate. The cool, velvety texture of the cream cheese combined with the bright, slightly tart strawberries made that moment unforgettable. Years later, after moving to a bustling city and juggling a demanding career, I craved that nostalgic comfort but lacked the time and oven space to bake a traditional cheesecake.
This no‑bake version was born out of that longing. By using a simple graham cracker crust and a quick‑set filling, I recreated the same luxurious mouthfeel without ever turning on the oven. The recipe stays true to the classic flavor profile while embracing modern convenience, making it perfect for spontaneous gatherings or a quiet weekend treat.
In this article, I’ll walk you through every step, from crushing the crackers to achieving a perfectly smooth filling, and share the science behind why gelatin helps the cheesecake hold its shape without compromising the silky texture. You’ll also discover tips for selecting the ripest strawberries, how to adjust sweetness, and ways to present the dessert like a professional patisserie.
Let’s dive in together and bring that cherished memory to your own kitchen—no oven required, just a little patience and a love for fresh fruit.
🌟 Why This Recipe Will Capture Your Heart
This strawberry cheesecake blends simplicity with elegance, delivering a dessert that feels both homemade and restaurant‑worthy.
- ✨ Effortless No‑Bake Process : No heat means less mess, no risk of over‑baking, and a faster turnaround for last‑minute celebrations.
- ✨ Fresh, Seasonal Flavor : Ripe strawberries provide natural sweetness and a burst of color that brightens any table.
- ✨ Versatile Presentation : Serve in individual jars, a classic round pan, or layered parfait glasses for visual impact.
- ✨ Balanced Sweetness : The subtle tang of cream cheese and lemon juice counters the berries’ sugar, creating a harmonious palate.
- ✨ Adaptable for Dietary Needs : Swap dairy or gluten components easily, making it inclusive for many guests.
- ✨ Crowd‑Pleasing Appeal : Its smooth texture and vibrant look win over both kids and adults, ensuring unanimous praise.
🥗 Ingredients
📝 Complete Ingredient List
For the Graham Crust:
For the Cheesecake Filling:
For the Strawberry Topping:

🔍 Focus on Key Ingredients
Cream Cheese
Cream cheese provides the rich, velvety backbone of the cheesecake. Choose a full‑fat variety for maximum creaminess; low‑fat versions can become grainy. Let it sit at room temperature for at least 30 minutes before mixing—this prevents lumps and ensures a smooth batter.
Graham Crackers
The graham crackers create a buttery, slightly sweet crust that holds the filling together. When crushing, aim for fine crumbs rather than large chunks; a food processor works best, but a zip‑top bag and rolling pin do the trick. Adding a touch of melted butter and sugar binds the crumbs into a compact base.
Fresh Strawberries
Strawberries are the star of the topping. Look for berries that are firm, glossy, and free from bruises. Rinse gently, pat dry, and slice just before serving to retain their bright color and natural juices. If you prefer a glossy finish, gently heat the jam with a splash of water and brush over the sliced berries.
🔄 Quick Substitutions
| If you don’t have... | Use instead... |
|---|---|
| Graham crackers | Digestive biscuits (same amount) |
| Cream cheese | Neufchâtel cheese (slightly less fat) |
| Gelatin | Agar‑agar (1 g agar for 12 g gelatin, dissolve in hot water) |
👨🍳 Step‑by‑Step Instructions
Follow these detailed steps to create a flawless no‑bake strawberry cheesecake that will impress every guest.
📋 Phase 1: Preparation & Mise en Place
Gather all tools and ingredients before you start. This ensures a smooth workflow and prevents any last‑minute scrambling.
Crush the Graham Crackers
Place the graham crackers in a food processor and pulse until you achieve a fine crumb. If you don’t have a processor, put the crackers in a sturdy zip‑top bag and crush them with a rolling pin until they resemble coarse sand. Transfer the crumbs to a large mixing bowl.
Combine Butter and Sugar
In a small saucepan, melt the unsalted butter over low heat. Stir in the 30 g of granulated sugar until fully dissolved, then pour the mixture over the crushed crackers. Mix with a fork until the crumbs are evenly coated and begin to clump together.
Press the Crust into the Pan
Transfer the crumb mixture into a 20‑cm (8‑inch) springform pan. Using the back of a spoon or a flat-bottomed glass, press the crumbs firmly and evenly across the bottom, creating a compact base. Chill the crust in the refrigerator while you prepare the filling.
🔥 Phase 2: Filling & Assembly
The filling is where the cheesecake gets its silky texture and bright flavor.
Bloom the Gelatin (if using)
Sprinkle the gelatin powder over 60 ml of cold water in a small bowl. Let it sit for 5 minutes, then gently warm it in the microwave for 10‑15 seconds until fully dissolved. Set aside to cool slightly.
Blend Cream Cheese and Yogurt
In a large mixing bowl, beat the softened cream cheese with an electric mixer on medium speed until smooth (about 2 minutes). Add the Greek yogurt, sugar, vanilla extract, and lemon juice. Continue beating until the mixture is light, airy, and free of lumps.
Incorporate Gelatin and Fill the Crust
With the mixer on low, slowly drizzle the dissolved gelatin into the cream cheese mixture, ensuring it integrates fully. Pour the filling over the chilled crust, spreading it with a spatula to create an even surface. Tap the pan gently on the countertop to release any air bubbles.
Chill to Set
Cover the pan loosely with plastic wrap and refrigerate for at least 4 hours, preferably overnight. The chilling time allows the gelatin to set, giving the cheesecake a firm yet creamy texture.
✨ Phase 3: Finishing Touches & Serving
Add the strawberry topping and present the cheesecake beautifully.
Prepare the Strawberry Topping
Wash the strawberries, pat dry, and slice them thinly. If you like a glossy finish, warm the strawberry jam with a splash of water, then gently toss the sliced berries in the sauce. Arrange the berries in a decorative pattern over the chilled cheesecake.
Dust with Powdered Sugar
Using a fine sieve, lightly dust the top of the berries with powdered sugar. This adds a subtle sparkle and balances the tartness of the fruit.
Serve and Enjoy
Release the springform pan, slice the cheesecake with a hot, wet knife for clean cuts, and serve chilled. Pair with a glass of chilled rosé or a sparkling water with a slice of lemon for a refreshing finish.
💡 Expert Tips & Tricks
🛒 Choosing the Right Ingredients
Always buy strawberries that are bright red all the way to the tip; a white or greenish hue indicates under‑ripeness. For cream cheese, avoid those in the “light” line as they contain more stabilizers that can affect texture. When selecting graham crackers, look for the ones with a honey‑golden color and a subtle cinnamon aroma for added depth.
🔪 Preparation Techniques
Before crushing the crackers, give them a quick toast in the oven for 5 minutes; this intensifies the buttery flavor. When beating the cream cheese, start on low speed to prevent splattering, then increase to medium once the mixture is smooth. Use a rubber spatula to scrape the sides of the bowl to ensure no dry patches remain.
🌡️ Mastering the Set
The gelatin step is crucial for a firm slice. If you prefer a softer texture, reduce the gelatin to 6 g. Always dissolve gelatin in cold water first, then gently warm; overheating will cause it to lose its gelling ability. Refrigerate the cheesecake on the middle shelf where the temperature is most consistent.
🍽️ Presentation & Service
For a restaurant‑style look, pipe the filling into the crust using a piping bag with a wide tip. Arrange the strawberry slices in a concentric circle, starting from the outer edge and working inward. Finish with a drizzle of reduced strawberry jam for a glossy, professional finish.
🏆 Pro Tips
Professional chefs distinguish their desserts with precision, balance, and visual drama.
- 🎯 Temperature Control : Keep all dairy ingredients at the same temperature (room‑temp) before mixing. This prevents the formation of fat pockets that cause grainy texture.
- 🎯 Layered Flavor Development : Add a thin layer of raspberry coulis between the crust and the filling for an extra burst of fruit flavor that doesn’t overwhelm the palate.
- 🎯 Air Incorporation : Whip the cream cheese and yogurt just enough to incorporate air; over‑whipping can destabilize the gelatin, leading to a runny cheesecake.
- 🎯 Cutting Technique : Dip the knife in hot water, wipe dry, and slice; repeat for each cut. This ensures clean, smooth slices without dragging the creamy filling.
- 🎯 Garnish Geometry : Use a small melon baller to create strawberry spheres for an elegant garnish that adds texture and visual contrast.
- 🎯 Plate Temperature : Serve the cheesecake on chilled plates to keep it firm longer, especially in warm climates.
“A perfect cheesecake balances richness with lightness; the secret is in the precise setting of the filling.” — Dominique Crenn
🔄 Variations & Adaptations
This base recipe is a canvas for countless creative twists, allowing you to tailor it to any occasion or dietary need.
🥬 Vegetarian / Vegan Version
Replace dairy components with plant‑based alternatives while maintaining texture and flavor.
- Use vegan cream cheese (e.g., almond‑based) and coconut‑milk yogurt instead of dairy.
- Swap butter with coconut oil for the crust, and use maple syrup as a sweetener.
🌶️ Flavor Variations
Explore global flavor profiles by adjusting the topping, aromatics, or base.
Spicy Version:
Incorporate a pinch of cayenne pepper into the crust and drizzle a thin layer of chili‑infused strawberry sauce over the topping for a subtle heat.
Mediterranean Version:
Add finely chopped fresh basil to the filling and garnish with toasted almond slivers and a drizzle of honey‑infused olive oil.
Asian Fusion Version:
Mix a splash of yuzu juice into the cream cheese mixture and top with sliced strawberries tossed in a light ginger‑soy glaze.
⚠️ Dietary Adaptations
Gluten‑Free:
Use certified gluten‑free graham crackers or almond flour mixed with melted butter for the crust.
Lactose‑Free:
Replace cream cheese with lactose‑free cream cheese and Greek yogurt with coconut‑milk yogurt.
Low‑Calorie:
Reduce sugar in the filling by 30 %, use low‑fat Greek yogurt, and limit the amount of jam in the topping.
👶 Family / Kids Version
Kids love fun shapes and extra sweetness. Press the crust into a muffin tin for mini cheesecake cups, swirl a little strawberry jam into the filling, and top with colorful fruit candy or sprinkles.
📦 Storage & Reheating
🧊 Conservation
Refrigerator:
- Duration: 5 days
- Recommended container: airtight glass or plastic container
- Tip: Place a sheet of parchment paper directly on the surface to prevent drying.
Freezer:
- Duration: 1 month
- Method: Wrap tightly in plastic wrap, then foil, and store in a freezer‑safe bag.
- Defrosting: Transfer to the refrigerator overnight; avoid rapid thawing to keep texture.
💡 For best flavor, consume within three days of refrigeration; the fresh strawberries may lose their vibrancy after longer storage.
♨️ Reheating
🔥 Oven (Recommended):
- Preheat to 150 °C (300 °F).
- Cover the cheesecake loosely with aluminum foil.
- Heat for 8‑10 minutes until just warmed through.
- Remove foil and warm an additional 2 minutes for a gentle surface glow.
⚡ Microwave (Quick):
- Place a slice on a microwave‑safe plate.
- Heat at medium power for 20‑30 seconds.
- Check temperature; repeat in 10‑second bursts if needed.
🍳 Stovetop:
If you prefer a gentle heat, place a slice in a non‑stick skillet over low heat, covering with a lid for 2‑3 minutes. This method keeps the crust crisp while warming the interior.
🍷 Perfect Pairings
🥗 Side Dishes
- Light Citrus Salad: A mix of arugula, orange segments, and toasted pistachios provides a refreshing contrast.
- Vanilla‑Infused Shortbread: The buttery crumb complements the cheesecake’s richness without competing for flavor.
- Fresh Berry Compote: A warm compote of mixed berries adds depth and can be served alongside the slice.
🍷 Wine & Beverage Matches
- Rosé (dry, chilled): Its bright acidity cuts through the creaminess and highlights the strawberry notes.
- Prosecco: The effervescence lifts the dessert, making each bite feel lighter.
- Non‑Alcoholic Option: Sparkling water with a splash of elderflower syrup and a mint garnish.
🍰 Complementary Courses
Begin with a light appetizer such as smoked salmon crostini, follow the cheesecake with a palate‑cleansing sorbet (lemon or raspberry), and finish with a small espresso or a cup of herbal tea like chamomile to soothe the palate.
❓ Frequently Asked Questions
Q: Can I use a different fruit topping?
A: Absolutely! Blueberries, raspberries, or even a mixed tropical fruit compote work beautifully. Adjust the sweetness of the jam or glaze to complement the chosen fruit.
Q: How do I prevent the crust from becoming soggy?
A: Ensure the butter‑sugar mixture is fully incorporated and the crust is firmly pressed. Chill the crust for at least 15 minutes before adding the filling, which creates a barrier that reduces moisture migration.
Q: Is gelatin necessary?
A: Gelatin provides a firmer set, especially if you plan to slice the cheesecake after a short chilling period. If you prefer a softer, mousse‑like texture, you can omit it, but the cheesecake may be more delicate when cutting.
Q: What if I don’t have a springform pan?
A: A regular 9‑inch (23 cm) round cake pan works fine; just line the bottom with parchment paper for easy removal. Alternatively, use a deep pie dish and press the crust into the bottom and up the sides.
Q: Can I make this cheesecake ahead of time for a party?
A: Yes. Prepare the cheesecake up to the chilling step the day before. Keep it refrigerated, covered, and add the fresh strawberry topping just before serving to maintain brightness.
Q: How can I make the cheesecake lower in sugar?
A: Reduce the granulated sugar in the filling to 100 g, use a low‑sugar strawberry jam, and rely on the natural sweetness of ripe strawberries. Taste the filling before chilling and adjust as needed.
🎉 Let’s Get Baking!
This Strawberry Cheesecake No Bake with Graham Crust brings together the best of both worlds: the indulgent creaminess of a classic cheesecake and the effortless convenience of a no‑bake dessert. By following the detailed steps, you’ll achieve a silky, stable filling that holds its shape beautifully, while the fresh strawberry topping adds a burst of summer flavor year‑round. Remember, the key lies in using high‑quality ingredients, respecting the chilling times, and embracing the simple elegance of this dish.
Now it’s your turn—grab your ingredients, set the timer, and let the aroma of buttered graham crust fill your kitchen. Share your creations on social media, ask questions in the comments, and don’t forget to rate the recipe so we can keep improving our collection of unforgettable desserts.
Have you tried this recipe?
Leave a comment and rating below! Share your photos on Instagram with #StrawberryNoBakeCheesecake to be featured on our page.
Strawberry Cheesecake No Bake with Graham Crust
A silky, chilled cheesecake topped with fresh strawberries and a buttery graham crust.
📝 Ingredients
Graham Crust
Cheesecake Filling
Strawberry Topping
👨🍳 Instructions
- 1
Crush graham crackers into fine crumbs.
- 2
Mix melted butter and sugar, then combine with crumbs.
- 3
Press mixture into a 20 cm springform pan and chill.
- 4
Bloom gelatin in cold water, then dissolve gently.
- 5
Beat cream cheese, yogurt, sugar, vanilla, and lemon juice until smooth.
- 6
Stir dissolved gelatin into the filling, pour over crust.
- 7
Refrigerate for at least 4 hours or overnight.
- 8
Arrange sliced strawberries on top, drizzle jam, dust with powdered sugar.
- 9
Slice with a hot, wet knife for clean cuts.
- 10
Serve chilled, optionally paired with rosé.
🥗 Nutritional Information (per serving)
*Values are approximate and may vary based on ingredient brands.
📚 You Might Also Like
Blueberry No‑Bake Cheesecake
Lemon Cream No‑Bake Cheesecake
Chocolate No‑Bake Cheesecake


💬 Comments & Reviews
Leave a Comment
No comments yet. Be the first to share your thoughts!