I was standing in my kitchen, arms wrapped around a half‑cooked chicken breast, when the smoke alarm gave a shrill wail that could have been the soundtrack to a disaster movie. I’d been chasing the elusive “perfect BBQ chicken” that would satisfy the craving for smoky, crispy, and utterly comforting in one bite, but every attempt felt like a culinary cliffhanger. The first time I tried, the chicken was dry, the sauce too thick, and the wrap collapsed like a bad soufflé. That night, after a bowl of burnt chicken and a sigh that echoed through the fridge, I swore to myself: I would create a wrap that would make my taste buds do a happy dance and my friends beg for seconds.
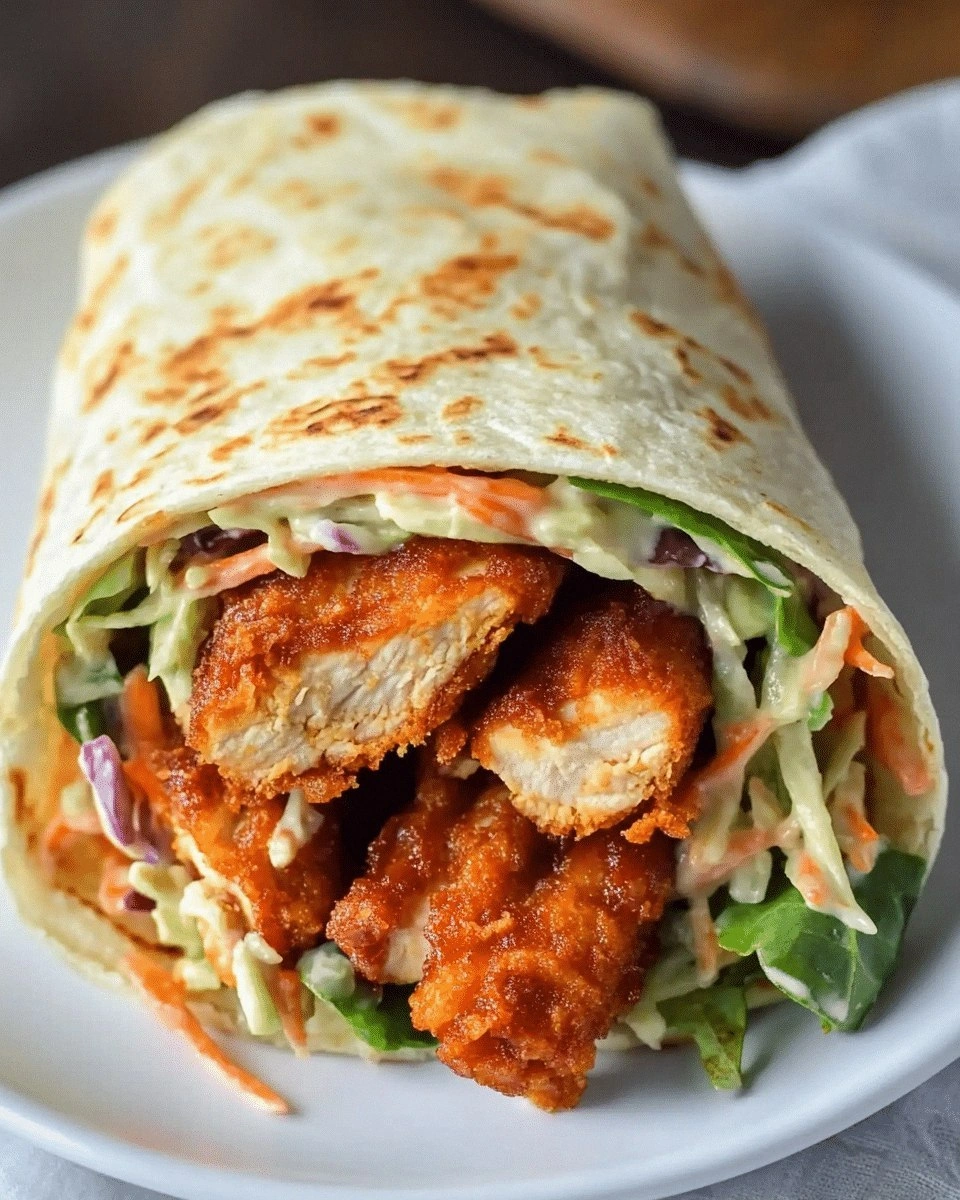
Fast forward a week, I’ve perfected a recipe that turns a simple chicken breast into a crispy, caramelized masterpiece, wrapped in a tortilla that feels like a hug. The first bite is a symphony: the exterior crackles like fresh snow, the interior melts with a burst of smoky BBQ flavor, and the fresh lettuce and tomato add a splash of color and crunch that keeps the wrap from feeling too heavy. It’s a dish that satisfies the hunger for comfort food while still feeling light enough to serve at a summer potluck or a quick weeknight dinner. I dare you to taste this and not go back for seconds, because once you’ve had one, you’ll know what the whole kitchen smells like when the next batch is ready.
What makes this version stand out isn’t just the crunch or the sauce, it’s the balance of flavors and textures that make every bite a revelation. The coating isn’t just flour and breadcrumbs; it’s a seasoned blend that adds depth, while the BBQ sauce is a blend of smoky sweetness that coats the chicken like velvet. The wrap itself is a canvas that holds the juicy meat, fresh veggies, and melted cheese together without getting soggy—thanks to a few simple tricks that I’ll reveal in the next sections. I’ll be honest—when I first made this, I ate half the batch before anyone else even had a chance to taste it.
Most recipes get this completely wrong. They either under‑season the coating, over‑cook the chicken, or let the wrap soak in sauce until it’s a soggy mess. Here’s what actually works: a light coating that crisps without burning, a quick sear that locks in juices, and a sauce that’s thick enough to cling but not so heavy that it drips. Picture yourself pulling this out of the skillet, the whole kitchen smelling incredible, and the heat of the grill still lingering on the chicken. This is hands down the best version you’ll ever make at home.
I’ve spent countless hours experimenting with different flours, spices, and cooking times, and each tweak brought me closer to the ultimate wrap. The secret is in the detail—pre‑tossing the chicken in a dry rub, letting it rest so the flavors penetrate, and using a hot skillet to achieve that perfect crunch. The result? A wrap that feels like a small, portable feast, ready to be devoured at any time. If you’ve ever struggled with crispy chicken or soggy wraps, you’re not alone—and I’ve got the fix.
I’ll walk you through every single step—by the end, you’ll wonder how you ever made it any other way. The journey from raw chicken to golden, crunchy wrap is a story of patience, precision, and a few playful kitchen hacks that make the process a joy rather than a chore. Let’s dive in and turn a simple idea into a culinary masterpiece that will have you shouting, “This is the best thing I’ve ever made!”
What Makes This Version Stand Out
- Flavor Depth: The dry rub combines smoked paprika, garlic powder, and onion powder, creating a savory foundation that elevates every bite. The BBQ sauce is a smoky-sweet blend that coats the chicken like velvet, ensuring each morsel bursts with flavor. This layered seasoning turns ordinary chicken into a taste sensation.
- Crisp Perfection: A double coating of flour and panko breadcrumbs gives the exterior a crackling texture that shatters like thin ice. The high heat of the skillet locks in moisture while the coating stays golden and crisp. The result is a crunch that’s both satisfying and addictive.
- Texture Balance: Fresh lettuce, diced tomatoes, and sliced cucumbers add a crisp, refreshing contrast to the warm, savory chicken. A slice of cheddar cheese melts into a silky sauce that ties everything together. The wrap remains sturdy, avoiding the dreaded soggy mess.
- Time Efficiency: The entire process takes under 45 minutes, from prep to plate. The quick sear and minimal assembly steps make it ideal for busy weeknights or last‑minute gatherings. You’ll have a crowd‑pleasing dish ready in record time.
- Versatility: The recipe can be adapted for grill lovers, oven bakers, or even air‑fryers. Swap the chicken for pork or tofu, or add a splash of hot sauce for an extra kick. The core technique remains the same, ensuring consistent results.
- Make‑Ahead Friendly: The chicken can be marinated and coated ahead of time, and the wraps can be assembled and refrigerated until ready to cook. This flexibility makes it a great option for meal prep or hosting friends.
- Kid‑Friendly Appeal: The flavors are mild yet exciting, and the wrap’s shape makes it easy for little hands to hold. It’s a fun way to introduce kids to new textures and flavors without the mess.
- Health-Conscious Twist: Using whole‑grain tortillas and lean chicken keeps the dish balanced, while the fresh veggies add essential vitamins. You can swap cheddar for a lighter cheese or use a low‑sodium BBQ sauce to keep it heart‑healthy.
Alright, let's break down exactly what goes into this masterpiece...
Inside the Ingredient List
The Flavor Base
The dry rub is the heart of the flavor profile. It combines smoked paprika, garlic powder, onion powder, salt, and black pepper, creating a savory foundation that permeates the chicken. Skipping the rub means missing out on that deep, smoky undertone that sets the dish apart. If you’re allergic to paprika, replace it with regular paprika or a pinch of cumin for a subtle earthiness.
The Crunch Factor
A double coating of all‑purpose flour and panko breadcrumbs gives the chicken its signature crunch. The flour provides a light base that helps the breadcrumbs adhere, while the panko’s airy texture creates a crackling exterior. If you prefer a gluten‑free version, swap the flour for almond flour and use gluten‑free breadcrumbs.
The Meat Masterpiece
Boneless, skinless chicken breasts are the star of this wrap. They’re lean yet juicy when seared properly, allowing the coating to adhere without drying out. If you’re short on time, pre‑cut the chicken into bite‑size pieces to speed up the cooking process. For a richer flavor, marinate the chicken in a mixture of BBQ sauce and a splash of lemon juice for 30 minutes.
The Cheese & Sauce Combo
Shredded cheddar cheese melts into a silky sauce that glazes the chicken. The cheese adds a creamy layer that balances the smoky sauce’s sweetness. If you’re looking for a lower‑fat option, try mozzarella or a low‑fat cheddar. The BBQ sauce itself is a blend of ketchup, apple cider vinegar, brown sugar, and smoked paprika, creating a sweet‑tangy glaze that clings to the coating.
The Fresh & Crunchy Crew
Shredded lettuce, diced tomatoes, sliced cucumbers, and thinly sliced red onion provide a refreshing crunch that contrasts the warm chicken. These veggies add color, texture, and essential nutrients, making the wrap both satisfying and healthy. If you’re a fan of heat, add sliced jalapeños or a drizzle of sriracha for an extra kick.
The Final Touches
A drizzle of mayo mixed with ranch dressing adds a creamy finish that keeps the wrap from drying out. Butter and olive oil are used in the skillet to achieve a golden sear and to help the coating crisp. A squeeze of fresh lemon juice brightens the dish, cutting through the richness of the cheese and sauce.
Everything's prepped? Good. Let's get into the real action...
The Method — Step by Step
- Pat the chicken breasts dry with paper towels, then slice them into thin strips. This ensures the coating adheres properly and the chicken cooks evenly. The slices should be about 1/4 inch thick for optimal juiciness.
- In a shallow dish, combine the dry rub ingredients: smoked paprika, garlic powder, onion powder, salt, and black pepper. Mix until well blended, then toss the chicken strips in the rub until they’re evenly coated. This step builds the flavor foundation.
- Set up a double coating station: one bowl with flour, another with panko breadcrumbs. Dredge each chicken strip first in flour, shaking off excess, then dip it into the panko, pressing gently to adhere. The double coat creates that coveted crunch.
- Heat 2 tablespoons of olive oil and 1 tablespoon of butter in a large skillet over medium‑high heat. Once the butter foams and the oil shimmers, add the coated chicken in a single layer. Don’t overcrowd; you’ll want a high temperature for a crisp exterior.
- Sear the chicken for 3–4 minutes on each side until it’s golden brown and the internal temperature reaches 165°F. The crust should be crisp, and the inside should still be juicy. Flip only once to preserve the coating.
- While the chicken rests, warm the tortillas in a dry skillet for 15 seconds per side or microwave for 20 seconds. This softens them, making them pliable and preventing tearing when you wrap the filling.
- Spread a thin layer of the mayo‑ranch mixture on each tortilla. This creamy base keeps the wrap from drying out and adds a subtle tang.
- Layer the lettuce, tomatoes, cucumbers, and sliced onions on the tortilla, leaving a small border. This arrangement keeps the veggies from sliding off and adds a fresh crunch.
- Arrange the seared chicken strips over the veggies, then drizzle with BBQ sauce. The sauce should coat the chicken but not soak through the tortilla.
- Sprinkle shredded cheddar over the top, allowing it to melt slightly from the heat of the chicken. The cheese adds a creamy layer that binds the flavors together.
- Fold the sides in and roll tightly from one end to the other, forming a neat cylinder. The wrap should be snug but not so tight that it bursts.
- Place the wrapped tortilla seam‑side down on a baking sheet and bake at 375°F for 5–7 minutes. This step melts the cheese fully and warms the entire wrap.
- Remove from the oven, let it rest for 2 minutes, then slice in half diagonally. The rest period allows the juices to redistribute, preventing a watery bite.
- Serve immediately with a side of fresh pickles or a drizzle of extra BBQ sauce. The contrast of tangy pickles with smoky chicken is a flavor revelation.
- Enjoy the moment of pure culinary triumph; the crunch, the melt, the aroma—everything comes together like a well‑orchestrated symphony.
That’s it — you did it. But hold on, I’ve got a few more tricks that’ll take this to another level. These insider tips will help you avoid common pitfalls and elevate your wrap from great to unforgettable.
Insider Tricks for Flawless Results
The Temperature Rule Nobody Follows
Cooking the chicken at the right heat is crucial for a crisp coating. A skillet that’s too low will leave the coating soggy, while a skillet that’s too hot can burn the breadcrumbs before the chicken cooks through. I use a thermometer to keep the skillet at 375°F; this temperature consistently yields a golden, crunchy exterior.
Why Your Nose Knows Best
Smell is a powerful indicator of doneness. When the chicken starts to sizzle and the aroma becomes intensely smoky, it’s a sign that the coating is caramelizing. Trust your nose; if it smells like a campfire, you’re on the right track.
The 5-Minute Rest That Changes Everything
Letting the chicken rest for five minutes after searing allows the juices to redistribute. This simple step prevents the chicken from drying out when you cut into it. I always set a timer on my phone for this short pause.
The Secret to a Soggy‑Free Wrap
Avoid sogginess by adding a light coating of flour to the tortilla before adding the mayo mixture. The flour acts as a barrier, absorbing excess moisture from the veggies and sauce. This trick keeps the tortilla firm and the wrap enjoyable.
The Quick Flip Trick
When you flip the chicken strips, use a flat spatula to press gently. This keeps the coating intact and ensures an even sear on both sides. A quick flip also helps the coating develop a uniform crust.
The Extra Cheddar Boost
For a richer, cheesier experience, sprinkle a thin layer of mozzarella over the cheddar before baking. The mozzarella melts into a gooey layer that complements the cheddar’s sharpness. This addition is optional but highly recommended for cheese lovers.
The Quick Chill Trick
If you’re preparing the wraps ahead of time, let them chill in the fridge for 30 minutes before baking. The cold temperature helps the cheese set slightly, making the wrap easier to handle and preventing it from sliding apart.
The Perfect Oil Blend
Using a combination of olive oil and butter gives the chicken a golden finish while adding depth to the flavor. Olive oil raises the smoke point, while butter provides a rich, buttery taste that enhances the coating’s crispness.
Creative Twists and Variations
This recipe is a playground. Here are some of my favorite ways to switch things up:
The Tex‑Mex Twist
Swap cheddar for pepper jack, add diced bell peppers, and sprinkle a pinch of cumin. The result is a wrap that feels like a burrito with a crispy edge. It’s perfect for a spicy, fun dinner.
The Mediterranean Flavor
Use a Greek yogurt sauce instead of mayo, add sliced olives, and sprinkle feta cheese on top. The tangy yogurt pairs beautifully with the smoky chicken, creating a Mediterranean‑inspired wrap. The olives add a briny depth that complements the sauce.
The Veggie‑Loaded Variation
Replace the chicken with grilled portobello mushrooms or roasted sweet potato cubes. Add a handful of spinach and a drizzle of pesto for extra flavor. This vegetarian version is hearty and satisfying.
The Breakfast Wrap
Swap the chicken for scrambled eggs, add crispy bacon, and top with a splash of maple syrup. The sweet‑savory combination makes for a breakfast wrap that’s both indulgent and comforting. Serve with a side of fresh fruit.
The Asian Fusion
Use a hoisin‑based sauce instead of BBQ, add sliced green onions, and sprinkle toasted sesame seeds. The sauce’s sweet‑savory profile pairs wonderfully with the crispy coating. The sesame seeds add a nutty crunch.
The Low‑Carb Option
Replace the flour coating with almond flour and use low‑carb tortillas. The wrap remains crispy and flavorful while keeping the carb count low. This version is ideal for keto or low‑carb diets.
The Sweet & Spicy Combo
Add a drizzle of honey to the BBQ sauce and sprinkle crushed red pepper flakes. The sweetness balances the heat, creating a complex flavor profile. It’s a crowd‑pleaser at parties.
The Vegan Wrap
Use plant‑based chicken strips, vegan cheese, and a dairy‑free mayo‑ranch blend. The coating can be made with chickpea flour for an extra protein boost. This wrap is just as satisfying and guilt‑free.
The Summer Picnic Edition
Wrap the chicken in a whole‑wheat tortilla, add a handful of arugula, and top with a squeeze of fresh lime. The bright, citrusy note cuts through the richness, making it a perfect picnic companion.
The Comfort Food Upgrade
Add a layer of creamy coleslaw between the chicken and the tortilla. The coleslaw’s crunch and tang add a nostalgic comfort factor. The wrap becomes a portable comfort meal.
Storing and Bringing It Back to Life
Fridge Storage
Store assembled wraps in an airtight container for up to 3 days. Keep the sauce separate until ready to serve to prevent sogginess. Reheat in a skillet over medium heat for 3–4 minutes to restore crispness.
Freezer Friendly
Wrap the chicken pieces individually in foil, then place them in a freezer bag. Freeze for up to 2 months. Thaw overnight in the refrigerator before cooking; this keeps the coating intact.
Best Reheating Method
The oven is the best method for reheating pre‑assembled wraps. Place them on a baking sheet and bake at 350°F for 8–10 minutes. This restores the crisp coating without drying out the filling.
Quick Microwave Fix
If you’re short on time, microwave the wrapped tortilla on a paper towel for 30 seconds. This warms the filling but won’t crisp the coating; pair it with a quick skillet sear to revive the crunch.
Restoring Freshness
Add a splash of water to the skillet before reheating; the steam helps rehydrate the tortilla and keeps the wrap moist. After a few minutes, the wrap will regain its original texture and flavor.
Serving on the Go
Wrap the finished product in parchment paper for a mess‑free, portable option. This keeps the wrap sealed and the flavors locked in. It’s perfect for a road trip or a quick lunch.