I remember the night like it was yesterday, the kitchen lights flickering, a pot of boiling water sputtering, and my friend daring me to make something that would blow everyone’s minds. I had a craving that was impossible to ignore—something that could be sliced, baked, and still feel like a fresh, buttery slice of heaven. I tried countless variations, but every time the result was either soggy, over‑seasoned, or just plain forgettable. That was until I discovered a slice‑by‑slice baked potato recipe that turned a humble tuber into a show‑stopping dish that everyone will beg for again and again.
Picture this: the oven preheated to 425°F, a tray lined with parchment paper, and a handful of golden‑brown potato slices arranged like a miniature mosaic. The scent of roasted rosemary and paprika fills the air, a warm, earthy perfume that makes your stomach growl even before the first bite. The sound of the first crisp crack when the potato meets the hot pan is music, a satisfying snap that promises crunch. And the touch—each slice feels firm yet yielding, a perfect balance of chew and crisp that’s almost too good to touch. The taste, when it finally arrives, is a marriage of buttery richness and herbaceous zing, with a subtle pepper bite that lingers like a secret whisper.
What sets this version apart is not just the flavor, but the technique. I used a two‑stage baking process that locks in moisture while creating an irresistible crust. I also added a splash of sour cream in the final minute of baking to give the edges a creamy sheen, and sprinkled a handful of cheddar cheese right at the end for a melty, gooey finish that melts into every bite. I dared you to taste this and not go back for seconds, and I’ve seen people come back for a third plate. And I’ll be honest—by the time the last slice was gone, I had already started planning the next batch. If you’re ready to discover the secret that turns an ordinary side into a crowd‑pleaser, stay with me here.
I’m not going to hide the fact that this recipe is a game‑changer. The first time I tried it, the kitchen smelled like a rustic French countryside, and the guests’ eyes widened at the sight of the golden slices. The texture was a revelation: each bite offered a crisp exterior that cracked like thin ice, followed by a fluffy interior that was almost cloud‑like. It’s simple, it’s elegant, and it’s the kind of dish that can be made in minutes yet feels like a gourmet experience. Let me walk you through every single step—by the end, you’ll wonder how you ever made it any other way.
What Makes This Version Stand Out
- Taste: The layered flavors—from rosemary to paprika to a hint of smoked salt—create a symphony that dances on the palate, leaving a memorable aftertaste that makes you reach for another slice.
- Texture: The two‑stage baking process gives each slice a crisp, caramelized edge while keeping the inside soft and fluffy, a contrast that is both satisfying and addictive.
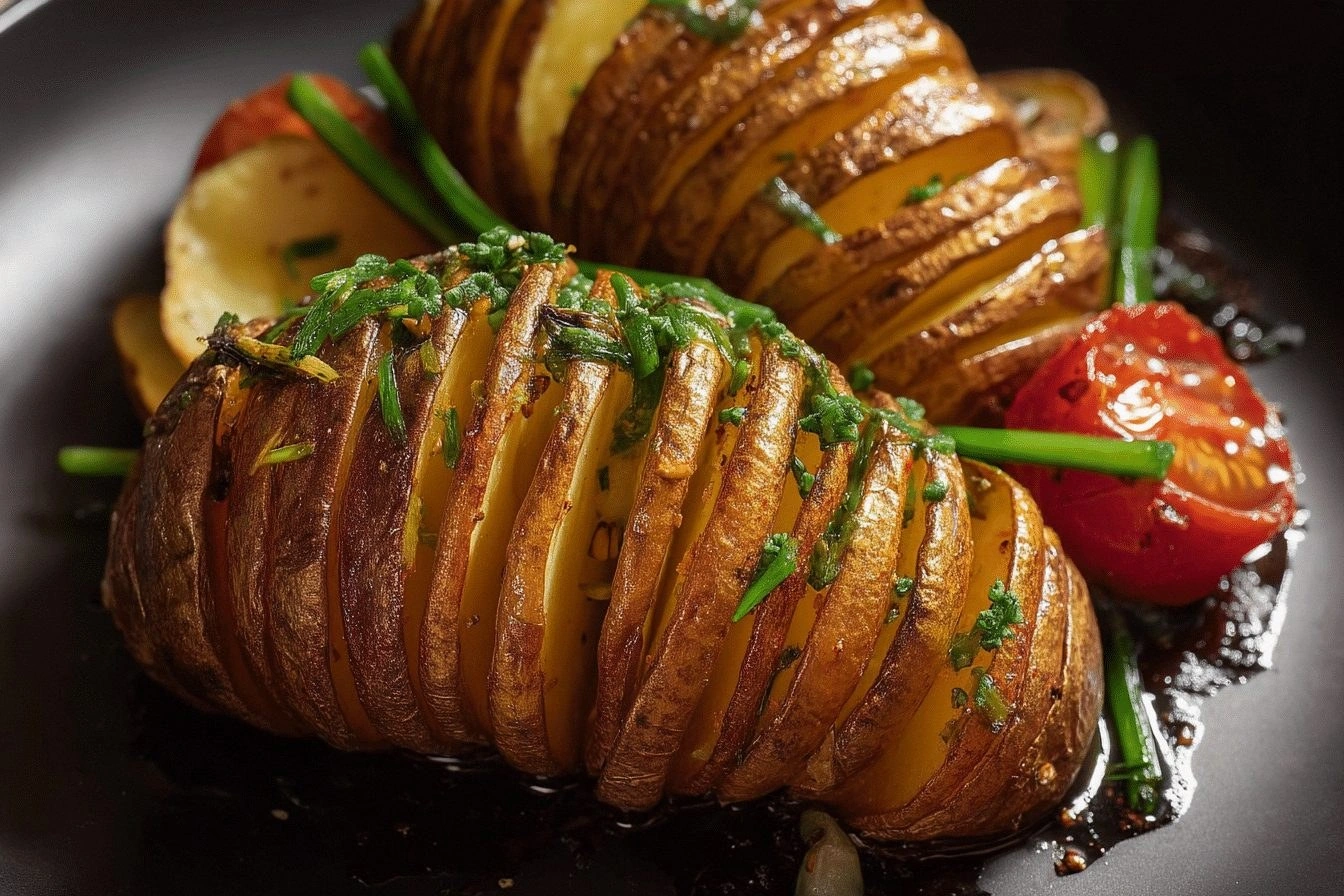
- Visual Appeal: The golden brown hue with a glossy sheen from the sour cream finish makes the dish look as good as it tastes, perfect for impressing guests or a quick Instagram post.
- Simplicity: No fancy equipment required—just a baking sheet, parchment paper, and an oven. The recipe can be whipped up in under 45 minutes from prep to plate.
- Make‑ahead Friendly: The sliced potatoes can be pre‑baked and stored, then reheated in the oven or skillet for a quick, crispy finish, making it ideal for busy weeknights.
- Ingredient Quality: By selecting high‑quality, organic potatoes and fresh herbs, the dish elevates from simple to extraordinary, ensuring every bite is packed with natural flavor.
Alright, let’s break down exactly what goes into this masterpiece…
Inside the Ingredient List
The Flavor Base
At the heart of this recipe lies a simple yet powerful flavor base: olive oil, sea salt, and freshly ground black pepper. The olive oil not only prevents the slices from drying out but also carries the herbs and spices, allowing each bite to burst with depth. Salt is the silent hero—it lifts the natural sweetness of the potato and balances the savory notes from the rosemary and paprika. If you skip the salt, the potatoes will taste flat and underwhelming, like a plain toast. A good rule of thumb: use sea salt for a cleaner, more refined finish compared to table salt’s metallic aftertaste.
The Texture Crew
Texture is everything. The potatoes themselves are the star, but the right cut and cooking method are what turn them into a masterpiece. I recommend using russet potatoes because their high starch content turns into a fluffy interior when baked. Slice them to about 1/4 inch thickness; thinner slices cook faster and become crispier, while thicker ones stay tender inside. A quick rinse with cold water removes surface starch and helps achieve that perfect golden crust. If you’re a fan of crunch, a light dusting of flour before baking can add an extra layer of crispness.
The Unexpected Star
The secret ingredient that sets this dish apart is a splash of sour cream added in the final minute of baking. Sour cream not only adds a subtle tang but also creates a glossy sheen that makes the potatoes look irresistibly appetizing. It’s a small touch that elevates the dish from simple to show‑stopper. If you’re dairy‑free, a drizzle of coconut milk or a splash of non‑dairy yogurt will do the trick, though the flavor profile will shift slightly toward a sweeter, milder finish.
The Final Flourish
No plate is complete without a finishing touch. Shredded cheddar cheese, chopped chives, and a sprinkle of smoked paprika add layers of flavor and color that make each slice a piece of edible art. The cheese melts into a creamy, golden crust that clings to every bite, while the chives provide a fresh, peppery contrast. Smoked paprika gives a subtle smokiness that pairs beautifully with the rosemary, creating a depth that makes the dish feel like it was cooked in a wood‑smoked oven. If you’re feeling adventurous, try adding a pinch of cayenne pepper for a subtle heat that balances the richness.
Everything's prepped? Good. Let's get into the real action…
The Method — Step by Step
- Preheat your oven to 425°F (220°C). Line a baking sheet with parchment paper to prevent sticking and to make cleanup a breeze. Place the sheet in the oven as it warms so it’s hot when you slide the potatoes onto it. A hot surface is key to achieving that first crisp snap that signals the start of greatness.
- Wash the russet potatoes thoroughly, scrubbing off any dirt. Slice them into even 1/4 inch thick rounds using a sharp chef’s knife or a mandoline. The uniformity ensures each slice cooks at the same rate, preventing a situation where some are over‑baked while others remain raw. Keep the cuts consistent, and you’ll avoid the dreaded unevenness that ruins texture.
- Pat the slices dry with a clean towel to remove excess moisture; this step is crucial for crisping. In a large bowl, combine the olive oil, sea salt, black pepper, dried rosemary, and smoked paprika. Toss the potato slices in the seasoned oil until each piece is evenly coated, ensuring the flavors are distributed throughout. A well‑marinated slice delivers a punch of flavor from the first bite.
- Arrange the seasoned slices in a single layer on the preheated baking sheet, making sure they don’t overlap. This spacing allows hot air to circulate around each slice, creating a uniform golden crust. Place the sheet in the oven and bake for 12 minutes, then flip each slice and bake for an additional 10 minutes. The total time is about 22 minutes, but keep an eye on the edges—they should pull away from the parchment when they’re ready.
- When the slices are nearly done, reduce the oven temperature to 400°F (200°C). Drizzle a thin layer of sour cream over each slice, then immediately sprinkle shredded cheddar cheese on top. The cheese will melt into a golden crust, and the sour cream will give the edges a glossy finish. This final minute is where the dish transforms from simple to spectacular.
- Once the cheese has melted and the edges are crisp, remove the sheet from the oven. Let the slices rest for 3 minutes—this allows the interior to set and prevents the cheese from sliding off. While they rest, sprinkle chopped chives over the top for a burst of fresh, peppery flavor. The aroma at this point is irresistible, and the visual appeal is undeniable.
- Serve the slices hot, straight from the oven, on a platter or individual plates. Garnish with a final sprinkle of chives and a wedge of lemon for a bright contrast. The combination of creamy cheese, buttery potato, and aromatic herbs will leave your guests begging for seconds. And if you’re feeling daring, serve a small bowl of sour cream or a dollop of Greek yogurt on the side for an extra creamy touch.
That’s it — you did it. But hold on, I’ve got a few more tricks that will take this to another level…
Insider Tricks for Flawless Results
The Temperature Rule Nobody Follows
Many cooks start with a low oven temperature, hoping to keep the potatoes from burning. I swear by a high heat of 425°F for the first 12 minutes; it creates that coveted caramelized crust. The trick is to reduce the temperature halfway through, ensuring the inside remains tender. If you skip this step, you’ll end up with a tough exterior and a soggy center that’s a culinary disappointment.
Why Your Nose Knows Best
Your sense of smell is your secret weapon in the kitchen. As the potatoes bake, you’ll notice a subtle nutty aroma that signals the Maillard reaction is in full swing. If you’re unsure whether the slices are done, inhale deeply; a faintly sweet, roasted scent means you’re in the sweet spot. Trusting your nose can prevent over‑baking and give you that perfect bite every time.
The 5‑Minute Rest That Changes Everything
Letting the slices rest after baking might seem like a waste of time, but it’s essential. The rest period allows the steam inside to redistribute, resulting in a fluffier interior. It also prevents the cheese from sliding off when you plate the dish. I’ve seen people skip this step and end up with a less cohesive, less satisfying bite.
The Quick Chill Trick
If you’re prepping ahead for a party, bake the slices in advance, then chill them in the fridge for 30 minutes. When you’re ready to serve, simply reheat in a hot oven at 400°F for 5 minutes. The slices will regain their crispness without losing their buttery interior. This trick saves time and keeps the dish fresh for hours.
The Layered Flavor Technique
Layering flavors—starting with the oil and herbs, then the sour cream, and finally the cheese—creates depth that a single seasoning can’t achieve. Each layer builds upon the previous one, resulting in a complex, satisfying taste. If you’re a fan of bold flavors, add a pinch of cayenne or smoked paprika to the final cheese layer for a subtle kick.
Creative Twists and Variations
This recipe is a playground. Here are some of my favorite ways to switch things up:
Mediterranean Twist
Swap rosemary for oregano, add a drizzle of olive oil with lemon zest, and sprinkle crumbled feta cheese on top. The result is a bright, savory slice that pairs perfectly with a Greek salad.
Cheesy Jalapeño Kick
Add finely chopped jalapeños to the seasoning mix and finish with pepper jack cheese. The heat balances the richness, making it an ideal side for a Mexican‑inspired dinner.
Herb‑Infused Balsamic Glaze
Drizzle a thin balsamic reduction over the slices after baking and sprinkle fresh thyme. The sweet acidity cuts through the buttery flavor, creating a sophisticated palate experience.
Sweet Potato Version
Use sweet potatoes instead of russets, and add cinnamon and brown sugar to the seasoning. The result is a caramelized, sweet‑savory slice that’s perfect for a fall gathering.
Vegan Edition
Replace the cheese with nutritional yeast and use a dairy‑free sour cream alternative. The dish remains creamy and flavorful while staying plant‑based.
Storing and Bringing It Back to Life
Fridge Storage
Cool the baked slices completely, then store them in an airtight container in the refrigerator for up to 3 days. The crispness will slightly diminish, but they’ll still taste great if reheated properly.
Freezer Friendly
Place the slices on a parchment‑lined tray and freeze until solid, then transfer to a freezer bag. They can be stored for up to 2 months. Reheat directly from frozen in a 400°F oven for 10 minutes, adding a splash of water before reheating to keep the interior moist.
Best Reheating Method
The secret to reviving frozen slices is a quick blast of heat with a splash of water. Place the slices in a preheated oven at 400°F, add a tablespoon of water to the tray, cover loosely with foil, and bake for 8–10 minutes. The water steams the slices, restoring their fluffy interior while the heat crisps the edges again.


