The moment my kitchen turned into a smoky battlefield, I realized I had overcooked the sauce, letting it caramelize into a bitter char. A friend dared me to recreate a classic Chinese stir‑fry that would still taste fresh and vibrant, but I promised her a dish that would make her taste buds do a happy dance. The challenge became a personal mission, and I set out to find the perfect balance between peppery heat, umami depth, and that elusive silky texture that makes every bite feel like a secret handshake between flavor and texture. I tested countless versions, each missing a crucial element, until I stumbled upon a combination that felt like a culinary revelation. This is the version that has become my go‑to for weeknight dinners and special occasions alike. It’s hands down the best version you'll ever make at home, and I’m about to walk you through every single step — by the end, you'll wonder how you ever made it any other way.
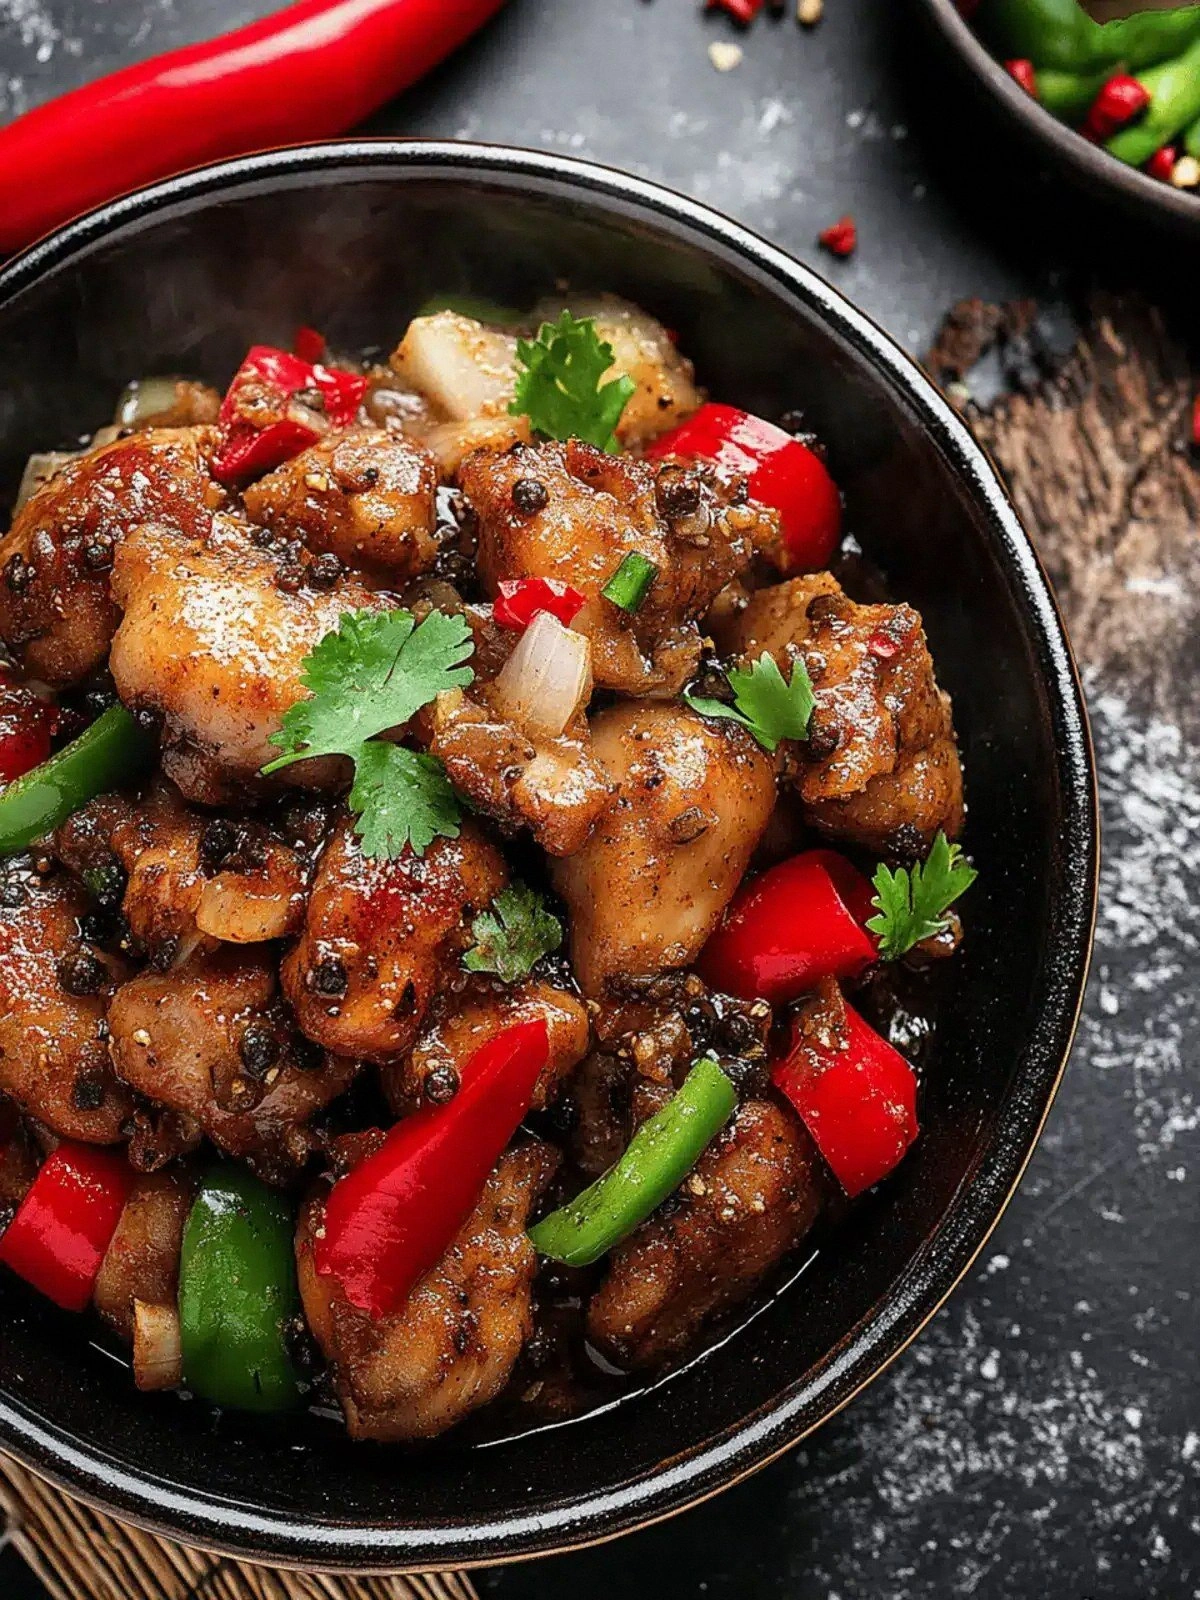
Picture yourself pulling this dish out of the pan, the kitchen filling with a heady aroma of garlic, toasted sesame oil, and black pepper that makes you gasp in anticipation. The sizzling sound as the chicken hits the hot wok is a promise of crisp edges that shatter like thin ice when you bite into them. The vibrant colors of red and green bell peppers contrast with the golden brown chicken, creating a feast for the eyes that is just as satisfying as the taste. Every bite delivers a burst of savory umami from the oyster sauce, a subtle sweetness from the Shaoxing wine, and a peppery kick that lingers on the tongue. This dish is a symphony of textures: the tender chicken, the crunchy vegetables, and the silky sauce that coats everything like velvet. If you've ever struggled with a dish that feels either too dry or too soggy, you're not alone — and I've got the fix.
What sets this version apart is not just the combination of ingredients, but the precise technique that brings them together. The chicken is first coated in a dry mix of potato starch and crushed peppercorns, creating a crisp, golden crust that locks in moisture. The sauce is built in stages, starting with a fragrant base of garlic and Shaoxing wine that caramelizes just enough to add depth without bitterness. The addition of toasted sesame oil at the end gives the dish a nutty finish that balances the heat of the peppercorns. The bell peppers are sliced into uniform cubes, ensuring even cooking and a satisfying crunch that contrasts with the softness of the chicken. The result is a dish that feels both comforting and elevated, with every component working in harmony.
I dare you to taste this and not go back for seconds. That sizzle when it hits the pan? Absolute perfection. The peppercorns are toasted just enough to release their oils, creating a subtle nuttiness that complements the sharpness of the black pepper. The sauce reduces to a glossy coating that clings to the chicken, turning each bite into a flavorful explosion. This is the moment of truth, where your kitchen transforms into a restaurant kitchen and you feel like a culinary superstar. Stay with me here — this is worth it, because the payoff is a dish that will become a staple in your rotation, a go‑to for any occasion, from a quick weekday dinner to a special family gathering.
What Makes This Version Stand Out
- Crust: The potato starch coating gives the chicken a golden, crunchy exterior that stays crisp even after the sauce has thickened, a texture that most recipes miss.
- Depth: The combination of Shaoxing wine and oyster sauce creates a layered umami profile, turning simple ingredients into a complex flavor experience.
- Heat Control: Toasted black peppercorns deliver a peppery heat that is sharp but not overwhelming, giving the dish a sophisticated kick.
- Balance: The subtle sweetness of the bell peppers and the savory saltiness of the sauce are perfectly balanced, preventing any one flavor from dominating.
- Time Efficiency: The entire dish comes together in 45 minutes, making it an ideal choice for busy weeknights without sacrificing quality.
- Visual Appeal: The contrast of bright bell pepper cubes against the dark, glossy sauce creates a plate that looks as good as it tastes.
- Versatility: The recipe can be easily adapted for different protein choices or spice levels, making it a flexible base for many variations.
- Make‑Ahead Friendly: The flavors continue to develop when stored, making it a great make‑ahead option for busy schedules.
Alright, let's break down exactly what goes into this masterpiece. This recipe is a playground, and each ingredient plays a starring role in the final performance.
Inside the Ingredient List
The Flavor Base
Garlic, when grated finely, releases its oils into the sauce, creating a fragrant foundation that lingers on the palate. Shaoxing wine adds a subtle sweetness and depth that is reminiscent of a well-aged sherry; it caramelizes when heated, producing a caramelized flavor profile that enriches the dish. Oyster sauce, a staple in Chinese cooking, contributes a rich umami sweetness that balances the pepper's bite. Toasted sesame oil, added at the end, delivers a nutty finish that ties all the flavors together, preventing the sauce from feeling flat.
The Texture Crew
Potato starch is the secret to that perfect crisp crust on the chicken; it creates a thin, golden shell that seals in moisture. Black peppercorns, toasted just until aromatic, release their oils, giving the dish a peppery heat that is bright and lively. Vegetable oil is the medium that carries all the flavors together, ensuring the ingredients cook evenly and preventing sticking. Together, these components transform a simple stir‑fry into a textural delight.
The Unexpected Star
The bell peppers add a bright, sweet crunch that contrasts beautifully with the savory sauce. Their natural sugars caramelize slightly during cooking, providing a subtle sweetness that balances the pepper's heat. The onion, cut into uniform cubes, releases its mild sweetness and adds a layer of depth to the sauce. Together, these vegetables bring color, texture, and flavor that elevate the dish beyond a standard chicken stir‑fry.
The Final Flourish
Salt is the quiet hero that brings all the flavors together; it enhances the umami of the oyster sauce and the richness of the chicken. The chicken thighs themselves, with their skin-on and boneless cuts, offer a juicy, tender interior that pairs perfectly with the crispy exterior. The combination of these components results in a dish that feels both hearty and refined.
Everything's prepped? Good. Let's get into the real action.
The Method — Step by Step
- Start by slicing the onion and bell peppers into uniform ¾‑inch cubes; this ensures even cooking and a satisfying crunch. Grate the garlic finely, so it releases maximum flavor into the sauce. Measure out the Shaoxing wine, oyster sauce, and toasted sesame oil; keep them ready to add at the right moments. This prep stage sets the foundation for a dish that feels seamless from start to finish. I dare you to notice how the aroma begins to build even before the pan heats up. Remember, a well‑prepared mise‑en‑place saves time and reduces kitchen chaos.
- In a small bowl, combine the potato starch, black peppercorns, and salt; this dry mix will coat the chicken, giving it that crisp, golden crust. Toast the peppercorns in a dry skillet for a minute until they release their oils, then crush them with a mortar or the back of a spoon. Coat each chicken thigh in the dry mix, shaking off any excess; this step ensures that the starch adheres firmly to the meat. The coating will crisp beautifully when seared, creating a delightful contrast with the tender interior. This is the moment of truth where the dish starts to feel like a professional kitchen creation. Keep an eye on the heat; too high and you’ll burn the coating before the chicken is cooked through.
- Heat a wok or large skillet over medium‑high heat and add the vegetable oil, swirling to coat the surface. Place the chicken thighs skin‑side down, letting them sear until the skin turns a deep golden brown; this should take about 4–5 minutes. Flip the thighs and sear the other side until it’s also golden; the goal is a crisp, caramelized exterior that locks in juices. Remove the chicken from the pan and set it aside on a plate; this prevents the sauce from becoming too thick before the chicken is ready to rejoin. The sizzling sound is a cue that the pan is hot enough to develop a rich flavor base. Keep the chicken warm while you finish the sauce.
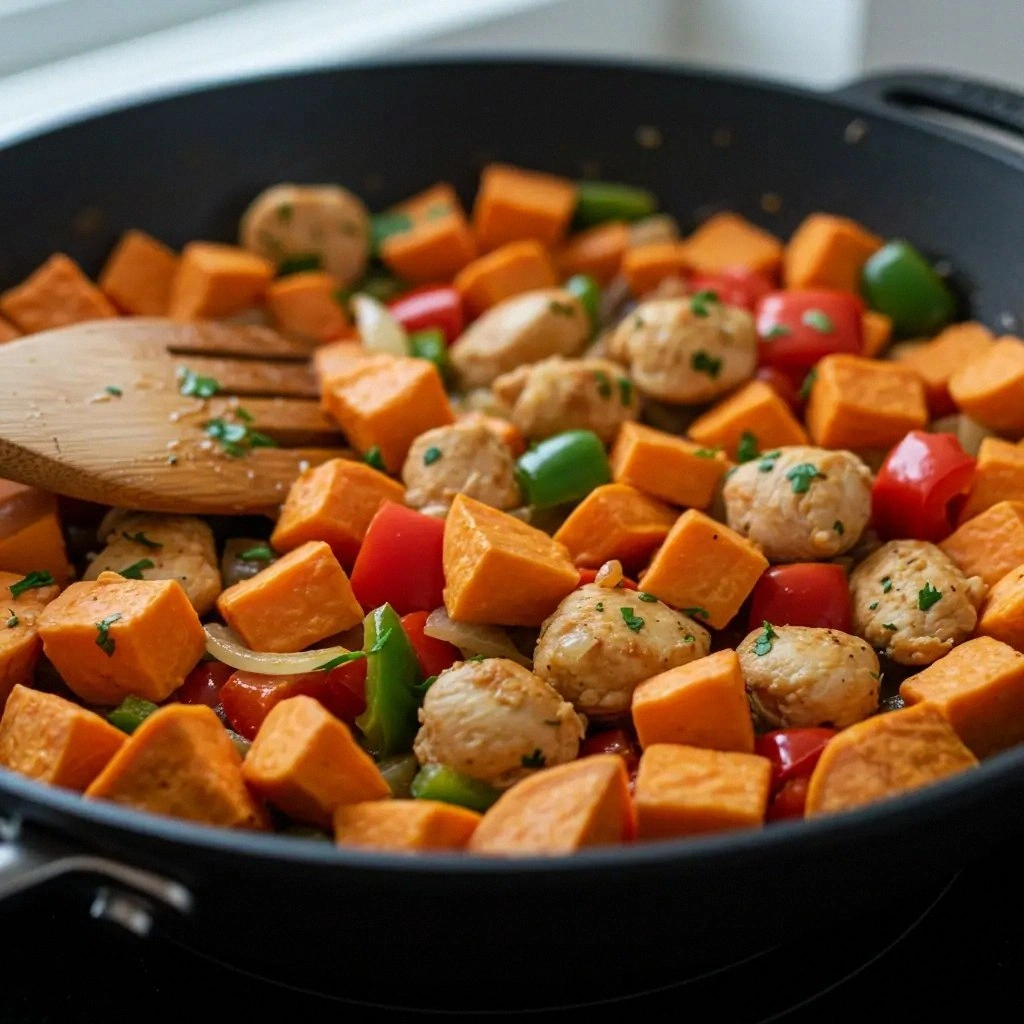
- In the same pan, add a splash more oil if necessary, then toss in the onions and both bell peppers. Stir‑fry them for 2–3 minutes until they start to soften but still retain a bright, crunchy bite. This is where the vegetables bring color and texture to the dish; they should not become mushy. Add the grated garlic and let it sizzle for 30 seconds, watching carefully so it doesn’t burn. The aroma should be intoxicating, hinting at the depth that will develop in the sauce. This step is essential for building layers of flavor that will coat the chicken beautifully.
- Pour in the Shaoxing wine, allowing it to deglaze the pan and lift the browned bits from the bottom; these bits are packed with flavor. Stir well, scraping any caramelized bits into the sauce; this creates a richer, more complex base. Add the oyster sauce and toasted sesame oil, stirring until the mixture starts to thicken slightly. The sauce should coat the back of a spoon, indicating it’s ready to combine with the chicken. This is where the dish starts to feel like a restaurant favorite, with a glossy, savory coating that clings to every piece. Keep the heat at medium to avoid burning the delicate sauces.
- Return the seared chicken thighs to the pan, nestling them into the sauce and vegetables. Reduce the heat to medium‑low and let the dish simmer for 8–10 minutes, or until the chicken reaches an internal temperature of 165°F (74°C). The sauce should thicken further, coating the chicken like a silky blanket. The edges of the chicken will pull away from the pan, indicating a perfect sear. This is the moment where the dish feels complete, and the aroma in the kitchen is simply irresistible. Keep the lid off to allow the sauce to reduce and intensify.
- Add an extra pinch of black pepper or a splash of water if the sauce seems too thick; this helps maintain the right consistency. Taste the sauce, adjusting salt or oyster sauce if needed; the goal is a balanced flavor profile that isn’t too salty or too sweet. Let the chicken rest in the sauce for a minute before serving; this allows the flavors to meld together. The result is a dish that feels cohesive, with each bite delivering a burst of savory, peppery, and slightly sweet flavors. The final plating should showcase the vibrant colors of the bell peppers against the glossy sauce.
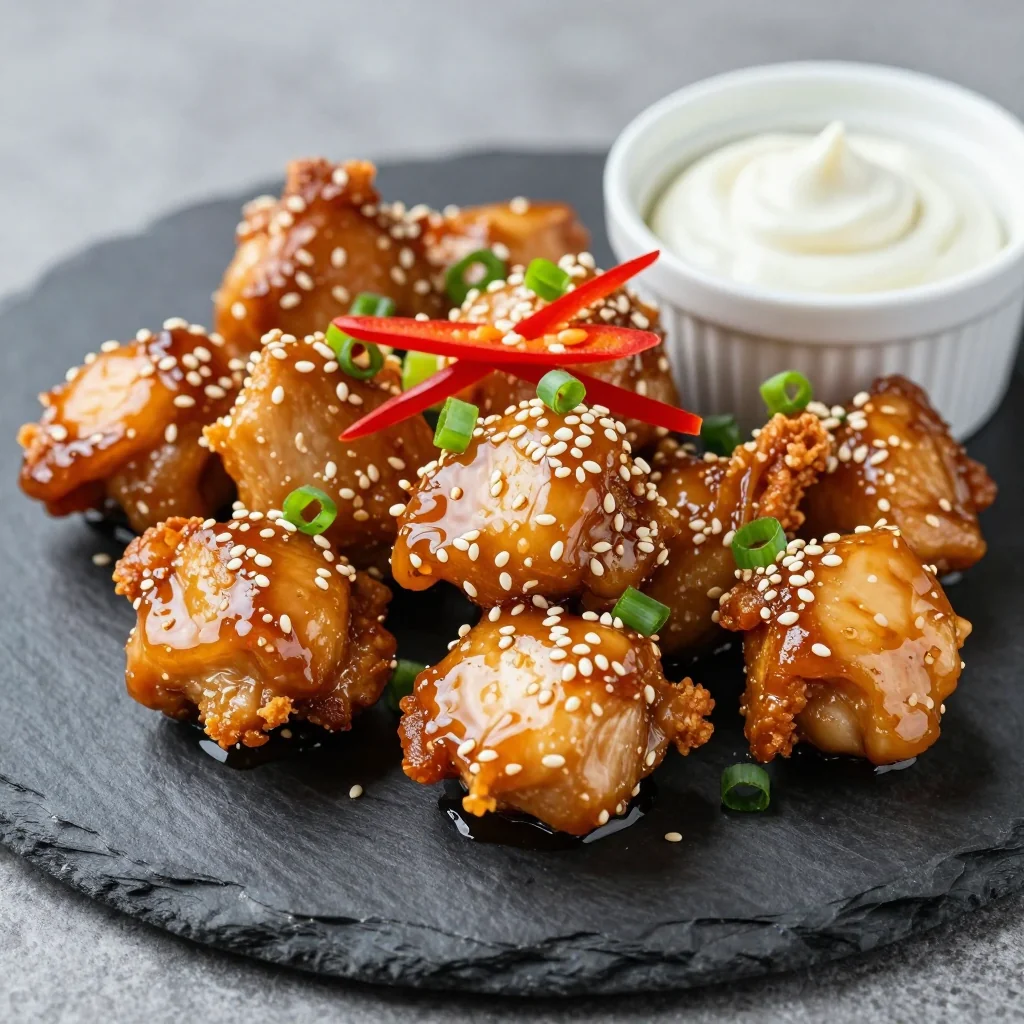
- Serve immediately over steamed jasmine rice or noodles, letting the sauce coat every grain or strand. Garnish with a sprinkle of toasted sesame seeds or sliced green onions for an extra pop of freshness. The dish should look as impressive as it tastes, with a glossy sheen that invites you to dig in. This is the moment when you realize how effortless this recipe is, and how it can elevate a simple dinner into a memorable meal. Picture yourself pulling this out of the oven, the whole kitchen smelling incredible, and feeling proud of the culinary masterpiece you’ve created.
- If you’re short on time, you can skip the searing step and simply fry the chicken in a pan; the final flavor will still be excellent. However, the sear adds depth and texture that can’t be replicated with a quick fry. Keep a close eye on the chicken to avoid overcooking; it should remain juicy inside. Remember, the sauce should be glossy and slightly thickened, not watery. This final step ensures that every bite is a harmonious blend of flavors and textures.
- If you prefer a spicier kick, sprinkle a pinch of red pepper flakes into the sauce during the simmering stage. The heat will mingle with the peppercorns, creating a complex spicy profile that excites the palate. The dish will still maintain its balance, thanks to the sweetness of the bell peppers and the savory depth of the oyster sauce. This variation is perfect for those who love a little heat but don’t want it to overpower the dish. It’s a simple tweak that makes the dish feel brand new.
That's it — you did it. But hold on, I've got a few more tricks that'll take this to another level. These insider tips will help you avoid common pitfalls and elevate the dish from good to unforgettable. Each trick is a small tweak that can make a big difference in flavor, texture, or presentation.
Insider Tricks for Flawless Results
The Temperature Rule Nobody Follows
Many cooks think medium heat is safe, but for a perfect sear, you need a hot pan. Heat the wok until a drop of water sizzles and evaporates almost instantly. This ensures the chicken gets a crisp exterior without cooking the interior too quickly. If the pan isn’t hot enough, the chicken will steam instead of sear, losing that essential crunch.
Why Your Nose Knows Best
Smell the sauce as it simmers; a sweet, caramelized aroma indicates the flavors are developing. If the scent is too sharp or burnt, reduce the heat immediately. Your nose is a reliable gauge for doneness, far more accurate than a timer for this dish.
The 5-Minute Rest That Changes Everything
Let the chicken rest in the sauce for five minutes after removing it from the heat. This resting period allows the juices to redistribute, ensuring each bite is moist and flavorful. A friend once skipped this step and the chicken turned out dry; the rest is non-negotiable.
Keep the Sauce Thick
If the sauce becomes too thin, whisk in a tablespoon of potato starch mixed with water before adding it to the pan. This thickens the sauce without adding heaviness. The result is a glossy coating that clings to the chicken and veggies like a velvet blanket.
Quick Cleanup Hack
After cooking, pour the pan contents into a heat‑proof bowl, then add a little hot water. This helps loosen any stuck bits, making the pan easier to clean. A clean pan means less time cleaning and more time enjoying the meal.
Creative Twists and Variations
This recipe is a playground. Here are some of my favorite ways to switch things up:
Smoky Chipotle Variation
Add a teaspoon of chipotle powder to the sauce for a smoky, spicy undertone. The heat will complement the peppercorns, creating a layered spicy profile that’s both bold and balanced.
Asian Noodle Bowl
Serve the chicken over a bed of soba or rice noodles instead of rice. Toss the noodles with a splash of soy sauce and sesame oil for a quick, satisfying bowl.
Creamy Coconut Twist
Replace half the oyster sauce with coconut milk for a creamy, tropical version. The coconut’s natural sweetness will soften the pepper’s bite and add a silky texture.
Low‑Carb Cauliflower Rice
Swap out rice for cauliflower rice for a low‑carb, high‑fiber option. The mild flavor of cauliflower pairs well with the savory sauce, keeping the dish light.
Vegan Version
Use firm tofu or tempeh instead of chicken. Marinate the protein in the same dry mix for a crispy exterior and the same sauce for a plant‑based take.
Extra Spicy with Red Pepper Flakes
Add a pinch of crushed red pepper flakes during the simmering stage. The heat will mingle with the peppercorns, creating a complex spicy profile that excites the palate.
Storing and Bringing It Back to Life
Fridge Storage
Store the cooked dish in an airtight container in the refrigerator for up to three days. The sauce will thicken slightly, but the flavors will remain vibrant. Keep the chicken and vegetables separate if you want to reheat them individually.
Freezer Friendly
Freeze portions in freezer‑safe containers for up to two weeks. Thaw overnight in the refrigerator before reheating. The texture may change slightly, but the flavor stays intact.
Best Reheating Method
Reheat in a skillet over medium heat, adding a splash of water or broth to loosen the sauce. Finish with a quick stir to restore the glossy coating. Avoid microwaving the entire dish, as it can make the sauce watery.