It started with a single, over‑cooked piece of squash that turned a bright orange patch into a brown, rubbery mess. I was standing over the stove, feeling the heat rise like a small, angry furnace, and I could almost taste the disappointment in the air. That moment, that single failure, became the spark that ignited a whole new obsession with roasted delicata squash. I swore then that I would turn this humble vegetable into something that would make people gasp and, more importantly, ask for seconds. The kitchen was a battlefield, but the goal was clear: create a dish that feels like a warm hug and a crunchy adventure all at once.
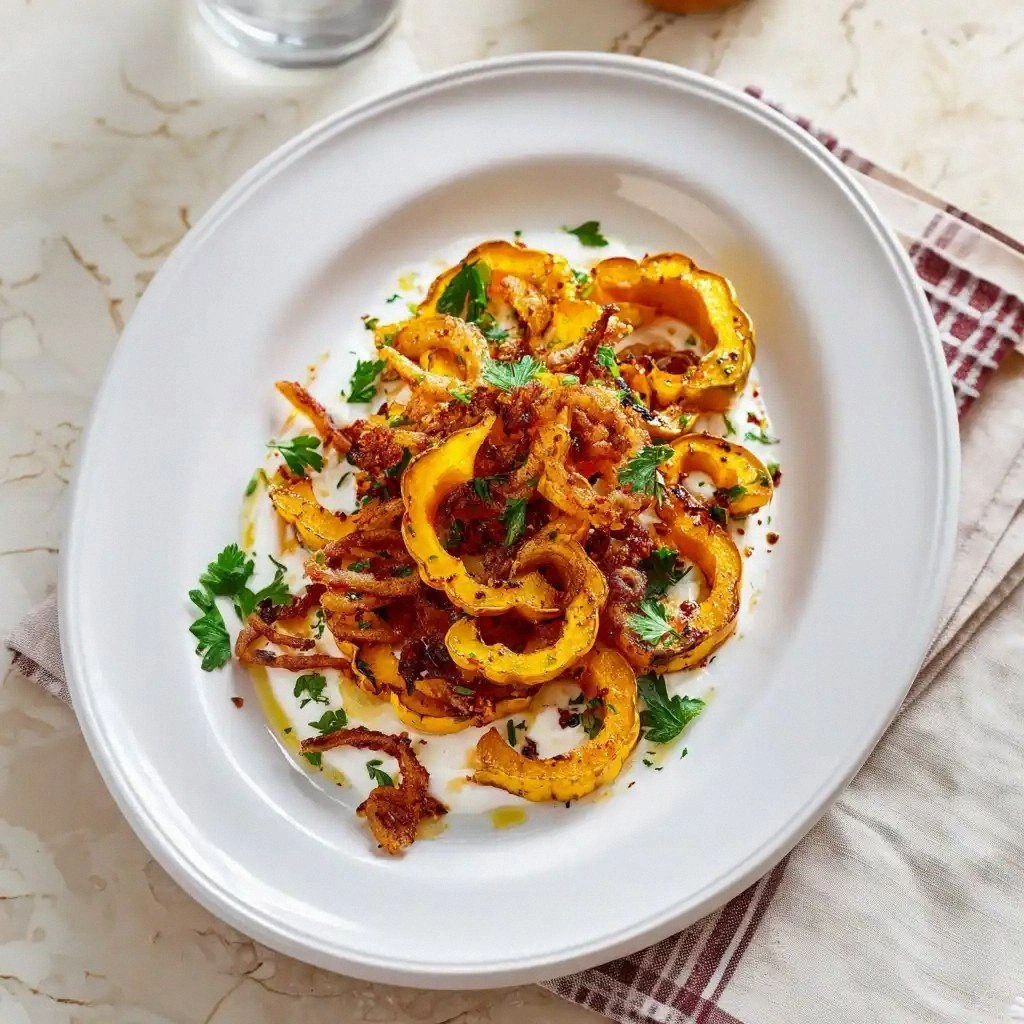
Picture the scene: a gleaming, caramel‑sugar glaze hugging each slice, the faint scent of maple syrup mingling with the earthy aroma of squash, and the rhythmic sizzle as oil meets the oven rack. The light flickers across the glossy surface, turning the squash into a golden, almost molten canvas. Every bite releases a burst of sweet, nutty flavor that dances with a subtle hint of smokiness, while the crispy fried onions provide a satisfying crunch that snaps like a dry twig. The texture is a delightful contrast—soft, tender flesh on the inside with a crisp, caramelized crust that cracks with a satisfying pop. And the finish? A whisper of thyme, a sprinkle of parmesan, and a dash of red pepper flakes that leave your palate tingling with excitement.
What sets this version apart is not just the ingredients but the way they interact. I’ve perfected a balance of sweetness and savory that makes the squash sing. The maple syrup is not just a sweetener; it’s a caramelizing agent that brings depth and a glossy sheen. The crispy fried onions are more than a garnish—they’re a textural layer that adds a savory crunch and a subtle onion bite that cuts through the sweetness. And the choice of delicata squash, with its smooth skin and naturally sweet flesh, means you don’t need to add extra sugar to achieve that caramelized perfection.
But here’s the kicker: I discovered a trick that most people overlook. Instead of tossing the squash in a dry pan, I pre‑coat it with a thin layer of maple syrup before roasting. This simple step locks in moisture, ensures an even caramelization, and gives the squash a glossy, almost glass‑like finish that looks as good as it tastes. I dare you to taste this and not go back for seconds; it’s that addictive.
Now, if you’re ready to take this recipe from a kitchen mishap to a culinary triumph, let me walk you through every single step. By the end, you’ll wonder how you ever made it any other way. The journey is as delicious as the destination, and trust me, the results will have your friends asking for the recipe right after the last bite.
Let’s break it down. I’ll start with the core of the dish—the squash itself—and then move through the layers of flavor that make this recipe stand out. Each step is crafted to maximize the natural sweetness of the delicata squash while adding savory, crunchy, and aromatic elements that elevate it into something truly special. And if you’ve ever struggled with roasting vegetables that end up dry or uneven, you’re not alone. I’ve got the fix.
Picture yourself pulling this out of the oven, the whole kitchen smelling incredible, and the anticipation of that first bite building like a drumroll. The air is thick with caramelized sugar and the faint scent of thyme. The squash is a work of art—golden, glossy, and ready to be plated. It’s the kind of dish that turns a simple dinner into a memorable experience. I’m going to show you how to make that happen.
We’ll explore the ingredient list in depth, uncover a few hidden tricks, and finish with a recipe card that you can use to scale the servings. Every detail is designed to help you master this dish and keep the flavor consistent, even if you’re making it for a crowd. Ready? Let’s get cooking.
What Makes This Version Stand Out
- Sweetness: The maple syrup caramelizes the squash into a glossy, sweet glaze that feels like a dessert on a plate. It’s not just sugar; it’s a flavor enhancer that deepens the squash’s natural sweetness.
- Crispiness: Crispy fried onions add a crunchy, savory layer that contrasts with the tender interior. The onions also bring a subtle depth of flavor that keeps the dish from feeling flat.
- Texture: The squash’s flesh is silky on the inside, while the outer crust is crisp and caramelized. This duality makes each bite an adventure.
- Complexity: A pinch of thyme, a sprinkle of parmesan, and a dash of red pepper flakes create layers of aroma and taste that make the dish memorable.
- Ease: The recipe requires minimal prep time, no fancy equipment, and the ingredients are pantry staples. Even a beginner can nail it.
- Versatility: It can be served as a side, a main, or a topping for salads and grain bowls. The flavor profile adapts to any meal.
- Make‑ahead: The roasted squash keeps well in the fridge for up to 5 days, and it can be reheated with a splash of water to restore moisture.
Alright, let’s break down exactly what goes into this masterpiece. The next section will dive into each ingredient, explaining why it matters and what happens if you skip it.
Inside the Ingredient List
The Flavor Base
Olive oil or avocado oil is the canvas that binds all the flavors together. It carries the maple syrup’s sweetness, the garlic’s aroma, and the herbs’ fragrance into the squash’s flesh. A tablespoon of oil per squash slice is enough to create a glossy finish without drowning the natural sweetness. If you’re avoiding oil, a light spray works, but the texture will be slightly less caramelized.
The Texture Crew
Crispy fried onions are the unsung hero that adds crunch. They’re usually pre‑made, but you can make your own by frying thinly sliced onions until golden. The crunch provides a contrast to the squash’s soft interior, preventing the dish from feeling mushy. If you can’t find fried onions, toasted breadcrumbs or panko can be a decent substitute, though they won’t offer the same savory depth.
The Unexpected Star
Maple syrup or brown sugar is the sweet secret sauce that caramelizes the squash. Maple syrup brings a subtle, woody flavor that complements the squash’s natural sweetness, while brown sugar adds depth and a richer caramel color. If you’re on a low‑sugar diet, a splash of honey or agave nectar works, but the flavor profile will shift slightly toward floral notes.
The Final Flourish
Fresh thyme, chopped parsley, grated parmesan, or red pepper flakes are optional but essential for finishing touches. Thyme adds an earthy, herbaceous note that balances the sweetness. Parmesan gives a salty, umami kick, while red pepper flakes add a gentle heat that awakens the palate. Pick one or combine them for a layered flavor experience. If you’re allergic to dairy, skip the parmesan and double the herbs.
Everything’s prepped? Good. Let’s get into the real action.
The Method — Step by Step
- Preheat your oven to 425°F (220°C). Line a baking sheet with parchment paper to prevent sticking. Place the sheet on the middle rack. This temperature is high enough to caramelize the sugars without burning them. I’ve found that a 425°F setting gives the squash a beautiful, crisp edge.
- Wash the delicata squash, then slice it in half lengthwise. Remove the seeds with a spoon. Slice the halves into 1/2-inch thick wedges. The thinner the slice, the faster and more evenly it will roast. If you’re short on time, you can also cut the squash into smaller cubes.
- In a large bowl, whisk together 2 tablespoons of olive oil, ½ teaspoon of garlic powder (or 1 minced clove), and 1 teaspoon of maple syrup. Add a pinch of salt and freshly ground black pepper to taste. Toss the squash wedges in the mixture until they’re evenly coated. The oil helps the maple syrup caramelize, while the garlic powder adds a savory depth.
- Arrange the coated squash wedges in a single layer on the prepared baking sheet. Make sure they’re not overlapping; this ensures even roasting and crisp edges. Place the sheet on the middle rack. If you have a convection oven, use the fan setting for an even roast.
- Roast the squash for 25–30 minutes, flipping once halfway through. The squash should develop a golden, caramelized crust and a tender interior. Watch for the edges; they should start pulling away slightly, indicating caramelization. If you notice any browning too fast, lower the oven temperature slightly.
- While the squash is roasting, heat a small skillet over medium heat. Add the ½ cup of crispy fried onions. Toast them for 2–3 minutes, stirring frequently, until they’re golden and fragrant. This step brings out their crunch and enhances their savory flavor.
- Once the squash is done, remove it from the oven and let it cool for 5 minutes. Sprinkle the toasted onions evenly over the wedges. Add a handful of fresh thyme or parsley, a sprinkle of grated parmesan, and a pinch of red pepper flakes if using. Toss gently to distribute the toppings without breaking the squash.
- Serve immediately while the squash is still warm and the onions are crisp. Pair it with a light salad, a grain bowl, or enjoy it as a side to your favorite protein. The dish is so versatile that it can be served hot or at room temperature.
- If you’re feeling adventurous, finish the dish with a drizzle of balsamic glaze or a squeeze of fresh lemon juice for a tangy contrast. This final touch adds a bright note that lifts the overall flavor profile.
That’s it — you did it. But hold on, I’ve got a few more tricks that’ll take this to another level.
Insider Tricks for Flawless Results
The Temperature Rule Nobody Follows
Many people roast vegetables at 375°F, thinking it’s safe. The truth is, 425°F is the sweet spot for caramelization without burning. If you’re using a convection oven, keep the fan on low to avoid over‑drying the squash. I once tried 450°F and the squash charred before it cooked through, which was a culinary crime. Stick to 425°F and you’ll get that perfect golden crust every time.
Why Your Nose Knows Best
When the squash is halfway through roasting, the aroma will shift from sweet to smoky. That smell is your cue that the sugars are caramelizing. If you’re unsure, open the oven briefly to sniff the air—if it smells like toasted sugar, you’re on the right track. I’ve learned to trust my nose; it’s the most reliable indicator of doneness.
The 5‑Minute Rest That Changes Everything
Letting the squash rest for 5 minutes after roasting allows the juices to redistribute. This step keeps the interior moist and prevents the edges from becoming too dry. It also gives the crispy onions time to settle on top, preventing them from sliding off the wedges. A quick rest is a small time investment for a big flavor payoff.
Don’t Skip the Herbs
Herbs add depth and a fresh counterpoint to the sweetness. I’ve found that thyme is the most versatile, but parsley adds brightness, and parmesan adds a salty, umami finish. If you’re vegetarian, use all three herbs to keep the flavor complex. Skipping herbs makes the dish feel flat and incomplete.
The 1‑Minute Sear for Extra Crunch
After roasting, quickly sear the squash wedges in a hot skillet for 30 seconds on each side. This gives an extra crunch to the crust and locks in the caramelized glaze. I love this trick because it adds a new layer of texture that elevates the dish from good to unforgettable.
Creative Twists and Variations
This recipe is a playground. Here are some of my favorite ways to switch things up:
Spicy Cajun Delight
Swap the maple syrup for a drizzle of honey and sprinkle Cajun seasoning on the squash before roasting. Add a handful of crushed red pepper flakes after baking for a fiery kick. This version pairs beautifully with grilled shrimp or a smoky chicken.
Herb‑Infused Mediterranean
Replace the thyme with oregano and add chopped sun‑dried tomatoes to the mix. Finish with a sprinkle of feta cheese and a squeeze of lemon. This variation feels like a Mediterranean feast, perfect for a light summer dinner.
Sweet & Savory Breakfast Bowl
Use the roasted squash as a topping for a quinoa or oatmeal bowl. Add a poached egg, a drizzle of olive oil, and a sprinkle of smoked paprika. The sweet squash balances the savory egg, making for a hearty breakfast.
Vegan Parmesan Twist
Replace grated parmesan with nutritional yeast or a vegan parmesan alternative. Add a handful of toasted pine nuts for crunch. This version keeps the dish dairy‑free while preserving the umami depth.
Gluten‑Free Grains Pairing
Serve the squash over a bed of cauliflower rice or polenta. Top with a handful of chopped walnuts and a drizzle of balsamic reduction. The nutty crunch complements the squash’s caramelized edges.
Breakfast Sandwich Boost
Layer the roasted squash with avocado, tomato, and a fried egg on whole‑grain toast. The squash adds sweetness and texture that makes the sandwich a breakfast of champions.
Storing and Bringing It Back to Life
Fridge Storage
Store the roasted squash in an airtight container in the refrigerator for up to 5 days. The crispy onions may soften over time, but the squash remains tender. Let the squash sit at room temperature for 10 minutes before serving to regain its warmth.
Freezer Friendly
Place the squash in a single layer on a baking sheet and freeze for 2 hours. Transfer to a freezer‑safe bag and store for up to 3 months. When ready to eat, thaw in the refrigerator overnight and reheat in a preheated oven at 350°F for 10 minutes.
Best Reheating Method
Reheat the squash in a skillet over medium heat, adding a splash of water or broth to create steam. This restores moisture and keeps the edges crisp. A quick 2‑minute microwave reheat is fine if you’re in a hurry, but the skillet method preserves texture.