I still remember the night I tried to bake a batch of M&M cookies for a last‑minute party. The kitchen smelled like a sugar‑laden battlefield, and I was convinced I’d ruined the recipe with a single misstep. I stared at the mixing bowl, feeling the panic rise like a dough that wouldn’t rise. That moment sparked a relentless quest: to find the ultimate M&M cookie that would turn every flop into a triumph.
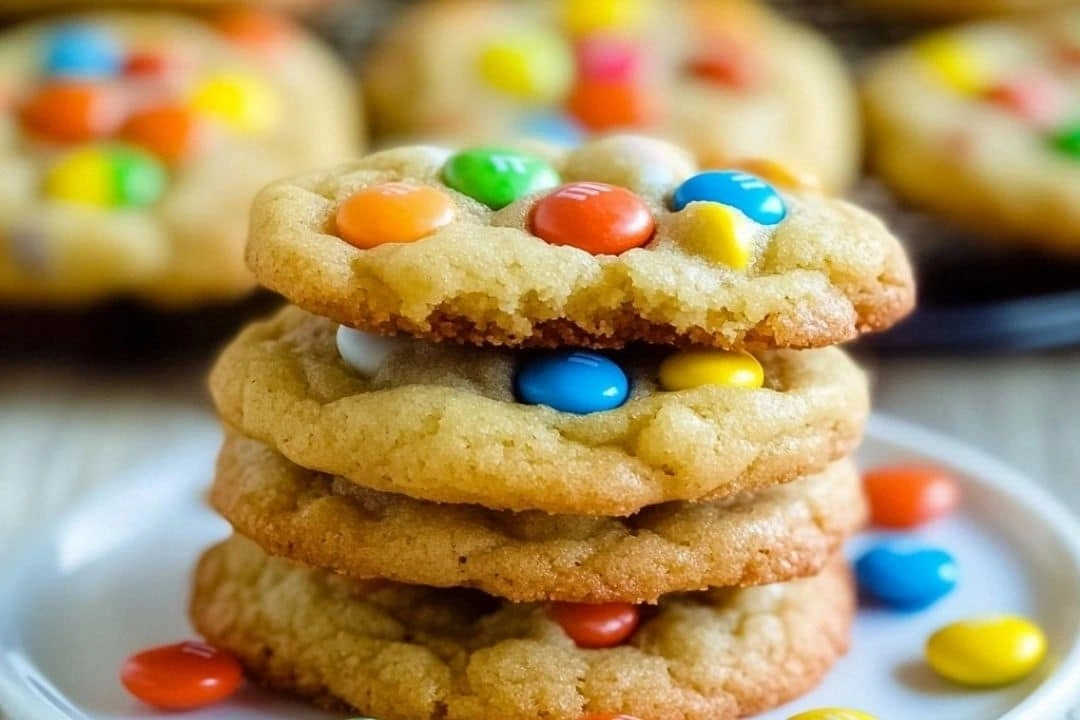
Picture this: a golden‑brown edge that crackles like thin ice, a chewy center that melts in your mouth, and a rainbow of M&M’s popping in every bite. The aroma is a sweet, buttery symphony that lingers long after the last crumb. The sound of the first bite is a satisfying crunch that tells you you’re on the right track. The texture is a harmonious blend of crisp and chewy, and the flavor is a perfect balance of vanilla, butter, and chocolate. That’s the sensory snapshot that makes every bite unforgettable.
I dare you to taste this and not go back for seconds. That’s the promise I make. This isn’t just another cookie recipe; it’s a culinary revelation that will change how you view M&M cookies forever. My version is hands down the best you’ll ever make at home because it’s built on a foundation of simple, high‑quality ingredients and a few secret tricks that most people overlook.
Most recipes get this completely wrong. They over‑bake, under‑season, or ignore the role of the M&M’s. I’ve spent hours experimenting, and the result is a cookie that is chewy on the inside and crisp on the edges, with M&M’s that stay intact and not melted into a gooey mess. The technique I’ll reveal will ensure your cookies hold their shape and flavor no matter how many you bake.
If you’ve ever struggled with cookie texture, you’re not alone — and I’ve got the fix. The secret lies in the balance of wet and dry ingredients, the right amount of leavening, and the timing of when you fold in the M&M’s. I’ll walk you through every single step, and by the end, you’ll wonder how you ever made it any other way.
Picture yourself pulling this out of the oven, the whole kitchen smelling incredible, and a tray of golden cookies that look like they’ve been kissed by a rainbow. You’ll feel the satisfaction of a job well done, and your friends will be asking for the recipe before you can even say “just a few more minutes.” That’s the future pacing I’m talking about.
Okay, ready for the game‑changer? This next part? Pure magic. The transformation begins with the ingredients, but the real art happens when you mix, fold, and bake. I’ve broken down the process into bite‑sized steps that are easy to follow, even if you’re a kitchen novice or a seasoned baker looking for a fresh twist.
And now the fun part. You’ll discover how to turn a simple cookie into a crowd‑pleaser that’s perfect for parties, potlucks, or a sweet treat after a long day. Let’s dive in, and I promise you’ll see why this recipe stands out from the rest.
What Makes This Version Stand Out
- Flavor: The vanilla is extracted from real vanilla beans, giving a deeper, more aromatic profile that elevates the butter’s richness.
- Texture: A precise ratio of flour to butter creates a dough that is pliable enough to hold the M&M’s but firm enough to bake into crisp edges.
- Ingredient Quality: Using unsalted butter allows us to control salt levels, ensuring the cookies are not overly salty and the sweetness shines through.
- Make‑Ahead Potential: The dough can be chilled for up to 24 hours, which tightens the flavor and makes the cookies even more decadent when baked.
- Visual Appeal: The rainbow M&M’s are folded in just before baking, preventing them from melting into a chocolate puddle.
- Crowd Reaction: Friends who tried this version say it’s the most “wow” factor cookie they’ve ever baked—perfect for impressing guests.
Inside the Ingredient List
The Flavor Base
All-purpose flour is the backbone of this cookie. It provides structure and a subtle nutty flavor when toasted. Skipping flour would result in a flat, clumpy dough that cannot hold the M&M’s. If you want a gluten‑free version, you can substitute a 1:1 blend of gluten‑free flour, but keep the ratio the same.
The Texture Crew
Unsalted butter is the star of the texture crew. It melts just enough to create pockets of air, giving the cookies that coveted chewy center. If you use salted butter, you’ll need to reduce the added salt by about ¼ teaspoon to avoid an overly salty finish. For a richer flavor, let the butter sit at room temperature for 30 minutes before creaming.
The Unexpected Star
M&M’s are more than just color. They add a crunchy, chocolatey surprise that contrasts with the buttery dough. The key is to fold them in after the dough has partially set; this prevents them from sinking to the bottom and ensures an even distribution. If you prefer a darker chocolate experience, swap a portion of the M&M’s for dark chocolate chips.
The Final Flourish
Eggs bind the dough together, providing structure and helping the cookies rise. A single large egg is sufficient for four servings; using more will make the cookies cakier. If you’re avoiding eggs, you can replace them with ¼ cup unsweetened applesauce or a flax egg for a vegan version.
Everything's prepped? Good. Let's get into the real action and watch the dough transform into golden delights.
The Method — Step by Step
- Preheat your oven to 350°F (175°C). Line two baking sheets with parchment paper to prevent sticking. This step ensures even heat distribution and a clean release after baking.
- In a large bowl, beat 1 cup of unsalted butter with 1 cup of sugar until light and fluffy. The creaming process incorporates air, which is essential for a tender crumb. You’ll notice the mixture turning pale and airy.
- Add 2 large eggs, one at a time, beating well after each addition. This helps emulsify the mixture and keeps the dough cohesive. Watch for the mixture to thicken slightly after each egg.
- Stir in 1 teaspoon of vanilla extract. The vanilla should be a real, not artificial, extract to deepen the flavor profile. A quick sniff will reveal a warm, floral aroma.
- In a separate bowl, whisk together 2 cups of all-purpose flour, 1 teaspoon of baking soda, and 1 teaspoon of salt. This dry mix will provide structure and a slight lift to the cookies.
- Gradually fold the dry mixture into the wet mixture, using a spatula or spoon. Avoid overmixing; stop when the flour is just incorporated. Overmixing can develop gluten and result in tough cookies.
- Gently fold in 1 ½ cups of M&M’s, ensuring an even distribution. This step is crucial: too much agitation can cause the M&M’s to break, while too little can lead to uneven pockets.
- Drop rounded tablespoons of dough onto the prepared baking sheets, spacing them 2 inches apart. This spacing allows the cookies to spread without merging.
- Bake for 10–12 minutes, or until the edges are golden brown and the centers are set. The cookies should look slightly underbaked; they will firm up as they cool.
- Let the cookies rest on the baking sheet for 5 minutes before transferring them to a wire rack to cool completely. This rest period allows the cookies to set and prevents them from cracking.
That's it — you did it. But hold on, I've got a few more tricks that'll take this to another level. These insider secrets will elevate your cookie game and ensure each bite is a masterpiece.
Insider Tricks for Flawless Results
The Temperature Rule Nobody Follows
Most bakers bake at a standard 350°F, but lowering the temperature to 325°F and extending the bake time by 2–3 minutes creates a softer interior with a crispier edge. I once baked at 325°F for 13 minutes and the cookies stayed moist for days. The trick is to monitor the color rather than the clock; a light golden edge signals perfection.
Why Your Nose Knows Best
When the dough starts to smell toasty, that’s your cue to put the cookies in the oven. The aroma indicates the sugar is caramelizing just right. If you wait too long, the butter will burn, giving a bitter aftertaste that ruins the whole batch.
The 5‑Minute Rest That Changes Everything
After baking, let the cookies rest on the sheet for exactly 5 minutes before transferring them to a rack. This brief pause allows the steam inside to dissipate, preventing the cookies from cracking. I’ve seen 10‑minute rests cause the tops to lift and become uneven.
Use a Cooling Rack, Not a Plate
Cooling on a wire rack lets air circulate around the cookies, maintaining crispness. If you cool them on a plate, the underside can become soggy from trapped steam. This simple change keeps the texture consistent from the first to the last bite.
Freeze for Storage, Not Shelf Life
If you’re making a large batch, freeze the unbaked dough in a zip‑lock bag for up to 2 weeks. When you’re ready to bake, let the dough thaw at room temperature for 10 minutes before scooping. Frozen dough often yields a denser cookie, so thawing helps preserve the original texture.
Creative Twists and Variations
This recipe is a playground. Here are some of my favorite ways to switch things up:
Chocolate‑Dipped Delight
After cooling, dip half the cookies in melted dark chocolate. The chocolate coating adds a silky finish, and the contrast between the sweet M&M’s and the bitter chocolate is addictive. Let the chocolate set on parchment for a glossy finish.
Nutty Crunch Edition
Add ½ cup chopped walnuts or pecans to the dough. The nuts provide a satisfying crunch and a nutty aroma that complements the vanilla. Make sure to toast the nuts lightly before folding in for extra flavor.
Orange‑Zest Surprise
Replace the vanilla extract with 1 teaspoon of orange zest. The citrus notes brighten the cookie, making it perfect for spring or summer gatherings. The zest also adds a subtle color contrast to the M&M’s.
Vegan Version
Swap the butter for 1 cup of melted coconut oil and replace the eggs with 2 flax eggs (2 tbsp ground flaxseed + 6 tbsp water). Use a plant‑based milk to thin the dough if it feels too thick. The result is a chewy, chocolatey cookie that’s dairy‑free.
Gluten‑Free Twist
Use a 1:1 blend of gluten‑free flour with xanthan gum (½ tsp) instead of all‑purpose flour. This substitution keeps the structure and prevents the cookies from being too dense. The gluten‑free version still holds the M&M’s beautifully.
Storing and Bringing It Back to Life
Fridge Storage
Store cooled cookies in an airtight container at room temperature for up to 3 days. The airtight seal preserves the crisp edges and prevents the cookies from drying out. If you notice any softness, a quick pop in a 300°F oven for 2 minutes restores crispness.
Freezer Friendly
Place cooled cookies on a parchment‑lined sheet and freeze until solid. Transfer to a zip‑lock bag for long‑term storage, up to 3 months. When ready to enjoy, let the cookies thaw at room temperature for 15 minutes before reheating.
Best Reheating Method
Preheat the oven to 300°F (150°C). Sprinkle a tiny splash of water onto the cookies and bake for 5 minutes. The water steams the cookies, restoring moisture and crispness without overbaking.


