Picture this: I was halfway through a midnight snack, the pantry was a battlefield, and the last thing I wanted was another burnt disaster. The moment a bag of flour exploded in my face, I knew I had to find a recipe that could turn a kitchen catastrophe into a triumph. Enter the Mini Purple Rice Cheese Tart, a dish that transforms humble pantry staples into a show‑stopping bite. I swear, the first time I tasted it, I almost cried because it was that good. Trust me, this is the kind of recipe that makes you want to shout, “I did that!”
Imagine the earthy aroma of freshly cooked purple rice mingling with the creamy perfume of softened cream cheese. The sound of the tart batter sliding into the pan is a satisfying hiss that promises something delicious. As you lift the first bite, the crust crackles like a gentle applause, revealing a silky, velvety center that melts in your mouth. The sweet undertone of taro paste dances with vanilla, creating a flavor profile that feels like a warm hug on a cool evening. Every bite is a sensory journey that turns ordinary ingredients into a culinary adventure.
This version is not just another tart; it's a masterpiece that balances nutty, sweet, and creamy in perfect harmony. The purple rice gives the crust a subtle pop of color and a delightful chew that contrasts with the smooth filling. The taro paste adds a surprising depth of flavor, reminiscent of sweet potato but with a silkier texture. The combination of vanilla and powdered sugar rounds off the taste profile with a gentle sweetness that doesn't overwhelm. Together, they create a dish that feels indulgent yet wholesome, making it a standout for any occasion.
I dare you to taste this and not go back for seconds—because once you taste the first bite, the rest will feel like a distant memory. What makes this recipe truly unique is the unexpected use of taro paste, a hidden gem that adds both flavor and a silky mouthfeel. The crust is light and crisp, yet the filling is decadently creamy, making each bite a revelation. Imagine the whole kitchen filling with an aroma that makes people stop in their tracks and ask what you're cooking. This is the kind of dish that turns a simple dinner into a memorable event.
Picture yourself pulling this out of the oven, the whole kitchen smelling incredible, and the guests lining up for a taste. I promise you, by the end of this guide, you’ll wonder how you ever made it any other way. From the first whisk to the final garnish, every moment is a chance to showcase your culinary flair. And trust me, the result will have them asking for the recipe before they even finish the last tart. Let me walk you through every single step—by the end, you'll wonder how you ever made it any other way.
What Makes This Version Stand Out
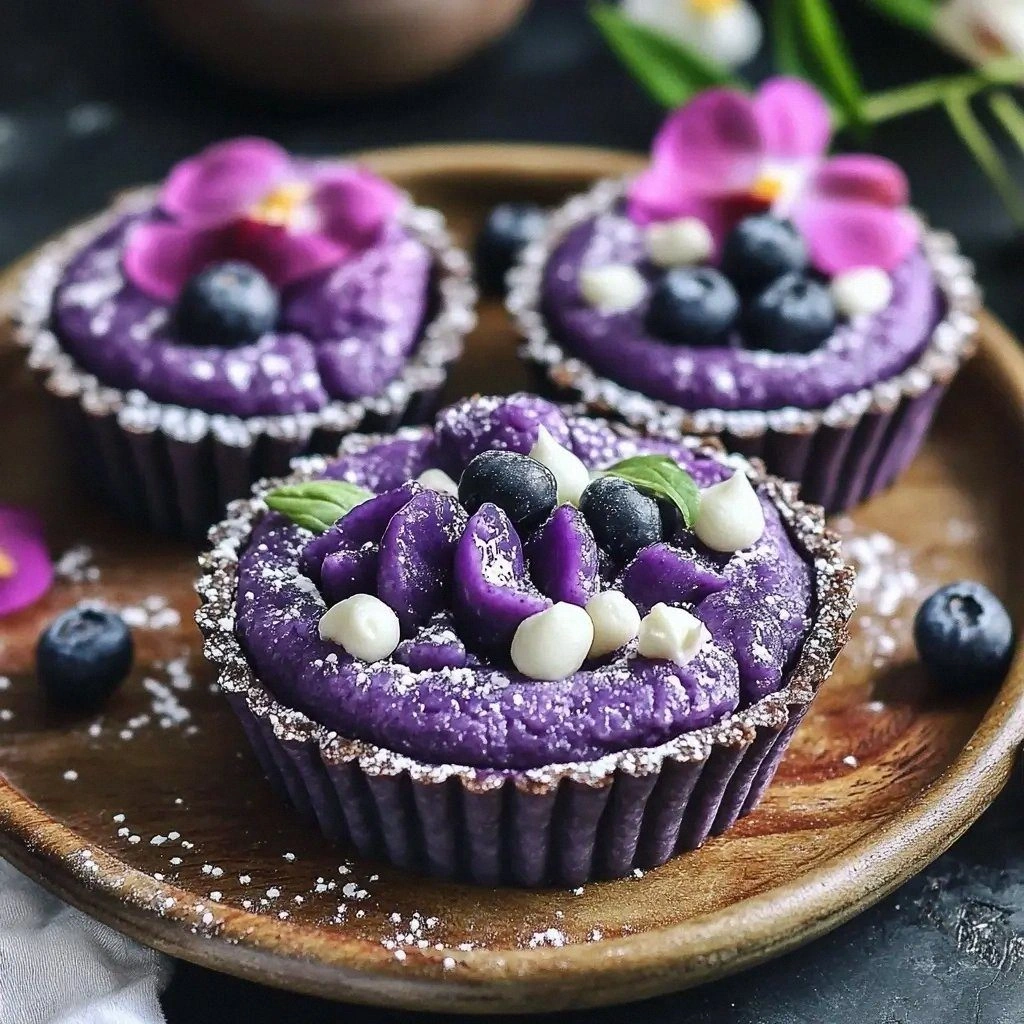
- Color Explosion: The purple rice gives a striking visual that sets the stage. The vibrant hue makes each tart a work of art, turning an ordinary snack into a show‑stopping centerpiece.
- Nutty Depth: The rice brings a subtle nuttiness that grounds the sweet filling. This depth elevates the dish beyond typical cheese tarts.
- Silky Sweetness: Taro paste delivers a silky, sweet flavor that balances the cream cheese. It’s like a smooth caramel swirl inside a crisp shell.
- Creamy Center: Cream cheese is softened to a perfect consistency, creating a luscious, spread‑like filling. The result is a decadent mouthfeel that lingers.
- Vanilla Touch: A splash of vanilla ties everything together, adding aromatic warmth. It rounds out the flavors without overpowering them.
- Easy Assembly: The crust and filling come together in a single pan, saving time and reducing cleanup. This simplicity is a major win for busy cooks.
- Make‑Ahead Friendly: The tarts can be assembled ahead and refrigerated, making them ideal for parties. They hold up beautifully when stored properly.
- Versatile Serving Options: Whether as a snack, dessert, or brunch item, these tarts adapt to any meal. Fresh fruit topping can elevate the presentation further.
Alright, let's break down exactly what goes into this masterpiece. Each component is chosen to create a harmonious balance of flavor, texture, and visual appeal. The ingredients may seem simple, but their synergy is what makes this tart unforgettable. Prepare to be amazed by how a few pantry staples can transform into a culinary triumph. And remember, the key is in the details—every pinch, every stir matters.
Inside the Ingredient List
The Flavor Base
Purple rice is the star of the crust, offering a nutty undertone that sets a unique foundation. Its natural color adds a pop of visual excitement, making the tart instantly eye‑catching. If you can't find purple rice, a mix of black and white basmati can mimic the color slightly, though the flavor profile will shift. Choosing high‑quality, organic rice ensures the best texture and flavor.
The Texture Crew
Coconut oil acts as a binder, giving the crust a tender yet firm bite that holds the filling together. The oil’s subtle tropical note complements the creamy center without overpowering it. Swapping coconut oil for butter adds a richer taste but can change the crust’s delicate crispness. A light touch of oil is key—too much, and the crust becomes greasy.
The Unexpected Star
Sweetened taro paste brings an unexpected depth of sweetness and silkiness. It’s a secret weapon that balances the tang of cream cheese and the subtle nuttiness of rice. If taro paste isn’t available, a thin layer of sweet potato puree can serve as a decent stand‑in, though the texture will differ. Remember, the paste should be smooth; any lumps will affect the filling’s consistency.
The Final Flourish
Powdered sugar and vanilla extract tie the flavors together, giving the filling a gentle, aromatic sweetness. The vanilla’s warmth lingers on the palate, making each bite feel comforting. A pinch of sea salt can enhance the overall taste, but avoid over‑salting. Fresh fruit topping adds a burst of brightness that cuts through the richness.
Everything's prepped? Good. Let's get into the real action, where the magic happens and the tarts come to life.
The Method — Step by Step
- Preheat your oven to 375°F (190°C). Line a 9‑inch tart pan with parchment paper for easy removal. Heat the coconut oil in a saucepan over medium heat until it shimmers. Add the cooked purple rice and stir until it’s lightly toasted, about 2 minutes. This step ensures the crust has a nutty aroma and a firm base for the filling.
- In a mixing bowl, combine the softened cream cheese and sweetened taro paste. Beat them together with a handheld mixer until the mixture is smooth and silky. The goal is a uniform texture that will spread easily over the crust. Add powdered sugar and vanilla extract, whisking until fully incorporated. The mixture should be creamy enough to pipe but not too runny.
- Spread the creamy mixture over the toasted rice crust, smoothing the surface with a spatula. The filling should cover the crust evenly, forming a glossy top. If you want a slightly raised edge, let the filling sit for a minute before baking. This helps the edges set and prevents the center from sliding.
- Slide the tart pan into the preheated oven. Bake for 20–25 minutes, or until the edges are golden and the center is set but still slightly wobbling. The slight wobble indicates a perfectly creamy center that will firm up as it cools. Avoid over‑baking, or the filling will become dry and crumbly. Keep an eye on the color—brownish edges mean it’s ready.
- Remove the tarts from the oven and let them cool in the pan for 5 minutes. This short rest allows the filling to set without cracking. After 5 minutes, carefully lift the tarts out of the pan using the parchment paper. Place them on a wire rack to finish cooling completely.
- Once cooled, refrigerate the tarts for at least 30 minutes. Chilling helps the flavors meld and the filling firm up for a clean slice. If you’re serving immediately, a quick chill will still yield a pleasant texture. Remember, the tarts are best served cold or at room temperature.
- Just before serving, top each tart with fresh fruit slices—think kiwi, berries, or citrus segments. The fruit adds a bright, tangy contrast that cuts through the richness. Arrange the fruit in a decorative pattern for an Instagram‑ready look. Serve immediately or keep refrigerated until ready to enjoy.
That's it — you did it. But hold on, I've got a few more tricks that'll take this to another level. These insider tips will help you master the tarts and avoid common pitfalls. Stick around, and you'll become a tart‑making pro in no time.
Insider Tricks for Flawless Results
The Temperature Rule Nobody Follows
Baking at the exact right temperature is critical. Too hot, and the crust burns before the filling sets; too cool, and the tart won’t firm up properly. I always preheat the oven for at least 15 minutes to ensure consistency. Use an oven thermometer to verify the temperature; this small step can save you from a ruined batch. A stable 375°F is the sweet spot for this recipe.
Why Your Nose Knows Best
Before you open the oven door, take a moment to sniff the batter. A faint nutty aroma indicates the rice is toasted; a sweet, buttery scent signals the filling is ready. If the scent is too mild, give it another minute. Your nose is a reliable guide for timing. Trust it, and you’ll avoid over‑baking.
The 5-Minute Rest That Changes Everything
After baking, let the tarts rest in the pan for exactly five minutes. This short pause allows the filling to set without cracking. Skipping this step often results in a runny center that spills when you cut it. I’ve seen even seasoned bakers forget this, so I always set a timer. The difference is worth the extra five minutes.
The Crust Crumb Test
Press a small area of the crust with your fingertip. If it feels firm and holds its shape, the crust is ready. If it feels soft or mushy, bake for another minute. This tactile test ensures the crust won’t collapse under the creamy filling. I always keep a small spatula handy for this quick check.
The Sweetness Balancer
If you prefer a sweeter tart, add an extra tablespoon of powdered sugar. However, too much sugar can cause the filling to become too firm. I recommend tasting a small spoonful of the mixture before baking. Adjust the sweetness to your liking; this small tweak can elevate the entire dish.
The Cooling Trick
Place the cooling rack over a sheet of parchment paper. This prevents condensation from dripping onto the tarts, which can soften the crust. I always do this during parties to keep the tarts crisp. The simple step keeps the texture pristine and ready for plating.
Creative Twists and Variations
Mango Madness
Swap the fresh fruit topping for ripe mango slices. The tropical sweetness pairs wonderfully with the creamy center. This variation turns the tart into a summer dessert. Guests will love the vibrant orange hue and juicy flavor.
Chocolate Drizzle Delight
Drizzle melted dark chocolate over the cooled tarts. The bittersweet chocolate contrasts the sweet filling. Sprinkle chopped nuts for added crunch. This version feels like a decadent bite‑size chocolate cake.
Spicy Citrus Kick
Add a pinch of cayenne pepper to the filling for a subtle heat. Top with segments of blood orange to balance the spice. The citrus brightens the overall taste profile. This twist is perfect for those who love a little heat.
Herbal Infusion
Stir fresh chopped mint into the filling. The mint adds a refreshing note that complements the creamy center. Garnish with a sprig of rosemary for a fragrant finish. This variation is ideal for brunch or light lunches.
Nutty Crunch
Fold toasted chopped almonds into the crust mixture. The almonds give the crust a delightful crunch. Top with sliced almonds for extra texture. This version adds a satisfying bite and nutty aroma.
Lemon Zest Finale
Add lemon zest to the filling for a citrusy lift. Finish with a drizzle of honey for natural sweetness. The bright lemon flavor brightens the overall taste. This variation is a crowd‑pleaser for afternoon teas.
Storing and Bringing It Back to Life
Fridge Storage
Store the tarts in an airtight container in the refrigerator for up to 3 days. The creamy filling will remain fresh and firm. Avoid stacking them too tightly to preserve the crust’s crispness. A small paper towel can absorb excess moisture and keep the tarts crisp.
Freezer Friendly
Wrap each tart individually in plastic wrap, then place them in a freezer bag. They can be frozen for up to 2 weeks. When ready to serve, thaw overnight in the fridge. This method keeps the texture intact and makes meal prep a breeze.
Best Reheating Method
To reheat, place the tarts in a preheated oven at 350°F for 5–7 minutes. This warms the filling without drying it out. If you prefer a quick fix, microwave on low power for 15–20 seconds, then let rest for a minute. Adding a tiny splash of water before reheating steams the tarts back to perfection.