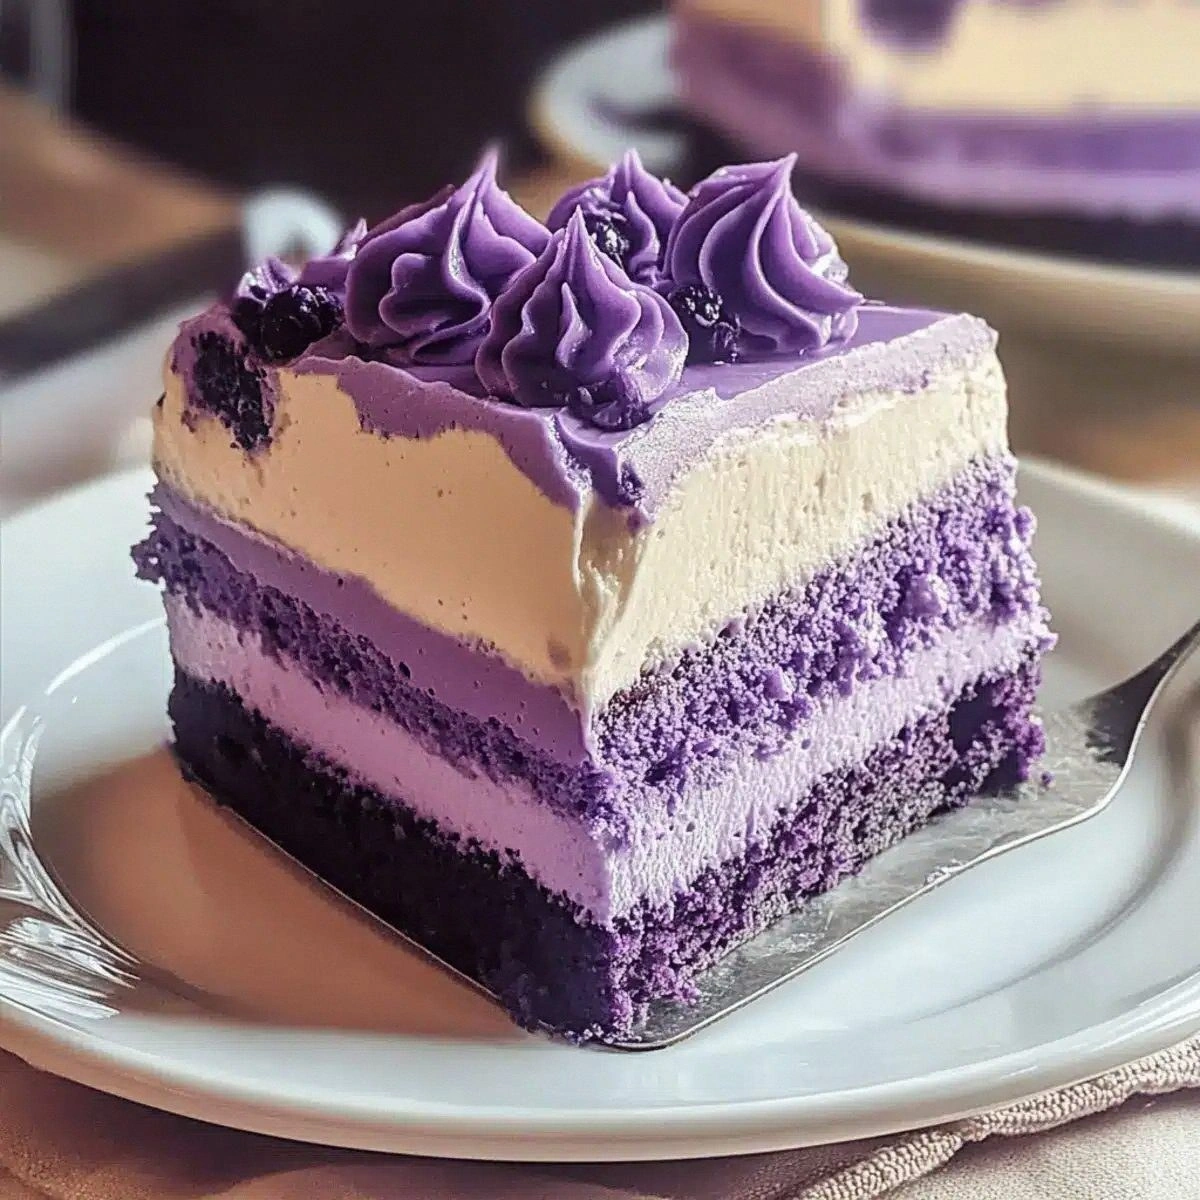
I was in the middle of a frantic Tuesday night, juggling a Zoom call, a half‑finished spreadsheet, and a sudden craving that hit me like a tropical thunderstorm. I opened the pantry, stared at a lonely bag of flour, and thought, “What if I could turn this into something that feels like a vacation in a bite?” The answer arrived in the form of a daring friend who dared me to combine two of my favorite desserts: the buttery, airy sponge of a tres leches cake and the vibrant, violet‑purple charm of ube. I laughed, I rolled my eyes, but then I grabbed the ube halaya, the three milks, and a whisk, and the kitchen turned into a laboratory of sweet alchemy.
The moment the batter hit the bowl, the kitchen was filled with the gentle hum of the mixer, the glossy sheen of ube extract swirling like a sunrise over a calm sea, and the faint scent of vanilla teasing my nostrils. I could hear the faint crackle of the oven preheating, a promise that something glorious was about to happen. My fingertips tingled as the batter rose, and the air felt warm, like stepping onto a sun‑kissed beach. When I finally lifted the golden‑brown cake from the pan, the edges pulled away with a sigh, and the interior was a cloud‑soft canvas waiting for a tropical rain of milks.
What makes this version the ultimate indulgence? Most tres leches recipes treat the cake as a neutral base, letting the milky soak do all the work. I flipped the script by infusing the batter itself with ube flavor, then topping it with a luscious blend of evaporated, condensed, and coconut milk that sings in harmony with the ube jam. The result is a cake that’s moist, creamy, and unmistakably tropical, with a depth of flavor that makes ordinary desserts feel flat. I’ll be honest — I ate half the batch before anyone else got to try it, and that’s because this cake is hands down the best version you’ll ever make at home.
Let me walk you through every single step — by the end, you’ll wonder how you ever made it any other way. Okay, ready for the game‑changer? This next part? Pure magic. I dare you to taste this and not go back for seconds. Picture yourself pulling this out of the oven, the whole kitchen smelling incredible, and the first forkful melting like a dream. Stay with me here — this is worth it.
What Makes This Version Stand Out
- Flavor Fusion: The ube extract and ube halaya are woven into the batter, so every bite bursts with that earthy, sweet violet flavor, not just a surface coating.
- Silky Soak: The three‑milk mixture includes coconut milk, adding a subtle nutty richness that makes the cake feel like a tropical lagoon.
- Texture Triumph: A light, airy sponge absorbs the milks without turning soggy, delivering a melt‑in‑your‑mouth experience that’s both fluffy and moist.
- Simplicity: Despite the impressive flavor profile, the method uses everyday pantry staples and a single bowl for the batter.
- Show‑Stopper Appeal: The vibrant purple hue makes it a centerpiece for any celebration, and the glossy milk glaze adds a professional finish.
- Make‑Ahead Magic: Once soaked, the cake keeps beautifully for up to three days, letting the flavors meld even deeper.
- Ingredient Quality: Using real ube halaya instead of artificial coloring ensures authentic taste and a natural, earthy sweetness.
- Crowd Reaction: Expect gasps, compliments, and the inevitable request for the recipe — it’s that good.
Inside the Ingredient List
The Flavor Base
Ube extract is the secret weapon that injects that unmistakable violet flavor into the batter. One tablespoon is enough to paint the entire cake with its earthy sweetness without overwhelming the palate. If you can’t find ube extract, a high‑quality ube powder works just as well, but be sure to dissolve it in a splash of milk first. The ube halaya, a sweetened ube jam, adds texture and a burst of caramel‑like depth; skip it, and you’ll lose the signature gooey pockets that make each bite exciting.
The Texture Crew
All‑purpose flour provides the structural backbone, while baking powder lifts the batter into a light, airy cloud. The eggs, separated into yolks and whites, are the real miracle workers: yolks enrich the batter, and whipped whites folded in at the end create that delicate rise. Whole milk thins the batter just enough for a smooth pour, and the granulated sugar sweetens and helps with the browning of the crust. If you’re allergic to dairy, you can swap whole milk for oat milk, but expect a slightly different crumb.
The Unexpected Star
Coconut milk in the three‑milk soak adds a tropical whisper that pairs perfectly with ube. It also keeps the cake from feeling overly heavy, balancing the richness of the condensed and evaporated milks. Heavy whipping cream, when lightly whipped, creates a velvety topping that crowns the cake with a silky finish. The two extra tablespoons of sugar for the topping help stabilize the whipped cream and add a subtle sparkle.
The Final Flourish
A pinch of salt might seem trivial, but it amplifies every sweet note, ensuring the flavors don’t become cloyingly flat. The final sprinkle of granulated sugar on the whipped cream adds a gentle crunch that contrasts the creamy texture. When selecting ube halaya, look for a brand that uses real ube and minimal artificial additives; the texture should be smooth, not grainy. And always use full‑fat dairy for the milks — low‑fat versions thin out the sauce and diminish the luxurious mouthfeel.
Everything's prepped? Good. Let's get into the real action...
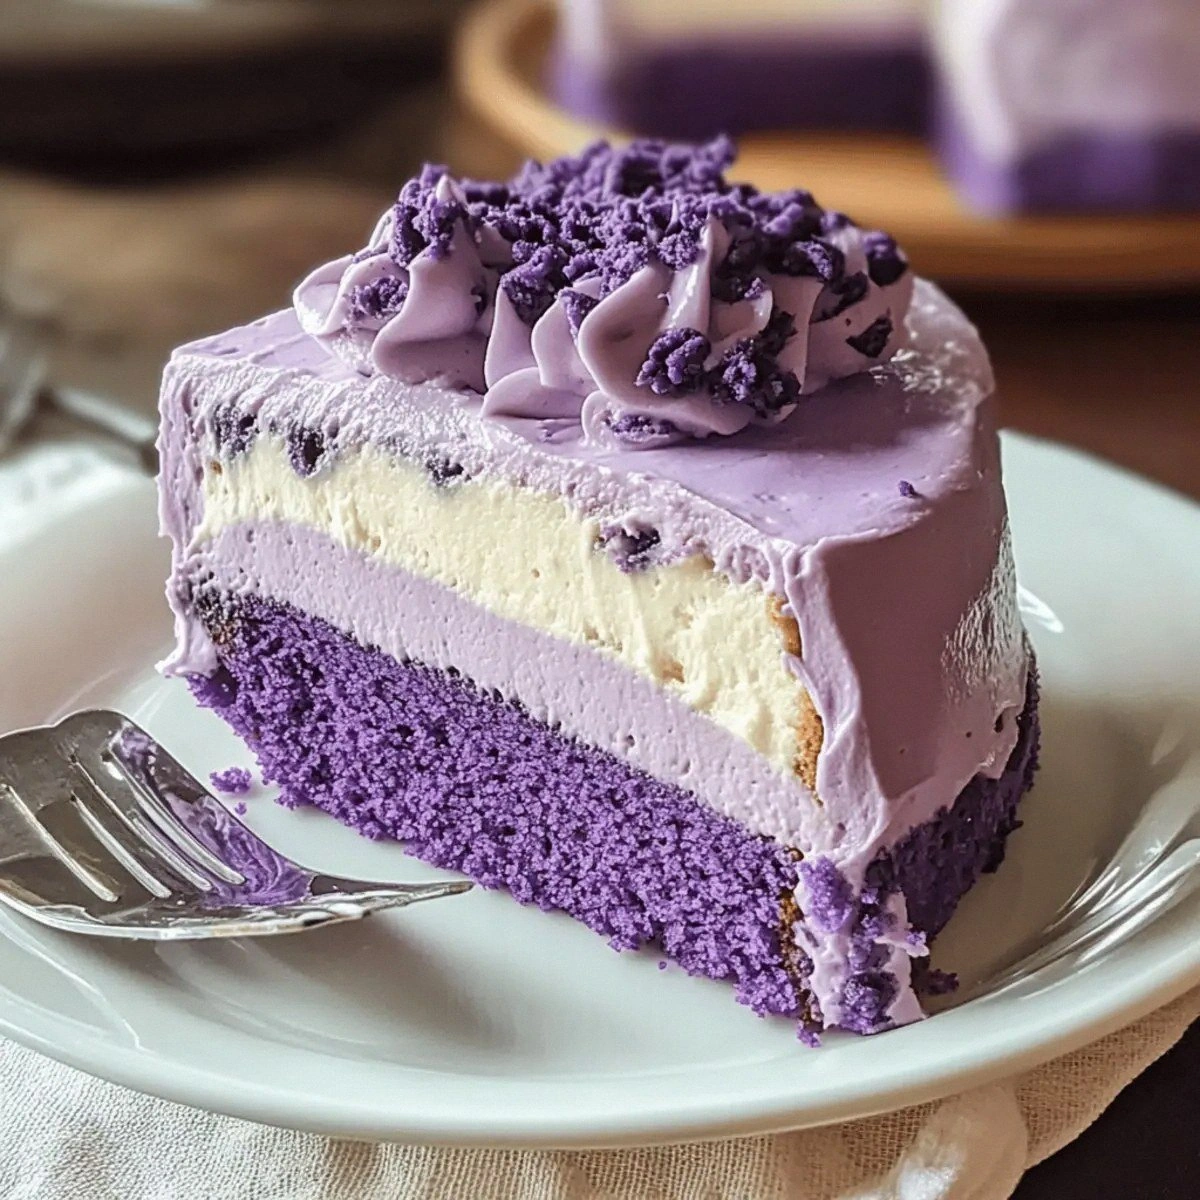
The Method — Step by Step
Preheat your oven to 350°F (175°C). Grease a 9‑inch round cake pan and line the bottom with parchment paper — this prevents the cake from sticking and makes the later soak even distribution a breeze. While the oven warms, whisk together the flour, baking powder, and salt in a large bowl, ensuring no lumps remain. This dry mix will be the canvas for the ube masterpiece.
Separate the eggs: place yolks in one bowl and whites in another. Beat the yolks with half of the granulated sugar (½ cup) until they turn a pale, creamy yellow, about 3 minutes. Then, in a clean bowl, whip the egg whites until soft peaks form, gradually adding the remaining ½ cup sugar until glossy stiff peaks develop. This step is crucial — the whipped whites will give the cake its airy lift.
Kitchen Hack: Add a pinch of cream of tartar to the egg whites; it stabilizes the foam and prevents over‑beating.In a separate saucepan, gently warm the whole milk, ube extract, and ube halaya over low heat, stirring until the halaya fully dissolves into a glossy, violet‑colored liquid. This infused milk will be folded into the batter, giving every crumb a burst of ube flavor. Remove from heat and let it cool slightly — you don’t want to scramble the yolks.
Combine the yolk mixture with the dry ingredients, stirring just until incorporated. Then, gradually pour the warm ube‑infused milk into the batter, mixing gently with a spatula. The batter should be smooth, slightly thick, and radiate a beautiful lavender hue. Over‑mixing at this stage can develop gluten, leading to a dense cake, so keep the motions light.
Now the magic moment: fold the whipped egg whites into the batter in three additions. Use a gentle “cut‑and‑fold” motion, turning the bowl rather than stirring, to preserve the airy structure. You’ll notice the batter becoming lighter with each fold, almost like a cloud ready to burst into the oven.
Pour the batter into the prepared pan, smoothing the top with a spatula. Slide the pan onto the middle rack and bake for 25‑30 minutes, or until a toothpick inserted into the center comes out clean with just a few crumbs attached. The edges should start pulling away from the pan, a sign that the cake is perfectly baked.
Watch Out: Opening the oven door before the 20‑minute mark can cause the cake to collapse; trust the timer and resist the urge to peek.While the cake bakes, prepare the three‑milk soak: in a large bowl, whisk together evaporated milk, condensed milk, and coconut milk until smooth. Once the cake is out, let it cool in the pan for 10 minutes, then run a thin knife around the edges and invert onto a serving platter. Using a fork, poke holes all over the surface — this is where the milky goodness will seep in.
Slowly pour the three‑milk mixture over the cake, allowing it to soak in gradually. You’ll hear a soft sizzle as the milks meet the warm sponge, and the cake will begin to swell and soften instantly. Let the cake rest for at least 30 minutes, or refrigerate for an hour to let the flavors meld fully.
Kitchen Hack: If you’re in a hurry, use a pastry brush to drizzle the milk mixture evenly, ensuring every nook gets saturated.Whip the heavy cream with the remaining 2 tbsp of granulated sugar until soft peaks form. Spread the whipped cream generously over the soaked cake, then sprinkle a light dusting of extra sugar for sparkle. For an extra touch, garnish with a few curls of fresh ube halaya or a drizzle of ube extract.
That's it — you did it. But hold on, I've got a few more tricks that'll take this to another level. The real secret to a flawless tres leches is in the resting time and the final presentation, so keep reading for the insider tips that will make your cake the talk of every gathering.
Insider Tricks for Flawless Results
The Temperature Rule Nobody Follows
Never pour the three‑milk soak over a cold cake. The cake should be warm (just out of the oven) so the milks can be absorbed instantly, creating that luscious, soggy‑but‑not‑soggy texture. If you chill the cake first, the soak will sit on top, forming a glossy glaze instead of a fully integrated soak. I once tried the cold‑cake shortcut and ended up with a soggy mess — lesson learned.
Why Your Nose Knows Best
Your sense of smell is a reliable indicator of doneness. When the cake is baking, you’ll notice a sweet, caramel‑like aroma that deepens as the edges turn golden. If the scent is faint, give it a couple more minutes; if it’s strong and slightly nutty, you’re at the perfect moment to pull it out. Trusting your nose beats relying on a timer alone.
The 5‑Minute Rest That Changes Everything
After soaking, let the cake sit uncovered for five minutes before covering it with plastic wrap. This short rest allows excess moisture to evaporate slightly, preventing a gummy surface while keeping the interior moist. Skipping this step results in a slick top that can slide off when you slice.
Whipping Cream Without a Mixer
If you don’t have a stand mixer, a sturdy whisk and a chilled bowl do the trick. Chill the bowl and whisk for at least 10 minutes, then whisk vigorously in a circular motion. The cream will thicken faster, and you’ll still achieve those soft peaks that crown the cake beautifully.
The Final Glaze Trick
For a glossy finish, gently warm a tablespoon of condensed milk and brush it over the whipped cream right before serving. This adds a subtle sheen and an extra layer of sweetness that makes the cake look restaurant‑ready. I swear this tiny step elevates the entire presentation.
Creative Twists and Variations
This recipe is a playground. Here are some of my favorite ways to switch things up:
Mango‑Infused Tres Leches
Swap the ube extract for mango puree and replace ube halaya with a mango jam. The result is a sunny, tropical twist that pairs perfectly with a dollop of coconut whipped cream.
Chocolate‑Ube Fusion
Add ¼ cup of cocoa powder to the dry ingredients and drizzle a dark chocolate ganache over the finished cake. The bitter chocolate balances the sweet ube, creating a sophisticated dessert.
Coconut‑Lime Breeze
Incorporate zest of one lime into the three‑milk soak and garnish with toasted coconut flakes. The citrus brightens the richness and adds a crunchy texture contrast.
Vegan Velvet
Replace the eggs with a flax‑egg mixture, use plant‑based milks (almond, soy, or oat) for the batter, and swap the dairy milks for coconut cream and soy condensed milk. The result is a cruelty‑free version that still delivers the same moist, fluffy experience.
Spiced Holiday Edition
Add a pinch of ground cinnamon and nutmeg to the batter, and finish with a dusting of powdered sugar shaped like snowflakes. This variation makes a stunning centerpiece for winter gatherings.
Storing and Bringing It Back to Life
Fridge Storage
Cover the cake tightly with plastic wrap and store it in the refrigerator for up to three days. The milks continue to infuse, making each slice more flavorful. Before serving, let it sit at room temperature for 10 minutes to soften the whipped cream.
Freezer Friendly
Slice the cake, wrap each piece in parchment paper, then place them in a zip‑top freezer bag. They’ll keep for up to two months. To revive, thaw overnight in the fridge, then add a splash of fresh coconut milk before serving to re‑moisturize.
Best Reheating Method
For a warm slice, microwave a single piece for 15‑20 seconds, then drizzle a tiny splash of water or extra milk over it. The steam generated will bring back that soft, melt‑in‑your‑mouth texture without making the cake rubbery.


