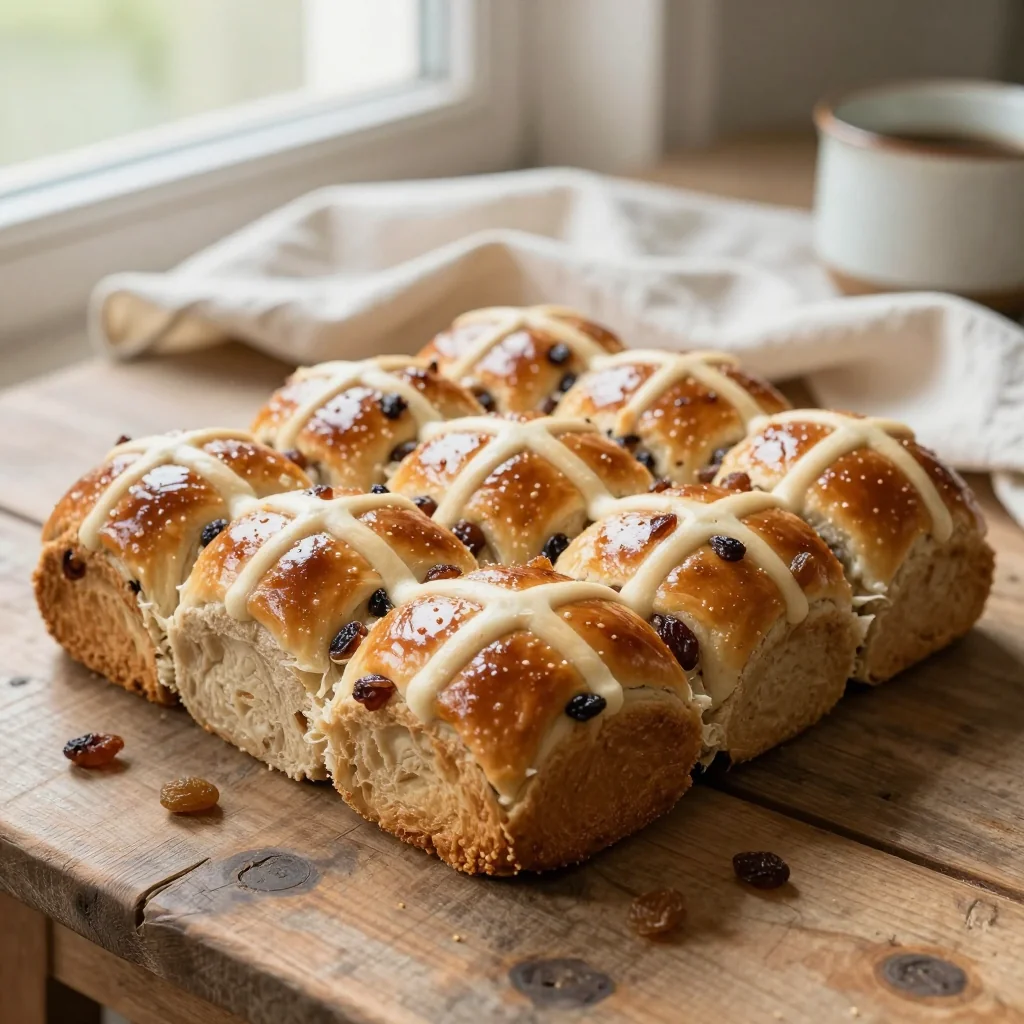
Warm, spiced buns studded with sweet raisins and marked with a classic cross – perfect for Easter brunch or any cozy morning.

A Personal Story Behind the Buns
The first time I tasted a warm hot cross bun was on a crisp Easter morning in my grandmother’s kitchen. The scent of cinnamon, nutmeg, and sweet raisins curled around the old oak table, mingling with the faint hum of a radio playing folk tunes. I remember watching her knead the dough, her hands moving with a rhythm that felt like a lullaby, and feeling the anticipation build as the buns rose in the oven.
Hot cross buns have a storied history that stretches back to medieval Europe, where they were originally offered to the poor on Good Friday. Over centuries, they evolved into a beloved springtime treat, celebrated not only for their symbolic cross but also for their comforting flavors. Today, they remain a staple in many households, a bridge between tradition and modern comfort food.
In this article, I will guide you through every step of creating perfectly fluffy buns with a glossy cross, a moist interior, and plump raisins that burst with sweetness. You’ll learn how to balance the spices, achieve an even rise, and finish with a shiny glaze that makes these buns look as good as they taste.
I’m thrilled to share this recipe with you, and I promise that with a little patience and the right technique, you’ll be able to bake a batch that rivals any bakery’s offering. Let’s get started and bring a slice of heritage to your own kitchen!
🌟 Why This Recipe Will Captivate You
Hot Cross Buns are more than just a seasonal pastry; they’re a celebration of texture, flavor, and tradition, all wrapped in a single bite.
- ✨ Perfect Balance of Sweet and Spice: The subtle sweetness of raisins is perfectly countered by warm spices like cinnamon and nutmeg, creating a harmonious flavor profile that’s comforting yet sophisticated.
- ✨ Fluffy, Light Texture: By using a combination of milk, butter, and a gentle yeast rise, the buns achieve an airy crumb that stays tender for days.
- ✨ Iconic Cross Design: The traditional cross not only looks beautiful but also adds a subtle crunch from the flour paste, enhancing the overall mouthfeel.
- ✨ Versatile Serving Options: Enjoy them warm with butter, toasted with cheese, or even as a base for a decadent bread pudding – the possibilities are endless.
- ✨ Easy to Scale: The built‑in portion adjuster lets you increase or decrease the recipe without recalculating each ingredient manually.
- ✨ Great for Community Baking: The recipe yields eight generous buns, making it ideal for family gatherings, church events, or a friendly brunch.
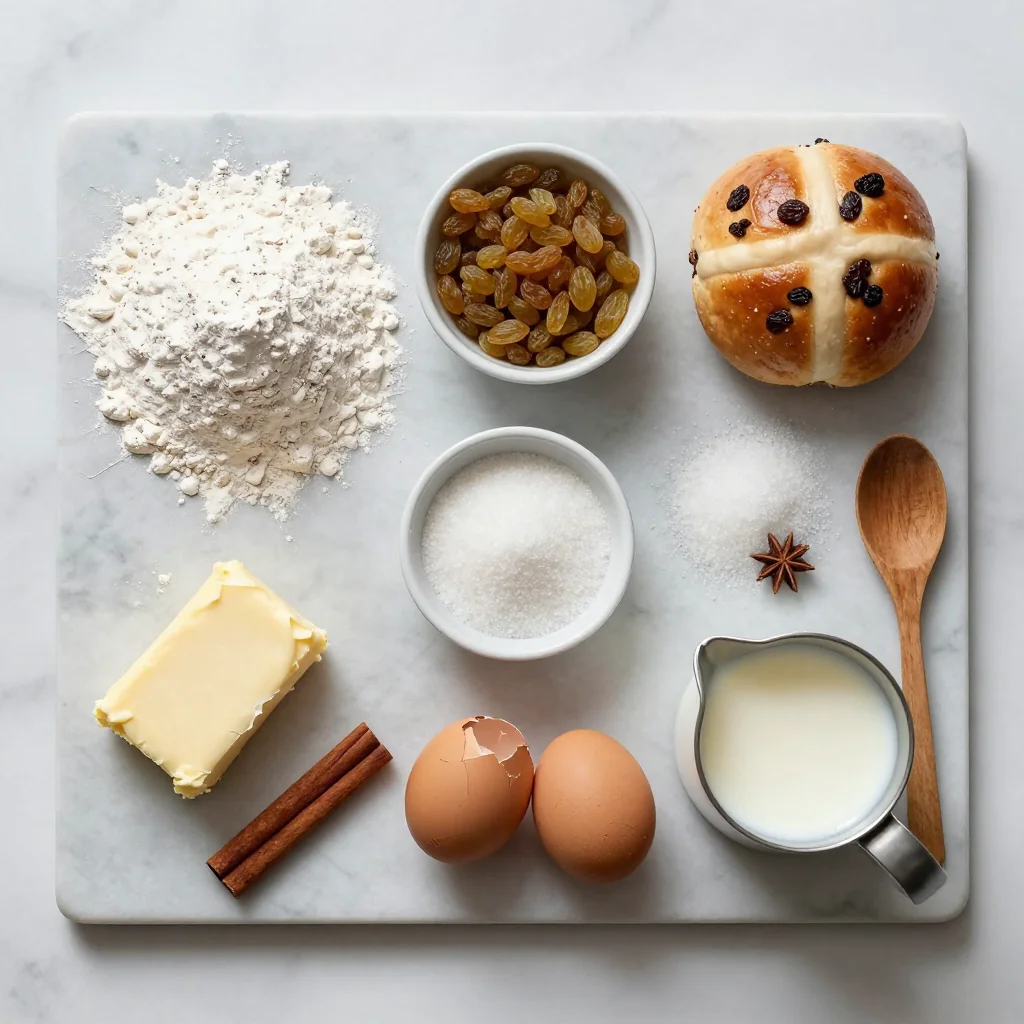
🥗 Ingredients
📝 Complete Ingredient List
For the Dough:
For the Glaze (Cross & Shine):
🔍 Focus on Key Ingredients
Bread Flour
Bread flour provides a higher protein content than all‑purpose flour, which creates more gluten. This gluten network traps the carbon dioxide produced by the yeast, giving the buns their signature rise and airy crumb. Look for flour labeled “strong” or “high‑gluten” for the best results.
Raisins
Raisins add bursts of natural sweetness and a chewy texture that contrasts beautifully with the soft dough. Plump, golden raisins retain more moisture than darker varieties, ensuring they don’t dry out during baking. If you prefer a tart note, try dried cranberries or chopped dried apricots as a variation.
Spices (Cinnamon & Nutmeg)
The warm spices are the heart of the bun’s flavor. Cinnamon offers a sweet, woody aroma, while nutmeg adds a subtle earthiness. For an extra depth of flavor, toast the spices briefly in a dry pan before mixing them into the dough.
🔄 Quick Substitutions
| If you don’t have... | Use instead... |
|---|---|
| Whole milk | 2% milk or oat milk (for dairy‑free) |
| Active dry yeast | Instant yeast (same amount) |
| Unsalted butter | Margarine or coconut oil (solid, not melted) |
👨🍳 Step‑by‑Step Instructions
Follow these detailed steps to achieve perfectly risen, fragrant buns with a glossy cross. Take your time with each stage – the dough rewards patience.
📋 Phase 1: Preparation & Mise en Place
Gather your tools, measure ingredients, and start the fermentation process.
Activate the Yeast
In a small bowl, combine the warm water (around 38 °C/100 °F) with the active dry yeast and a pinch of the granulated sugar. Stir gently and let sit for 5–10 minutes until the mixture becomes foamy. This indicates that the yeast is alive and ready to leaven the dough.
Mix Dry Ingredients
In a large mixing bowl, whisk together the bread flour, remaining sugar, salt, ground cinnamon, and ground nutmeg. Creating a well‑distributed spice blend ensures each bite carries an even flavor.
Combine Wet Ingredients
In a separate jug, warm the milk until it’s just lukewarm, then add the melted butter and beaten egg. Whisk until smooth, then pour in the activated yeast mixture.
Knead the Dough
Add the wet mixture to the dry ingredients. Stir with a wooden spoon until a shaggy dough forms, then turn out onto a lightly floured surface. Knead for about 8–10 minutes, or until the dough is smooth, elastic, and springs back when pressed. If using a stand mixer, set it to medium speed with the dough hook for 5 minutes.
Incorporate Raisins
Flatten the dough slightly, sprinkle the raisins evenly, and fold the dough over them. Continue kneading for another minute to distribute the raisins without crushing them.
First Proof
Shape the dough into a ball, place it in a lightly oiled bowl, cover with a clean kitchen towel, and let it rise in a warm, draft‑free spot for 1–1.5 hours, or until doubled in size.
🔥 Phase 2: Shaping, Crosses, and Baking
After the dough has risen, we’ll shape the buns, add the iconic crosses, and bake.
Shape the Buns
Punch down the risen dough gently to release excess air. Divide it into eight equal pieces (approximately 120 g each). Shape each piece into a smooth ball by pulling the edges to the center and pinching them together. Place the balls on a parchment‑lined baking sheet, leaving a little space between them.
Second Proof
Cover the shaped buns loosely with a damp kitchen towel and let them rise again for 30–45 minutes, until they look puffy and have increased noticeably in size.
Prepare the Cross Paste
While the buns are proofing, mix the flour and milk together to form a thick paste. Transfer the paste to a piping bag fitted with a small round tip (or a zip‑lock bag with a corner snipped off). This will be used to pipe the classic cross on each bun.
Pipe the Crosses
Once the buns have risen, use the prepared paste to pipe a simple “+” shape on the top of each bun. The paste will bake into a light, slightly crisp cross that adds visual appeal and a subtle texture.
Egg Wash
Brush the tops of the buns gently with the beaten egg. This will give the buns a glossy, golden finish once baked.
Bake the Buns
Preheat your oven to 190 °C (375 °F). Bake the buns on the middle rack for 20–22 minutes, or until they are deep golden brown and sound hollow when tapped on the bottom. Rotate the tray halfway through baking for even color.
✨ Phase 3: Finishing Touches & Serving
Cool, glaze, and enjoy.
Cool the Buns
Remove the buns from the oven and transfer them to a wire rack. Allow them to cool for at least 10 minutes; this lets the interior set while keeping the crust slightly crisp.
Optional Glaze
For an extra shine, brush the still‑warm buns with a thin glaze made from equal parts powdered sugar and milk. This adds a subtle sweetness and a beautiful sheen.
Serve
Serve the buns warm, split and buttered, or simply as they are. They pair wonderfully with a cup of tea, coffee, or a glass of sparkling cider.
💡 Expert Tips & Tricks
🛒 Choosing the Best Ingredients
Freshness matters. Look for flour that’s stored in a cool, dry place and hasn’t been opened for more than six months. Choose butter that’s slightly softened at room temperature for easier incorporation. When buying raisins, select those that are plump, glossy, and free from any signs of drying out. A quick sniff can tell you if they still retain their natural sweetness.
🔪 Preparation Techniques
When kneading, aim for a windowpane test: stretch a small piece of dough; if it becomes translucent without tearing, the gluten is well‑developed. This ensures a light, airy crumb. Also, avoid over‑mixing the yeast with hot liquids; temperatures above 45 °C (113 °F) can kill the yeast, resulting in a dense bun.
🌡️ Mastering the Bake
Oven hotspots can cause uneven browning. Use an oven thermometer to verify the true temperature, and rotate the pan halfway through the bake. If you prefer a softer crust, lower the temperature to 180 °C (350 °F) and extend the bake by a few minutes. For a crunchier crust, finish the last 2 minutes under the broiler, watching closely.
🍽️ Presentation & Service
To make the buns look restaurant‑ready, dust them lightly with powdered sugar just before serving. Arrange them on a wooden board with a few fresh sprigs of rosemary for visual contrast. For an indulgent twist, serve them with a side of clotted cream or a dollop of orange marmalade.
🏆 Pro‑Level Secrets
Elevate your Hot Cross Buns from home‑cooked comfort to bakery‑standard brilliance.
- 🎯 Use a Preferment (Biga): Mixing a small portion of the flour, water, and yeast the night before creates a biga that deepens flavor, improves texture, and gives a subtle tang that balances the sweetness.
- 🎯 Control Fermentation Temperature: Ideal dough temperature is around 24 °C (75 °F). If your kitchen is warmer, shorten the proofing time; if cooler, extend it. Consistent temperature yields consistent rise.
- 🎯 Steam the Oven: Place a shallow pan of boiling water on the lower rack during the first 10 minutes of baking. Steam delays crust formation, allowing the buns to expand fully and develop a glossy finish.
- 🎯 Add a Touch of Orange Zest: Grating a teaspoon of fresh orange zest into the dough adds a bright citrus note that complements the spices and raisins.
- 🎯 Finish with a Light Sugar Glaze: Brush a mixture of 2 tbsp powdered sugar dissolved in 1 tbsp milk onto the buns while they’re still warm for a delicate sheen and extra sweetness.
- 🎯 Store with a Damp Cloth: When keeping buns for a day, place them in a sealed container with a slightly damp clean kitchen towel on top. This prevents them from drying out while retaining the crust’s softness.
“Good bread is the foundation of great meals; a well‑made hot cross bun is a celebration of both tradition and technique.” — Mary Berry
🔄 Variations & Adaptations
The classic Hot Cross Bun is a versatile canvas. Below are several ways to adapt the recipe to suit dietary preferences, flavor cravings, and seasonal inspirations.
🥬 Vegetarian / Vegan Version
Replace the egg with a flaxseed “egg” (1 tbsp ground flaxseed mixed with 3 tbsp water, set for 5 minutes) and use plant‑based milk such as oat or soy. Swap butter for a neutral oil or vegan butter. The result is a soft, dairy‑free bun that retains the classic texture.
- Flaxseed egg: 1 tbsp ground flaxseed + 3 tbsp water.
- Vegan butter: 50 g, melted, same as dairy butter.
🌶️ Flavor Variations
Experiment with different mix‑ins and spices to create unique flavor profiles that match your palate or the season.
Spicy Version
Add ½ tsp cayenne pepper to the dry mix and substitute half the raisins with dried cranberries for a sweet‑spicy contrast.
Mediterranean Version
Incorporate ¼ cup chopped sun‑dried tomatoes, 2 tbsp crumbled feta, and a pinch of oregano. The cross can be made with olive‑oil‑based dough for a richer, savory twist.
Asian‑Inspired Version
Replace raisins with ¼ cup toasted sesame seeds and add 1 tsp ground cardamom. Finish the buns with a glaze of honey mixed with a splash of soy sauce for a sweet‑savory glaze.
⚠️ Dietary Adaptations
Gluten‑Free
Use a 1‑to‑1 gluten‑free flour blend that contains xanthan gum. Increase the liquid slightly (by about 20 ml) to compensate for the lower absorption of gluten‑free flours.
Lactose‑Free
Substitute whole milk with lactose‑free milk or almond milk, and use a dairy‑free butter alternative. The flavor remains rich, and the texture stays tender.
Low‑Calorie
Reduce sugar to 30 g, replace half the butter with unsweetened applesauce, and use whole wheat flour for added fiber. These adjustments cut calories while preserving the bun’s moisture.
👶 Kid‑Friendly Version
For picky eaters, omit the spices and use a milder sweetener like honey. Add a handful of mini chocolate chips instead of raisins for a fun, kid‑approved twist. Serve with a side of strawberry jam for extra excitement.
📦 Storage & Reheating
🧊 Conservation
Refrigerator
- Duration: 4‑5 days
- Container: Airtight plastic container or zip‑lock bag
- Tip: Place a paper towel at the bottom to absorb excess moisture.
Freezer
- Duration: 2‑3 months
- Method: Freeze individually on a tray, then transfer to a freezer‑safe bag.
- Defrost: Thaw overnight in the refrigerator or gently warm in a 150 °C oven for 10 minutes.
💡 For best flavor, reheat before serving rather than eating straight from the freezer.
♨️ Reheating
🔥 Oven (Recommended)
- Preheat to 160 °C (325 °F).
- Wrap each bun loosely in aluminum foil to keep moisture.
- Heat for 8‑10 minutes, then remove foil for the last 2 minutes to crisp the top.
⚡ Microwave (Quick)
- Place bun on a microwave‑safe plate, cover with a damp paper towel.
- Heat on medium power for 30‑45 seconds.
- Check and add another 10‑seconds if needed; avoid over‑cooking.
🍳 Stovetop
Slice the bun in half, butter the cut sides, and warm in a non‑stick skillet over low heat for 2‑3 minutes, pressing gently to toast the interior.
🍷 Perfect Pairings
🥗 Side Dishes
- Light Arugula Salad: Peppery arugula tossed with lemon vinaigrette balances the sweet bun.
- Soft Boiled Eggs: Creamy yolk adds richness, making a delightful breakfast combo.
- Cheese Platter: Mild cheddar or creamy brie pairs well with the spiced flavor.
🍷 Wine & Beverage Pairings
- Dry Riesling: Its crisp acidity cuts through the sweetness and highlights the spices.
- English Cider: A slightly sweet, effervescent cider mirrors the traditional Easter vibe.
- Non‑Alcoholic: Warm spiced chai or a hibiscus iced tea provides a refreshing contrast.
🍰 Complementary Courses
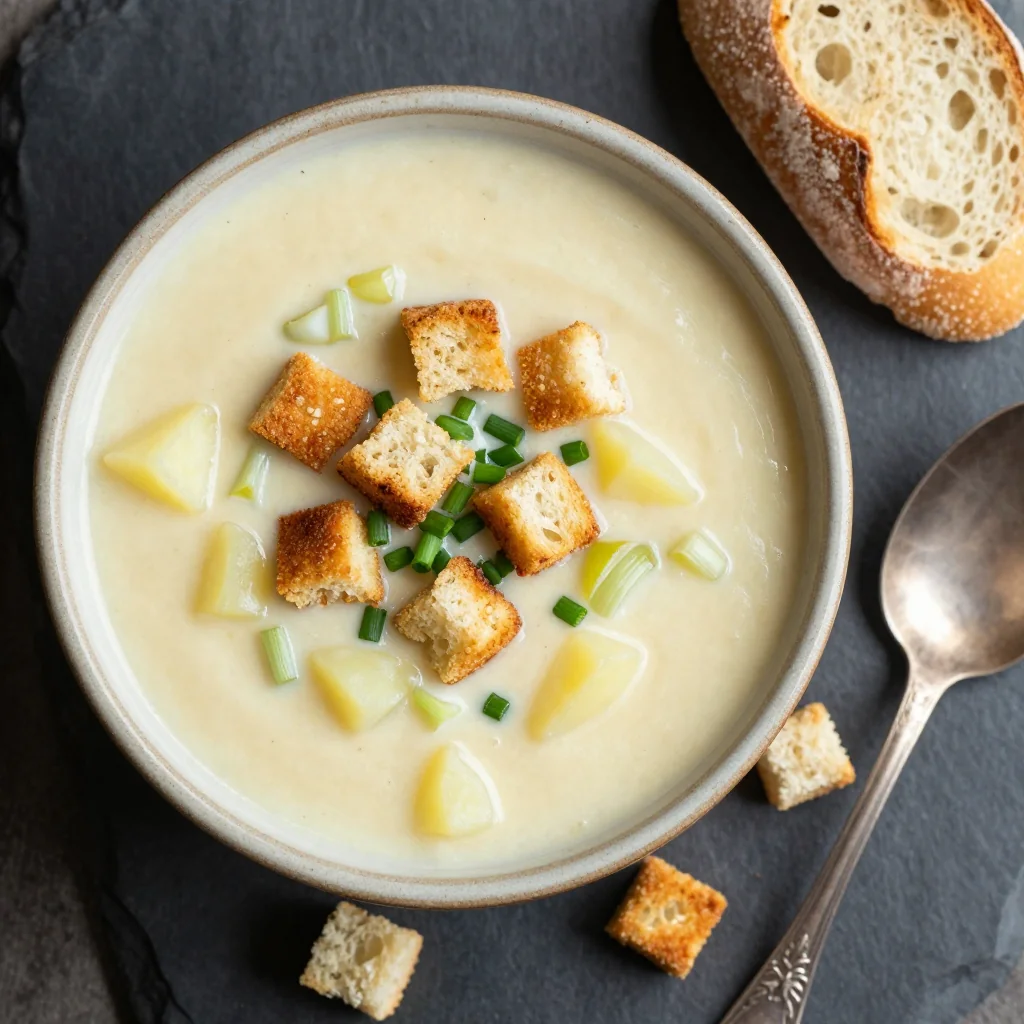
Begin with a light citrus soup or a fresh fruit salad to awaken the palate. Follow the buns with a simple vanilla custard or a lemon tart for a bright finish. The combination of sweet, tangy, and creamy ensures a well‑rounded meal.
❓ Frequently Asked Questions
Q: Can I use dried fruit other than raisins?
Absolutely! Dried cranberries, chopped dried apricots, or even candied orange peel work wonderfully. Adjust the quantity to 150 g, and consider balancing extra tartness with a touch more sugar if needed.
Q: How do I know when the dough has risen enough?
Perform the “finger‑poke test”: gently press a fingertip into the dough; if the indentation slowly springs back and remains shallow, the dough is ready. If it fills back instantly, give it more time. Temperature and humidity affect timing, so trust your senses.
Q: My buns are dense and not fluffy. What went wrong?
Possible causes include dead yeast, water that’s too hot (killing the yeast), or insufficient kneading. Ensure the water is warm, not hot, and that the yeast foams during activation. Also, allow the dough enough time to rise; a rushed proof leads to a compact crumb.
Q: Can I freeze the dough before shaping?
Yes. After the first rise, punch down the dough, divide into portions, wrap each tightly in plastic wrap, and freeze. When ready, thaw overnight in the refrigerator, then let it come to room temperature before shaping and proceeding with the second rise.
Q: How can I make the cross more decorative?
Use a piping bag with a fine tip to draw intricate lattice patterns instead of a simple “+”. You can also dust the paste with a little powdered sugar before baking for a subtle sparkle.
Q: Is it possible to make these buns gluten‑free?
Yes. Substitute the bread flour with a gluten‑free blend that includes xanthan gum. Add an extra tablespoon of psyllium husk powder to improve elasticity. The texture will be slightly different but still delicious.
🎉 Let’s Get Baking!
Hot Cross Buns with Raisins are a timeless treat that brings together history, aroma, and comfort in a single bite. By following this detailed guide, you’ll master the art of a perfect rise, a glossy cross, and a tender crumb that keeps you reaching for more. Whether you’re preparing them for an Easter celebration or simply craving a warm, spiced breakfast, these buns will become a staple in your culinary repertoire.
I encourage you to experiment with the variations, share your results, and let the aromas fill your home. Remember, the joy of baking lies not only in the final product but also in the process of creating something with love and patience.
Did you try this recipe?
Leave a comment and rating below! Share your photos on Instagram with #HotCrossBunsJoy for a chance to be featured.
Hot Cross Buns with Raisins
Soft, spiced buns studded with sweet raisins and topped with a classic cross.
📝 Ingredients
Dough
Glaze (Cross & Shine)
👨🍳 Instructions
- 1 Activate yeast in warm water with a pinch of sugar; let foam.
- 2 Whisk flour, sugar, salt, cinnamon, and nutmeg together.
- 3 Combine milk, melted butter, beaten egg, and the foamed yeast.
- 4 Mix wet into dry ingredients, knead until smooth and elastic.
- 5 Fold in raisins gently; let the dough rise until doubled.
- 6 Punch down, divide into eight balls, and let rise again.
- 7 Pipe a simple cross on each bun using a flour‑milk paste.
- 8 Brush buns with beaten egg for shine.
- 9 Bake at 190 °C for 20‑22 minutes until golden.
- 10 Cool, optional glaze, and serve warm.
🥗 Nutritional Information (per serving)
*Values are approximate and based on standard ingredients.
📚 You Might Also Like
Cranberry Orange Scones
Soft Gingerbread Cookies
Lemon Poppyseed Muffins


💬 Comments & Reviews
LLeave a Comment
No comments yet. Be the first to share your thoughts!