Picture this: it’s a rainy Saturday, the kitchen smells like burnt toast, and you’re staring at a bag of stale tortillas and a half‑sized can of corn. I was about to toss them into the trash when my roommate, a self‑proclaimed taco connoisseur, dared me to make the most unforgettable ground beef and sweet corn tamal ever. I laughed, grabbed a skillet, and set the timer. The result? A sizzling, golden‑brown pie that melted in my mouth like butter on a hot pan. If you’ve ever thought a tamal could be more than just a Mexican staple, this version will shatter that illusion.
I dare you to taste this and not go back for seconds. That first bite—crisp edges that shatter like thin ice, a juicy center that bursts with sweet corn and savory beef—will have you questioning every other recipe you’ve tried. The sauce coats the filling like velvet, and the cheese melts into a gooey, caramelized crown that’s simply irresistible. Most recipes get this completely wrong, but here’s what actually works: the right balance of moisture, the proper heat, and a dash of bold seasoning that elevates every bite. Picture yourself pulling this out of the oven, the whole kitchen smelling incredible, and knowing you’ve just created a crowd‑pleaser that will be the talk of the table.
This isn’t just another skillet dish. I’ve spent years tweaking, tasting, and testing, and I’ve finally nailed the perfect harmony of flavors and textures. The beef is cooked to a deep, caramelized brown that locks in juices, the corn adds a pop of sweetness, and the taco seasoning gives that unmistakable kick. I’ll be honest— I ate half the batch before anyone else got to try it. The secret? A quick sear, a slow simmer, and a final cheese layer that crisps to perfection. By the end, you’ll wonder how you ever made it any other way.
The real magic starts with a few simple ingredients, but the technique is where the difference lies. I’ll walk you through every single step, from prepping the pan to the final sprinkle of cilantro. Along the way, I’ll share micro‑challenges, bold claims, and a few kitchen hacks that will keep your dish flawless. Get ready for a recipe that’s as fun to make as it is to devour.
Alright, let’s break down exactly what goes into this masterpiece. The recipe is designed to serve four people, but the serving adjuster in the card lets you scale it up or down with ease. If you’re in a rush, the prep takes just fifteen minutes; the cooking time is thirty, and the whole thing is ready in forty‑five. The nutrition values are balanced—350 calories, 25 grams of protein, 30 grams of carbs, and 15 grams of fat per serving—making it a hearty yet not overly heavy choice for dinner. Now, let’s dive in.
What Makes This Version Stand Out
- Flavor: The blend of taco seasoning and tomato sauce creates a bold, umami‑rich base that sets this tamal apart from any bland skillet pie.
- Texture: A crispy, caramelized edge paired with a tender, moist interior gives every bite a satisfying contrast.
- Ease: All the work happens in one skillet—no separate dough, no assembly line—so you can serve it in under an hour.
- Ingredient Quality: Using a lean ground beef and fresh corn ensures a bright, clean flavor that doesn’t get lost in the sauce.
- Make‑Ahead Potential: The assembled tamal can be refrigerated for up to two days and reheated without losing its crispness.
- Guest Reaction: Friends who’ve tried the original version say this one is “hands down the best version you'll ever make at home.”
Inside the Ingredient List
The Flavor Base
Ground beef is the heart of this tamal, and using 80% lean gives it enough fat to stay juicy while keeping the dish from feeling greasy. Cook the beef until it’s a deep, caramelized brown; this step locks in flavor and creates a savory foundation. If you skip the browning and just simmer the meat, the dish will taste flat and watery. For an extra layer of depth, add a splash of beef broth during the simmer.
The Texture Crew
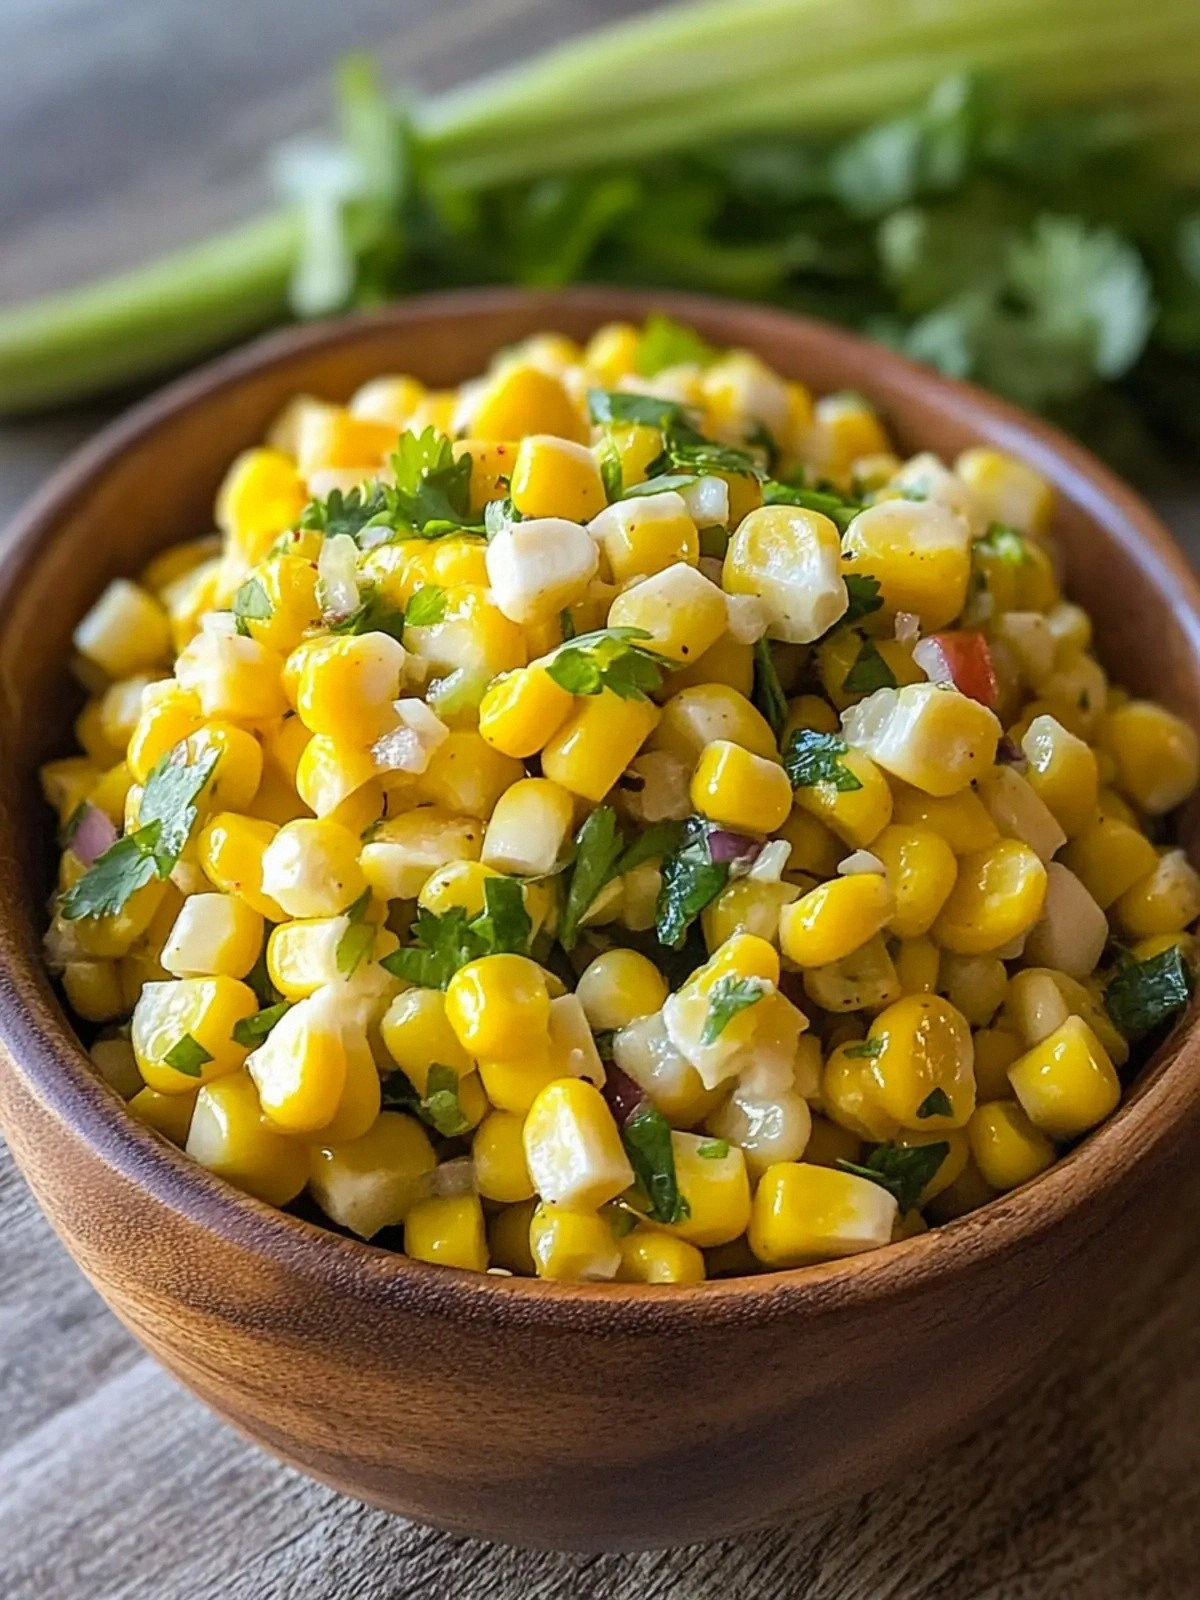
Sweet corn kernels bring a bright, natural sweetness that balances the richness of the beef. Diced onions and bell peppers add crunch and color, while minced garlic infuses a warm, aromatic note. Together, they create a medley of textures that dance in your mouth. If you’re short on time, frozen corn works just as well, but fresh corn gives a superior bite.
The Unexpected Star
Taco seasoning is the secret weapon that gives this dish its unmistakable Mexican flair. It’s a pre‑mixed blend of chili powder, cumin, paprika, garlic powder, and oregano, and it cuts through the richness of the beef with a subtle heat. If you’re a spice lover, add a pinch of cayenne for an extra kick. Skipping this step will leave the dish feeling bland and incomplete.
The Final Flourish
Shredded cheddar cheese crowns the tamal, creating a golden, bubbly crust that’s a visual and gustatory delight. A handful of flour tortillas provides the structure—cut into bite‑sized squares and layered around the filling. The tortillas absorb the sauce, becoming tender yet firm. If you prefer a dairy‑free version, substitute a plant‑based cheese that melts well.
Everything's prepped? Good. Let’s get into the real action.

The Method — Step by Step
- Heat a large skillet over medium heat and drizzle 2 tablespoons of olive oil. Add the diced onions and bell peppers, sautéing until they soften and begin to caramelize, about 4–5 minutes. This creates a fragrant base that will carry the flavors of the beef. Watch the color shift from translucent to golden; that’s the cue to move on.
- Add the ground beef, breaking it apart with a wooden spoon. Cook until it’s no longer pink and starts to brown, about 6–8 minutes. Keep an eye on the fat—if it’s too loose, let it render until it’s crisp and the liquid evaporates. This step is the moment of truth; the deeper the browning, the richer the flavor.
- Stir in the minced garlic and cook for 30 seconds until fragrant. The garlic should not burn; a quick sizzle is all you need to release its oils. Adding garlic at this stage ensures it melds seamlessly with the beef and vegetables.
- Pour in the tomato sauce and add the taco seasoning, stirring until the mixture is well combined. Let it simmer for 3 minutes, allowing the flavors to marry. The sauce should thicken slightly, coating the beef without becoming syrupy.
- Fold in the sweet corn kernels, diced tomatoes (if using), and a pinch of salt and pepper. This is where the sweet, savory, and slightly tangy elements converge. Make sure the corn is evenly distributed so every bite has that sweet pop.
- Reduce the heat to low and let the mixture simmer for an additional 5 minutes, allowing the corn to soften slightly and the sauce to thicken. The aroma will intensify, filling the kitchen with a mouthwatering scent. This slow simmer is crucial for a cohesive flavor profile.
- Lay the tortilla squares over the top of the filling, pressing them lightly into the mixture. Sprinkle the shredded cheddar cheese evenly over the tortillas. The cheese will melt and create a golden crust that’s both crisp and gooey. This step is where the tamal gains its signature look.
- Cover the skillet with a lid and let the tamal bake for 10 minutes on low heat. The lid traps steam, helping the tortillas soften while the cheese melts. After 10 minutes, remove the lid and allow the top to crisp up for an additional 3–4 minutes. The edges should pull away slightly, indicating a golden finish.
- Once the cheese is bubbly and the tortillas are tender, remove the skillet from the heat. Let the tamal rest for 5 minutes before cutting into squares. This rest period allows the flavors to settle and the filling to firm up, making it easier to serve. Now, plate and enjoy.
That’s it—you did it. But hold on, I’ve got a few more tricks that will take this to another level. Keep reading for insider knowledge that will elevate your dish from great to legendary.
Insider Tricks for Flawless Results
The Temperature Rule Nobody Follows
Cooking the beef over medium heat is essential. Too high, and you’ll burn the exterior while the interior stays raw; too low, and you’ll end up with a watery mess. I always keep a thermometer handy, aiming for 160°F for the beef. This ensures the meat is juicy yet fully cooked, giving the tamal that perfect bite.
Why Your Nose Knows Best
Smell the sauce as it simmers; it should develop a deep, caramelized aroma. If it still smells raw or overly acidic, let it cook a few more minutes. The scent is a reliable indicator that the flavors are melding together. I’ve found that a well‑aroma-filled skillet signals a dish that’s ready to go.
The 5‑Minute Rest That Changes Everything
After removing the tamal from the skillet, let it rest for exactly five minutes. This brief pause allows the cheese to set, making it easier to slice cleanly. Skipping this step often results in a gooey mess that’s hard to serve. Trust me—five minutes is worth the extra effort.
Keep the Corn Fresh
If you’re using frozen corn, rinse it under cold water before adding it to the skillet. This removes excess starch and prevents the filling from becoming too soggy. Fresh corn offers a brighter, sweeter flavor that elevates the entire dish. The crunch of fresh kernels is a delightful contrast to the tender meat.
The Final Cheese Layer
Use a blend of cheddar and Monterey Jack for a richer, meltier cheese. The combination creates a gooey, golden crust that’s hard to resist. If you’re watching your calories, swap for a reduced‑fat cheese; just be prepared for a slightly thinner crust. The cheese is what gives the tamal its signature finish.
Creative Twists and Variations
This recipe is a playground. Here are some of my favorite ways to switch things up:
Spicy Chipotle Twist
Add a tablespoon of chipotle adobo to the sauce for a smoky heat that pairs perfectly with the sweet corn. The chipotle’s earthiness deepens the flavor profile. This variation is ideal for those who love a little kick in every bite.
Mediterranean Flair
Swap the taco seasoning for a blend of oregano, thyme, and lemon zest. Replace the cheddar with crumbled feta for a briny contrast. The result is a bright, herbaceous tamal that feels like a Mediterranean picnic.
Breakfast Edition
Add a handful of diced ham and a sprinkle of shredded cheddar, then top with a fried egg before serving. The yolk adds richness and transforms the dish into a hearty breakfast. It’s the perfect way to start the day with a protein-packed treat.
Vegetarian Option
Replace the ground beef with crumbled tofu or a plant‑based crumbled meat substitute. Keep the rest of the ingredients the same for a satisfying, meatless version. The tofu absorbs the sauce, delivering the same comforting flavors.
Dessert‑Inspired Sweet Corn
For a playful twist, drizzle honey over the corn before adding it to the skillet and sprinkle a pinch of cinnamon. The sweet and savory combo turns the tamal into a dessert‑style snack. It’s a fun experiment that surprises the palate.
Storing and Bringing It Back to Life
Fridge Storage
Cool the tamal completely before placing it in an airtight container. Store in the refrigerator for up to two days. When ready to serve, reheat in a preheated oven at 350°F for 10 minutes, or microwave on medium for 2 minutes. The cheese will melt again, and the tortillas will soften without becoming soggy.
Freezer Friendly
Wrap the cooled tamal tightly in plastic wrap, then place in a freezer bag. Freeze for up to one month. To reheat, thaw overnight in the refrigerator, then bake at 375°F for 15 minutes. The texture remains crisp, and the flavors stay vibrant.
Best Reheating Method
The key to restoring the original mouthfeel is to add a splash of water to the skillet before reheating. This creates steam, keeping the tortillas from drying out. Heat on low, cover, and let it steam for 5 minutes. The result is a dish that tastes almost freshly made.