Picture this: a Saturday night, a half‑finished pizza on the counter, a stack of empty takeout containers, and a sudden craving for something that feels like a hug in a tortilla. I was staring at my pantry, feeling the familiar dread of “what do I even make?” When the fridge lights flicked on, there it was—ground beef, a bag of tortillas, and a jar of salsa that smelled like summer. I thought, “why not turn this into a meal‑prep masterpiece?” That spark turned a kitchen mishap into the most reliable, freezer‑friendly beef burrito recipe you’ll ever cook.
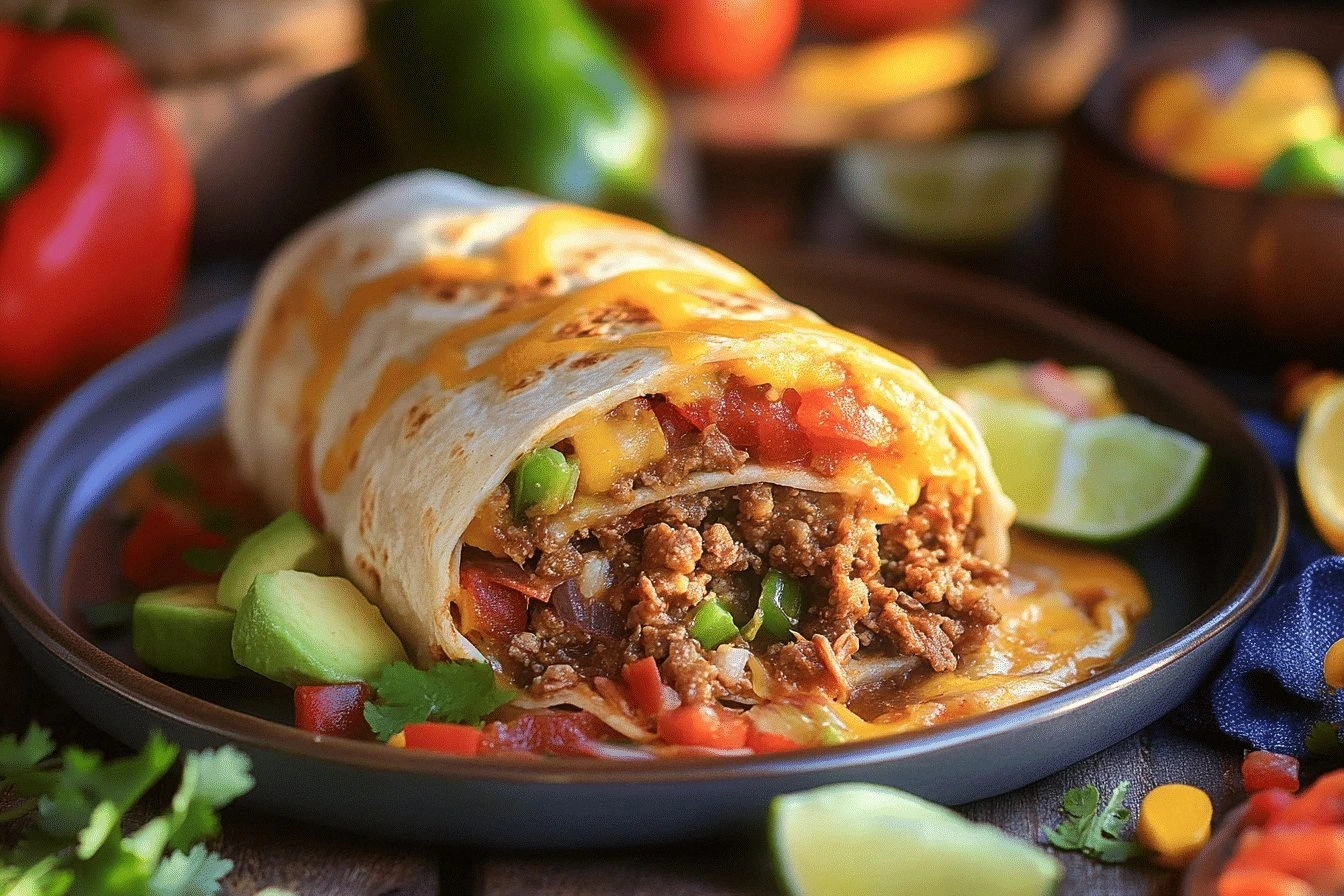
The first bite was a revelation: the beef was perfectly seasoned, the cheese melted into a silky blanket, and the salsa added a bright, tangy splash that cut through the richness. The tortillas wrapped around the filling like a warm blanket, and the edges were crisp enough to bite into without tearing. I dared my friends to taste this and not go back for seconds—most of them admitted they couldn’t resist a second round. I’ll be honest—half the batch vanished before anyone else could even see the plate.
What makes this version stand out? It’s the meticulous layering of flavors, the use of smoked paprika for depth, and the fact that every component can be prepped ahead of time and frozen without losing texture. The beef doesn’t dry out; the salsa stays moist; the cheese stays gooey. I’ve spent years experimenting with different spice blends, and this particular mix of cumin, chili powder, and smoked paprika is a game‑changer that turns an ordinary burrito into a flavor bomb. The result is a dish that tastes fresh, even after freezing, and that’s why I say, “this is hands down the best version you'll ever make at home.”
And the best part? You can make it all at once, portion it into individual servings, and pop them into the freezer for a quick, satisfying meal on busy nights. Picture yourself pulling a burrito out of the freezer, the kitchen filling with the aroma of sizzling beef and melted cheese, and the whole house smelling incredible. If you've ever struggled with meal prep burritos that fall apart or taste stale, you're not alone—this recipe is the fix you’ve been waiting for. Let me walk you through every single step—by the end, you'll wonder how you ever made it any other way.
What Makes This Version Stand Out
- Taste Explosion: The combination of cumin, chili powder, and smoked paprika creates a depth that feels like a smoky campfire, while the salsa adds a bright, fresh contrast. This balance turns each bite into a memorable experience.
- Texture Perfection: The tortillas are thick enough to hold the filling yet thin enough to soften when reheated, preventing a rubbery bite. The cheese melts into a creamy layer that clings to the beef without separating.
- Make‑Ahead Friendly: All components can be prepped and frozen separately, then assembled quickly on the day you eat. No need to cook the filling from scratch each time.
- Ingredient Quality: Using lean ground beef keeps the dish flavorful without excess grease, and the black beans add fiber and protein, making it a balanced meal.
- Crowd‑Pleaser: Whether you’re feeding a family, a group of friends, or a single person, the flavors are robust enough to satisfy everyone, and the portion sizes can be adjusted easily.
- Unique Twist: A splash of tomato sauce in the beef mixture keeps the filling moist and introduces a subtle sweetness that contrasts with the spices.
- Versatile Garnish: Fresh cilantro adds a burst of herbal freshness that can be omitted or substituted with parsley without compromising the dish.
Alright, let's break down exactly what goes into this masterpiece...
Inside the Ingredient List
The Flavor Base
Ground beef is the heart of this burrito. Choose a lean variety to keep the dish hearty yet not overly greasy. If you prefer a richer flavor, a 80/20 mix works, but be sure to drain excess fat before proceeding. A small pinch of salt enhances the meat’s natural umami, while the cumin and chili powder create that unmistakable Mexican warmth.
Onion and garlic are the aromatic foundation. Dice them finely so they release their flavors quickly. If you’re short on time, a tablespoon of onion powder and a clove of minced garlic will do the trick, but fresh pieces give a brighter, more vibrant taste.
The Texture Crew
Large flour tortillas are essential for a sturdy wrap. Their pliability ensures the burritos stay intact when frozen and reheat evenly. If you’re watching carbs, consider using a low‑carb or spinach tortilla as a healthier alternative.
Cheddar cheese adds that gooey richness that melts into a silky blanket over the beef. A sharp cheddar melts beautifully, but you can mix in Monterey Jack or pepper jack for a milder or spicier profile. A sprinkle of shredded cheese on top before freezing helps create a crisp edge when baked.
The Unexpected Star
Black beans are more than a side—they bring heartiness, fiber, and a subtle earthy sweetness that balances the spices. Rinse and drain canned beans to reduce sodium, or cook your own for an even fresher taste. If you’re vegan, swap the beef for a plant‑based mince or tempeh.
The Final Flourish
Tomato sauce or salsa keeps the filling moist and adds a bright, tangy note that cuts through the richness of the beef and cheese. Use a chunky salsa for texture or a smooth sauce for a silky finish. A splash of fresh cilantro at the end adds herbal freshness that brightens the dish.
Everything's prepped? Good. Let's get into the real action...
The Method — Step by Step
- Heat a large skillet over medium‑high heat. Add the ground beef, breaking it apart with a wooden spoon. Cook until it starts to brown, about 5 minutes. This is the moment of truth—watch for that savory aroma that signals the meat is ready.
- Add the diced onion and minced garlic to the pan. Stir and let the mixture sizzle for 2 minutes, until the onion turns translucent. The garlic should release a fragrant, almost sweet scent that makes your kitchen feel alive.
- Sprinkle in 1 tablespoon of cumin, 1 tablespoon of chili powder, and 1 teaspoon of smoked paprika. Stir to coat the meat evenly. The spices should toast slightly, releasing their oils and deepening their flavor.
- Pour in 1 cup of tomato sauce or your favorite salsa. Reduce the heat to medium and let the mixture simmer for 10 minutes. The sauce should thicken into a velvety coating that clings to the beef.
- Add the rinsed black beans and diced bell peppers. Cook for another 5 minutes, allowing the peppers to soften but still retain a slight crunch. The beans soak up the spices, creating a harmonious blend.
- Taste the filling and season with salt and pepper. If you like a little heat, sprinkle a pinch of cayenne or add a dash of hot sauce. The filling should be moist, flavorful, and ready to wrap.
- Lay a tortilla flat on a clean surface. Spoon about 1/2 cup of the beef mixture onto the center, leaving room at the edges. Sprinkle 1/4 cup of shredded cheddar on top. Fold the sides over the filling, then roll tightly from the bottom, ensuring the seam is sealed.
- Place each rolled burrito seam‑side down on a parchment‑lined tray. If you’re prepping for the freezer, arrange them in a single layer and freeze for 2 hours until solid. Once set, transfer to a freezer bag or airtight container. Label with the date and number of servings.
That's it — you did it. But hold on, I've got a few more tricks that'll take this to another level...
Insider Tricks for Flawless Results
The Temperature Rule Nobody Follows
Many people think any freezer temperature works, but setting your freezer at 0°F ensures the burritos freeze quickly, preserving texture and flavor. Quick freezing prevents ice crystals from forming, which can otherwise make the tortillas soggy. If your freezer is a bit warmer, place the tray on the bottom rack to maximize cold exposure.
Why Your Nose Knows Best
When reheating, let the burritos sit at room temperature for 10 minutes before microwaving. This allows the heat to distribute evenly, preventing the cheese from scorching while the inside remains undercooked. A quick sniff test after the first minute can tell you if it’s done.
The 5‑Minute Rest That Changes Everything
After microwaving, let the burrito rest for 5 minutes. This small pause lets the steam redistribute, ensuring the filling is uniformly hot. I once rushed a burrito and it was still cold in the center—resting saved the day.
The Sauce Secret
Adding a tablespoon of tomato paste to the sauce thickens it and deepens the flavor. It also helps the filling stay moist during freezing. If you prefer a tangier bite, swap the paste for a splash of lime juice before sealing.
The Wrap‑It‑Right Technique
Use a small amount of water or beaten egg on the tortilla edges before rolling. This seals the seam and keeps the filling from leaking when you lift the burrito. A clean, tight seal is the difference between a mess and a masterpiece.
Creative Twists and Variations
This recipe is a playground. Here are some of my favorite ways to switch things up:
Chipotle Kick
Swap the regular salsa for chipotle‑in‑adobo salsa. The smoky heat adds a new dimension, perfect for those who love a little fire. Pair with a dollop of sour cream to balance the heat.
Greek‑Inspired
Replace the cheddar with crumbled feta and add chopped kalamata olives. The briny flavors give a Mediterranean twist that pairs well with a cucumber yogurt sauce. This version is great for a quick lunch.
Breakfast Burrito
Add a scrambled egg to the filling and sprinkle with shredded mozzarella. Serve with a side of salsa verde and a squeeze of lime for a hearty morning meal that still feels like a treat.
Vegan Version
Use a plant‑based ground substitute and omit the cheese. Replace the cheddar with a vegan cheese or a sprinkle of nutritional yeast for a cheesy flavor. The result is a completely plant‑based, freezer‑friendly burrito.
Sweet‑And‑Spicy
Add a handful of diced mango or pineapple to the filling for a tropical sweetness that balances the spices. The fruit’s juiciness keeps the burrito moist and adds a surprising burst of flavor.
Storing and Bringing It Back to Life
Fridge Storage
Store cooked, unwrapped burritos in the refrigerator for up to 3 days. Wrap them tightly in foil or place them in an airtight container to prevent drying out. Reheat in the microwave for 2 minutes or until heated through.
Freezer Friendly
Freeze individually wrapped burritos for up to 3 months. Keep them in a single layer on a tray before transferring to a freezer bag. This prevents sticking and makes portioning easy.
Best Reheating Method
For the best texture, thaw the burrito in the refrigerator overnight, then bake at 350°F for 15 minutes, or microwave on high for 3 minutes. Add a tiny splash of water before reheating; it steams back to perfection and keeps the filling moist.