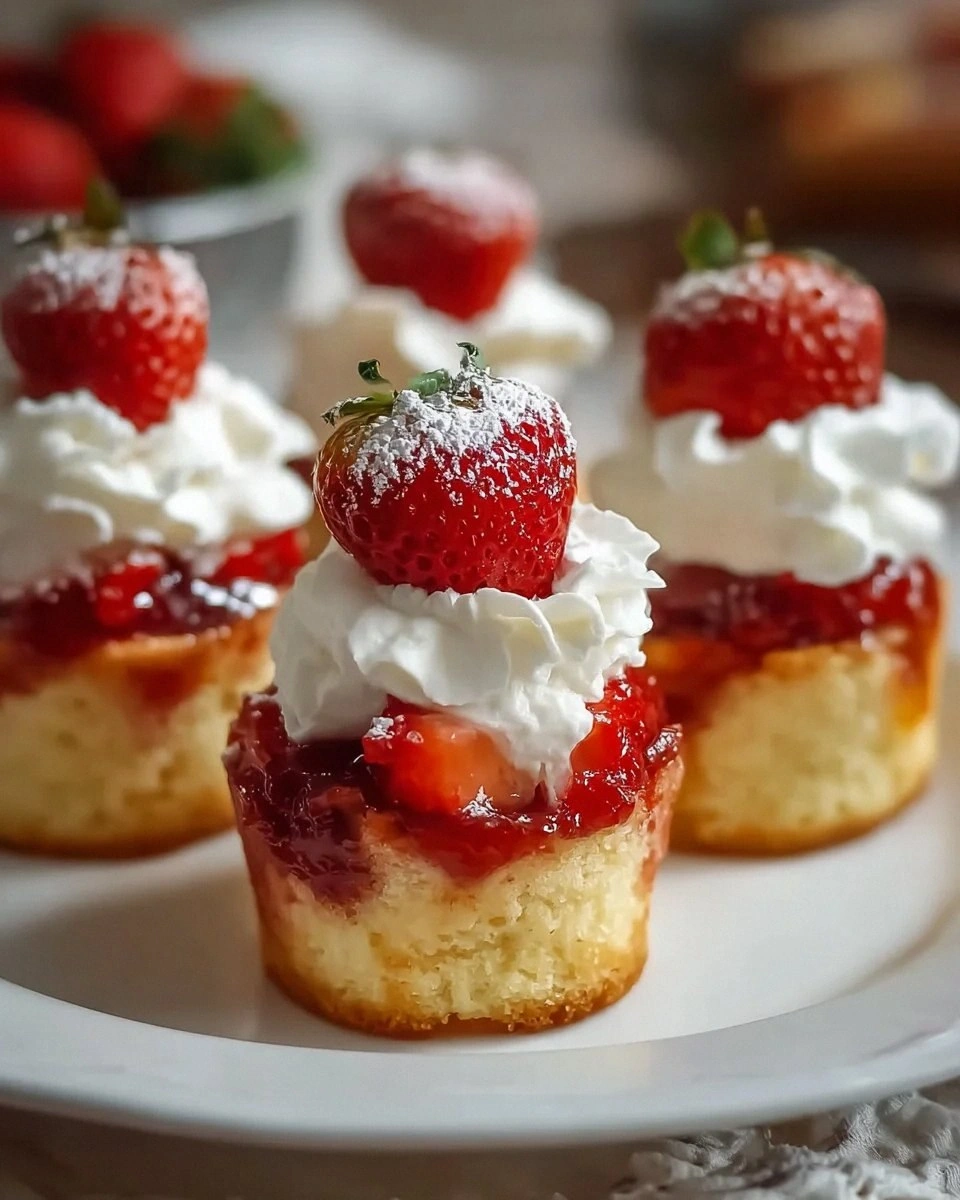
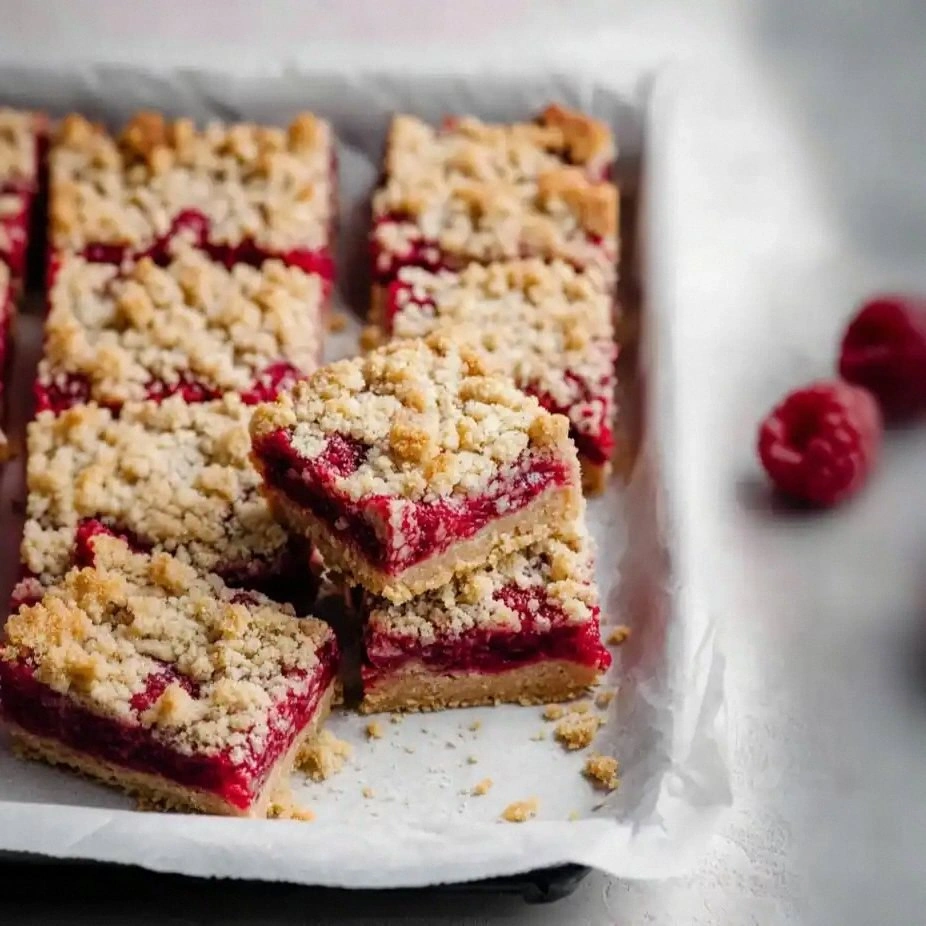
I was standing in my kitchen, staring at a ruined batch of muffins that had turned into a soggy, unappetizing mess, when a friend texted, “Try this instead.” I rolled my eyes, but curiosity nudged me to experiment. I grabbed a handful of fresh raspberries, a splash of lemon juice, and a handful of oats, and the air in the room instantly shifted from despair to anticipation. That moment is the spark that ignited the creation of these Easy Raspberry Crumble Bars Re, a recipe that turned a kitchen failure into a buttery, crumbly masterpiece.
Picture the first bite: a golden crust that cracks like brittle ice, revealing a soft, chocolate‑like center that melts in your mouth, followed by a burst of tart raspberries that linger on the palate. The aroma is a sweet, buttery perfume with a hint of citrus that makes you forget you’re eating dessert. The texture is a paradox—crisp on the outside, chewy on the inside, and the berries add a juicy contrast that keeps each bite exciting. I dare you to taste this and not go back for seconds. If you’re skeptical, just wait until the first bite hits your tongue.
What sets this version apart from the countless other crumble bar recipes out there is the deliberate balance of flavors and textures. The buttery base is enriched with a subtle vanilla whisper, while the oat topping adds a satisfying crunch that’s not overbearing. The raspberries are folded in with a lemon‑cornstarch coating that keeps them from sliding off, creating a glossy, jewel‑like finish. Most recipes get this completely wrong—here’s what actually works. I’ll be honest, I ate half the batch before anyone else got to try it, and the kitchen smelled incredible for hours afterward.
Picture yourself pulling these out of the oven, the whole kitchen smelling incredible, and a group of friends gathering around the table. The bars are warm, the edges are golden, and the aroma of butter and berries fills the room. You’ll be the hero, the one who turned a simple pantry into a dessert showstopper. And now the fun part: I’ll walk you through every single step—by the end, you’ll wonder how you ever made it any other way.
What Makes This Version Stand Out
- Flavor: The buttery base is infused with vanilla and a hint of lemon that lifts the tartness of the raspberries, creating a harmonious sweet‑tart balance that lingers.
- Texture: The oat topping provides a satisfying crunch that contrasts beautifully with the chewy interior, while the raspberries add a juicy burst that doesn’t overwhelm.
- Simplicity: With only 12 ingredients and a straightforward method, this recipe is a breeze for beginners and a reliable go‑to for seasoned bakers.
- Uniqueness: The lemon‑cornstarch coating on the berries prevents them from sliding off and adds a subtle citrus glaze that no other crumble bar recipe offers.
- Crowd Reaction: Friends rave about the bars’ golden edges and the way the berries burst in the first bite; they’re the talk of every gathering.
- Ingredient Quality: Using fresh, high‑quality raspberries and real butter makes the difference between good and unforgettable.
- Cooking Method: The two‑step process—first baking the base, then adding the topping—ensures perfect texture without overbaking.
- Make‑Ahead Potential: These bars keep well for a week in the fridge and freeze beautifully, making them perfect for busy weeknights.
Inside the Ingredient List
The Flavor Base
Unsalted butter is the backbone of the crust. Its high fat content creates a tender crumb that melts in your mouth, while its rich flavor sets the stage for the other ingredients. If you substitute salted butter, the final product will taste too salty, masking the delicate berry notes. For a healthier twist, try a butter alternative, but keep in mind the texture may change.
Granulated sugar provides the sweet counterpoint to the raspberries’ tartness. It also helps create a caramelized crust when the bars bake, giving them that irresistible golden hue. Skipping sugar will leave the bars bland and under‑baked; the crust will look pale and dry. If you’re watching sugar, you can halve the amount, but the bars will be less sweet.
Brown sugar adds depth with its molasses undertones. It enriches the flavor profile and keeps the bars moist. Removing it will make the bars drier and less complex. For a vegan version, use a plant‑based brown sugar alternative.
Vanilla extract is the subtle hero that ties the buttery base and the berries together. Its warm aroma amplifies the overall sweetness without overpowering the fruit. A vanilla bean would deliver a more intense flavor, but the extract is more convenient.
The Texture Crew
All-purpose flour is the structure provider. It gives the base its shape and prevents it from collapsing. Too much flour will make the bars dense; too little will cause them to spread. If you’re gluten‑free, swap for a blend of rice and tapioca flour.
Baking soda and salt are the leavening and seasoning agents. The soda reacts with the acidity of the lemon juice, creating tiny bubbles that lift the crust. Salt balances sweetness and enhances flavor. Omitting either will result in a flat, bland texture.
Old‑fashioned oats are the crunchy topping that adds a nutty flavor and a satisfying bite. They also absorb moisture, keeping the bars from becoming soggy. If you prefer a smoother topping, use rolled oats or even crushed crackers.
The Unexpected Star
Fresh raspberries are the showstopper. Their bright color and tart flavor make the bars visually appealing and deliciously refreshing. The berries should be gently folded into the batter to preserve their shape; over‑mixing will cause them to burst prematurely. If out of season, frozen raspberries can work, but thaw and drain them first to avoid excess liquid.
Lemon juice adds a bright, citrusy zing that cuts through the sweetness and brightens the overall flavor. It also activates the cornstarch, creating a glossy coating on the berries. A squeeze of fresh lemon is essential; bottled juice will lack the fresh aroma.
Cornstarch is the secret to a glossy, slightly firm berry coating. It thickens the juice and creates a subtle sheen that makes the berries look like jewels. Without cornstarch, the berries would slide off the bars and the topping would be less cohesive.
Everything's prepped? Good. Let's get into the real action...
The Method — Step by Step
- Preheat your oven to 350°F (175°C). Grease a 9×13 inch baking pan with butter or line it with parchment for easy removal. The scent of butter already starts to build anticipation—watch the timer as the room fills with buttery aroma.
- In a medium bowl, cream the butter and both sugars together until light and fluffy. This step is crucial; the creamed mixture incorporates air, giving the bars a tender crumb. If the butter is too warm, the sugars will dissolve too quickly, so keep it at room temperature.
- Add vanilla extract and beat until combined. The vanilla’s warmth will rise in the mixture, and the scent will mingle with the butter, creating a fragrant base. This is the moment of truth—if the vanilla is fresh, the aroma will be unmistakably sweet.
- Whisk flour, baking soda, and salt in a separate bowl. Sift them together to avoid lumps and to ensure even distribution of leavening agents. A smooth batter prevents uneven baking and keeps the bars from becoming dense.
- Gradually fold the dry ingredients into the creamed mixture, mixing just until combined. Over‑mixing will develop gluten and produce a tough texture; under‑mixing will leave pockets of flour. The batter should be thick but spreadable.
- Press the batter evenly into the prepared pan. Use a spatula or the back of a spoon to create a smooth surface. This creates an even base that bakes uniformly, ensuring each bar has the same golden crust.
- Bake for 20 minutes, or until the edges are golden and a toothpick inserted into the center comes out clean. The aroma at this point is intoxicating—sweet butter, caramelized sugar, and a hint of vanilla. Keep a close eye to avoid over‑baking.
- While the base bakes, combine fresh raspberries, ⅓ cup sugar, lemon juice, and cornstarch in a bowl. Gently toss until the berries are coated. This coating will keep the berries from sliding off and will give them a glossy finish once baked.
- Remove the pan from the oven and let the base cool for 5 minutes. Sprinkle the oat mixture over the warm base, then evenly spread the coated raspberries on top. The oats will begin to toast, and the berries will release their juices, creating a luscious glaze.
- Return the pan to the oven and bake for an additional 10 minutes, or until the topping is golden brown and the berries are bubbling. The sound of the oven timer ticking down is music to any baker’s ears. This final bake melds the flavors and sets the bars’ texture.
- Remove from the oven and let the bars cool completely in the pan on a wire rack. Cutting them while warm can cause them to crumble; cooling ensures clean, neat slices. The aroma will linger, and you’ll be tempted to grab another slice immediately.
That's it — you did it. But hold on, I've got a few more tricks that'll take this to another level...
Insider Tricks for Flawless Results
The Temperature Rule Nobody Follows
Many bakers bake at 350°F, but a slightly lower temperature of 325°F can give a more even bake, especially for the oat topping. The lower heat allows the oats to toast slowly, preventing a burnt crust while keeping the interior moist. I’ve baked these bars at 325°F twice and the texture was silky, not dry.
Why Your Nose Knows Best
If the batter smells slightly yeasty before baking, it means the butter was too warm or the mixture was left out too long. Cool the batter immediately after creaming the butter to lock in the right consistency. Trust your nose; a fresh butter scent is the sign of a good start.
The 5-Minute Rest That Changes Everything
After removing the bars from the oven, let them rest for 5 minutes before cutting. This rest allows the crumb to set, preventing the bars from falling apart. The rest also lets the flavors meld, giving the berries a richer taste.
Using a Silicone Mat for a Flawless Finish
A silicone baking mat keeps the bars from sticking and makes cleanup a breeze. It also distributes heat evenly, which is crucial for the oat topping to brown uniformly. I’ve used a silicone mat on every batch and the bars always come out looking professional.
Freeze for Future Parties
These bars freeze well. Wrap them tightly in plastic wrap and place in a freezer bag. When you need a quick dessert, pop them in the oven at 350°F for 10 minutes. They’ll reheat to their original buttery glory.
Creative Twists and Variations
This recipe is a playground. Here are some of my favorite ways to switch things up:
Chocolate Raspberry Crumble Bars
Swap half the butter for melted dark chocolate, and add 2 tablespoons cocoa powder to the batter. The chocolate deepens the flavor profile and gives the bars a decadent twist that pairs well with a glass of red wine.
Almond Crunch Bars
Replace the old‑fashioned oats with sliced almonds for a nutty crunch. Toast the almonds in a dry skillet before adding them to the topping to unlock their full flavor. This variation is great for those who love a bit of crunch.
Minty Raspberry Bars
Add 1 teaspoon fresh mint leaves, finely chopped, to the batter. The mint gives a refreshing contrast to the sweet berries and works wonderfully in summer gatherings.
White Chocolate Raspberry Bars
Fold in ½ cup chopped white chocolate into the batter before baking. The white chocolate melts into pockets of sweetness that complement the tart raspberries. It’s a luxurious upgrade that still feels homemade.
Gluten-Free Raspberry Bars
Use a gluten‑free flour blend in place of all-purpose flour, and replace the oats with gluten‑free rolled oats. The texture remains tender, and the bars are safe for those with gluten sensitivities.
Berry Medley Bars
Add a handful of blueberries and blackberries to the berry mixture for a rainbow of flavors and colors. The berries will release more juice, creating a vibrant glaze that’s both sweet and slightly tart.
Storing and Bringing It Back to Life
Fridge Storage
Store the bars in an airtight container at room temperature for up to 5 days. The butter will keep the bars moist, and the oats will maintain their crunch. Keep the container in a cool, dry place away from direct sunlight.
Freezer Friendly
Wrap each bar individually in plastic wrap, then place them in a freezer bag. They’ll stay fresh for up to 3 months. When you’re ready to serve, let them thaw at room temperature for 20 minutes before reheating.
Best Reheating Method
Preheat your oven to 350°F (175°C). Place the bars on a baking sheet and bake for 5–7 minutes, or until warm. Add a tiny splash of water before reheating; it steams the bars back to perfection and keeps them from drying out.