It started with a midnight craving that turned my kitchen into a culinary battlefield. I was standing in front of an empty fridge, staring at a lonely package of cheese curds, when the siren of my neighbor’s game night blared through the walls. “You’re not going to make this at home,” they said, smug as a cat that just discovered a new spot in the sun. I laughed, grabbed my apron, and decided that if I was going to make a snack worthy of a championship, it had to be flawless.
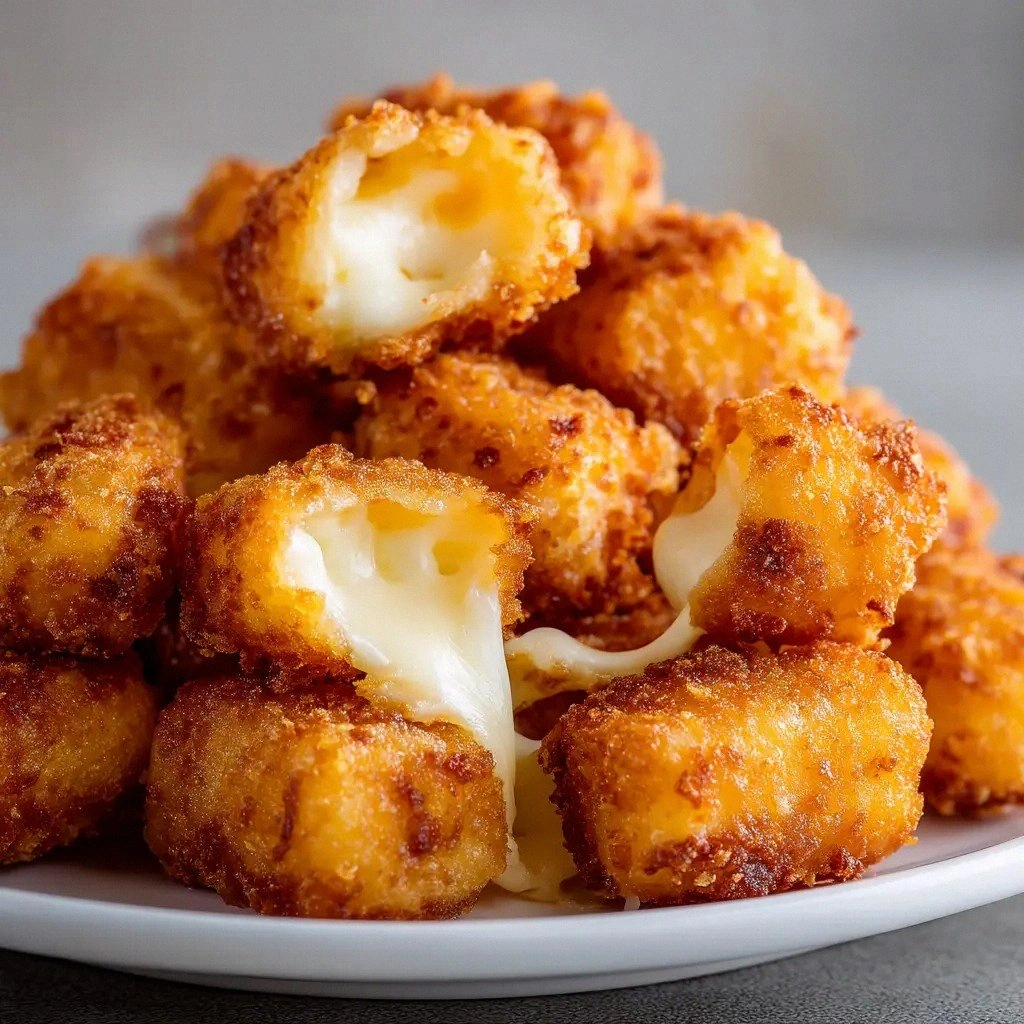
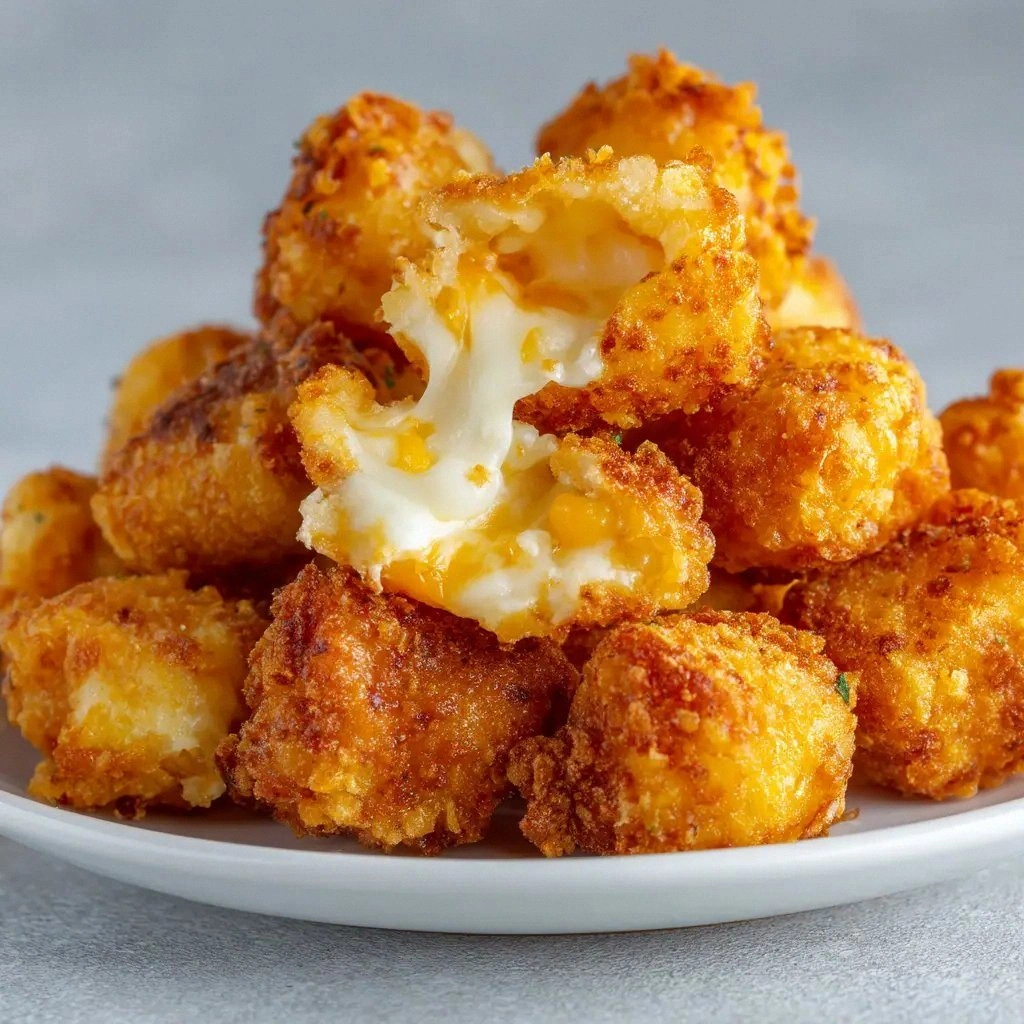
The first thing you notice is the bright, buttery glow that envelopes the curds as they hit the hot oil—an unmistakable sign that the transformation is underway. The scent of frying cheese rises like a warm, comforting blanket, while the sound of sizzling is a rhythmic drumbeat that syncs with the beat of the game. The texture is a paradox: the outside is a crisp, golden shell that cracks like thin ice, while the inside remains molten, oozing a rich, nutty flavor that lingers on the tongue. Every bite is a contrast, a moment of triumph against the ordinary.
I’ve tried countless versions of this dish over the years, but none of them delivered the same level of crunch, flavor, and ease that this recipe offers. The secret lies in a few clever tweaks: a double coating that locks in moisture, a dash of cayenne that gives a subtle kick, and a homemade dipping sauce that feels like a velvet blanket for the palate. These small but mighty changes elevate the humble cheese curd into a snack that feels like it belongs in the Hall of Fame.
If you’re skeptical, I dare you to taste this and not go back for seconds. The first bite will have you questioning every other snack you’ve ever made. The second bite will have you reaching for the bowl again, and the third will make you wonder how you ever lived without it. By the end of this guide, you’ll not only master the technique but also understand why this version is hands down the best you’ll ever make at home.
Picture yourself pulling this out of the oven, the whole kitchen smelling incredible, the timer beeping, and your friends’ eyes widening in anticipation. That moment of triumph is yours to create, and I’m going to walk you through every single step—by the end, you’ll wonder how you ever made it any other way.
What Makes This Version Stand Out
- Taste: The combination of garlic, paprika, and a hint of cayenne creates a flavor profile that’s both savory and subtly spicy. Each bite delivers a burst that lingers, turning ordinary cheese curds into a crowd-pleasing treat.
- Crispiness: Double‑coating the curds in flour and cornstarch before frying locks in moisture while creating an ultra‑crunchy exterior that shatters like thin ice.
- Simplicity: The recipe uses pantry staples—flour, cornstarch, eggs, and oil—making it an effortless go‑to for game day, weeknight, or spontaneous gatherings.
- Unique Twist: The homemade dipping sauce, a blend of mayo, ketchup, and Dijon mustard, offers a creamy, tangy finish that complements the crispy curds perfectly.
- Quick Turnaround: From prep to plate, the entire process takes less than an hour, which is ideal for last‑minute snack requests.
- Make‑Ahead Friendly: You can batch‑cook the curds and reheat them in a hot oven for crispness, saving you time when the game starts.
- Scalability: The recipe scales cleanly for small or large crowds, making it a versatile option for parties of any size.
Alright, let's break down exactly what goes into this masterpiece…
Inside the Ingredient List
The Flavor Base
Garlic powder, paprika, and cayenne pepper are the backbone of this snack’s bold flavor. Garlic powder brings a subtle earthiness that balances the richness of the cheese. Paprika adds a smoky undertone, while cayenne provides a gentle heat that wakes up the palate. If you’re watching sodium, you can reduce the garlic powder by a quarter; the taste will still hold up.
The Texture Crew
Flour and cornstarch are the dynamic duo that creates the signature crunch. Flour provides the structure, while cornstarch adds a light, airy quality that prevents the coating from becoming soggy. A pinch of salt, though not listed, can elevate the overall taste profile. If you prefer a gluten‑free version, swap the all‑purpose flour for a rice or oat flour blend.
The Unexpected Star
Mayonnaise, ketchup, and Dijon mustard might seem like an odd trio, but together they form a creamy, tangy dipping sauce that enhances every bite. The mayo delivers richness, ketchup adds sweetness, and mustard gives a subtle bite that cuts through the cheese’s richness. This sauce can be spiced up with a dash of hot sauce for an extra kick.
The Final Flourish
Vegetable oil is the medium that turns these ingredients into a crispy masterpiece. Use a neutral oil with a high smoke point, such as canola or grapeseed, to avoid any off flavors. The oil volume—four cups—is generous to ensure even frying and a golden finish. If you’re aiming for a lower‑fat version, try a light oil or a small amount of melted butter for flavor.
Everything's prepped? Good. Let's get into the real action…
The Method — Step by Step
- Begin by mixing the flour, cornstarch, garlic powder, paprika, cayenne pepper, and a pinch of salt in a shallow dish. The dry mix should be evenly distributed to avoid clumps. This coating will form the first layer of crunch. Keep the mixture in the fridge while you prepare the cheese.
- In a separate bowl, whisk the egg and milk (or beer) until frothy. The liquid acts as a binder, ensuring the coating adheres to the curds. If you’re using beer, the carbonation adds a subtle lift to the batter. Let the mixture rest for a minute; this helps the proteins set slightly.
- Heat the vegetable oil in a deep skillet or Dutch oven over medium‑high heat. Use a thermometer to check the temperature—aim for 350°F. If the oil is too hot, the coating will burn; too cool, and the curds will absorb oil and become soggy. Once the oil reaches the target, you’ll see a faint swirl appear.
- Dip each cheese curd first into the wet batter, letting excess drip off, then roll it in the dry flour mixture until fully coated. The double coating traps steam and creates a puffed, crunchy shell. Place a few curds in the hot oil and wait for the first crackle; this is the signal that the oil is ready for the rest.
- Carefully lower the remaining curds into the oil in batches, ensuring not to overcrowd the pan. Overcrowding drops the oil temperature, resulting in greasy curds. Fry each batch for 2–3 minutes or until golden brown. Flip once to ensure even cooking. The edges will start pulling away, a sign that they’re crisping up.
- Use a slotted spoon to transfer the fried curds onto a wire rack set over parchment paper. This setup allows excess oil to drain away, keeping the crunch intact. Let them rest for a minute; the steam inside will condense, preventing sogginess.
- While the curds are cooling, whisk together mayonnaise, ketchup, Dijon mustard, and a splash of hot sauce if desired. The sauce should be creamy but pourable. Taste and adjust seasoning—if it’s too thick, add a teaspoon of water or milk.
- Serve the crispy curds hot, paired with the dipping sauce on the side. The contrast between the crunchy shell and the molten center is a sensory delight. Enjoy while the edges are still crisp and the cheese inside is still gooey.
That’s it — you did it. But hold on, I've got a few more tricks that'll take this to another level. The next section is packed with insider tips that will keep your curds crisp, your sauce silky, and your guests raving.
Insider Tricks for Flawless Results
The Temperature Rule Nobody Follows
Oil temperature is the holy grail of crispiness. Too hot, and the coating burns; too cool, and the curds soak up oil. A quick test—drop a small amount of the batter into the oil; it should sizzle immediately and rise to the surface within seconds. If it takes longer, lower the heat; if it bubbles wildly, reduce the heat.
Why Your Nose Knows Best
A subtle aroma of toasted flour and caramelized onions can indicate that the oil has reached the right temperature. If you smell a faint nutty scent, you’re golden. This sensory cue is often more reliable than a thermometer, especially if you’re cooking in a small kitchen.
The 5-Minute Rest That Changes Everything
After frying, let the curds rest on a wire rack for at least five minutes. This allows steam to escape and prevents the crust from becoming soggy. During this brief pause, the cheese inside will continue to melt slightly, creating that perfect gooey center.
Double‑Coating for Double the Crunch
If you’re craving an extra crunch, dip the coated curds back into the wet batter before the second dry coating. This second layer creates a thicker shell that’s even more satisfying. The technique is simple but adds a wow factor that will impress your guests.
Using Beer for a Flavor Twist
Replacing milk with a light, crisp beer in the batter adds subtle malt notes that complement the cheese. The carbonation helps create a lighter batter, which translates to a lighter, airier coating. Just be sure to choose a beer that you enjoy drinking; the flavor will carry through.
Keeping the Sauce Fresh
The dipping sauce can be made ahead and stored in an airtight container for up to 48 hours. Before serving, give it a quick stir and adjust consistency with a splash of milk if it’s thickened. This saves time on game day and ensures the sauce stays vibrant.
Creative Twists and Variations
This recipe is a playground. Here are some of my favorite ways to switch things up:
Spicy Sriracha Drizzle
Swap the ketchup in the sauce for Sriracha and add a splash of lime juice. The heat will complement the cheese, while the lime adds brightness. This version is a hit with those who like a kick in their snacks.
Herb‑Infused Crust
Add chopped fresh rosemary or thyme to the dry coating mix. The herbs infuse the crust with aromatic flavors that elevate the snack. Pair it with a garlic aioli for a gourmet touch.
Vegan Cheese Curds
Use vegan cheese curds made from coconut milk and agar‑agar. Follow the same coating and frying process. The result is a plant‑based version that still delivers that iconic squeaky texture.
Sweet & Salty Bacon Bites
Wrap each coated curd with a half slice of bacon before frying. The bacon crisps up around the cheese, adding a salty, smoky layer. Serve with a drizzle of maple syrup for a sweet twist.
Blue‑Cheese Dipping Sauce
Blend mayonnaise with crumbled blue cheese and a dash of lemon juice. The tangy blue cheese pairs beautifully with the rich curds. This sauce adds a sophisticated flavor profile for special occasions.
Storing and Bringing It Back to Life
Fridge Storage
Cool the fried curds to room temperature, then place them in an airtight container. Store in the fridge for up to 3 days. The coating may soften slightly, so reheat before serving to restore crispness.
Freezer Friendly
Arrange the curds on a parchment‑lined tray and freeze until solid, then transfer to a freezer bag. They stay fresh for up to 2 months. When ready to serve, bake at 425°F for 10 minutes to revive the crunch.
Best Reheating Method
Reheat in a preheated oven at 400°F for 8–10 minutes, or until the edges are crisp again. Add a splash of water to the pan before reheating; the steam will keep the interior from drying out. This technique brings the curds back to their original glory.