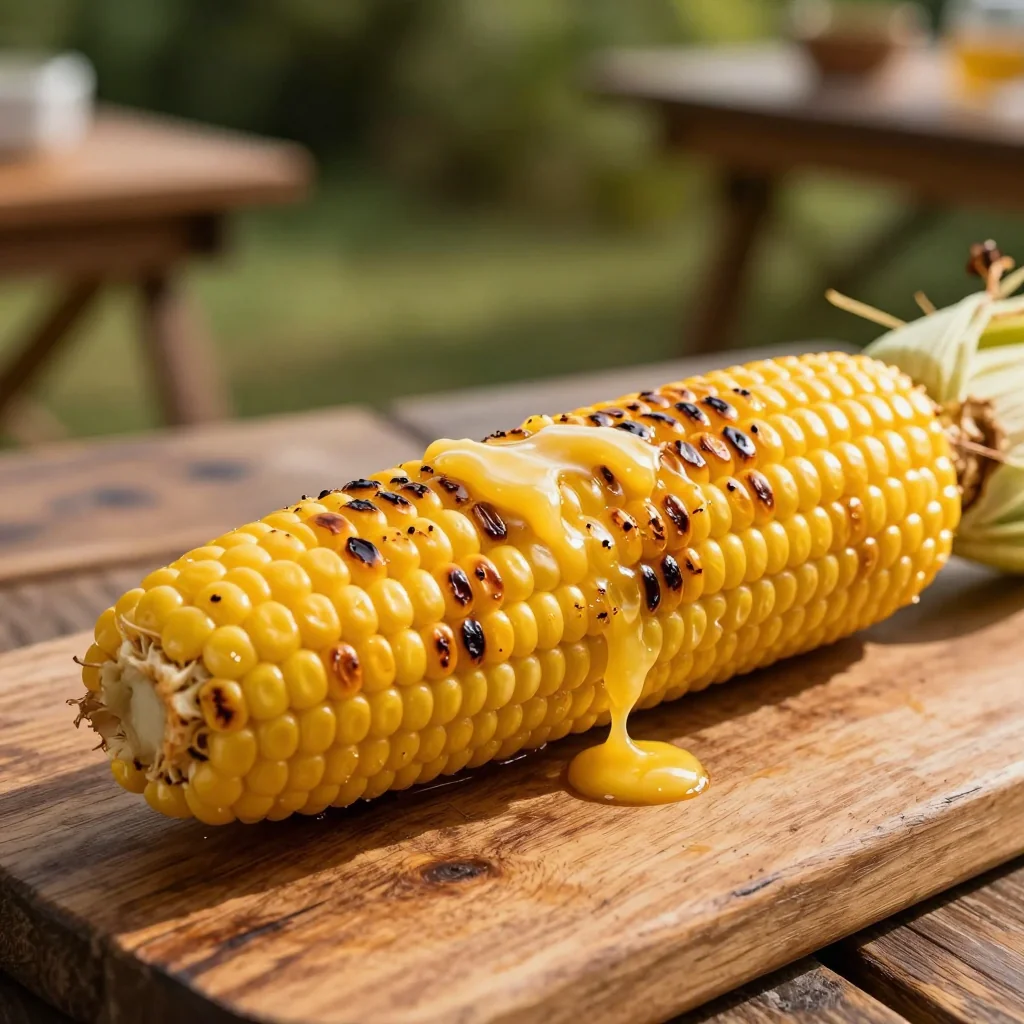
A smoky, buttery treat that turns humble corn into a summer‑long celebration of flavor.

The first time I tasted corn grilled with a generous brush of garlic butter, I was sitting on a breezy porch in July, the scent of charred kernels mingling with the distant hum of cicadas. My grandmother had always grilled corn on the cob, but she never added that silky, aromatic butter that turns each bite into a buttery, slightly smoky revelation. The memory of that sun‑kissed afternoon still makes my mouth water, and I’ve been chasing that perfect balance ever since.
Grilled corn is a staple in many cultures—from Mexican street vendors to Southern backyard barbecues—yet the simplicity of a well‑executed garlic butter glaze elevates it from a side dish to the star of any gathering. The combination of sweet corn, smoky char, and fragrant garlic butter creates a harmony that feels both rustic and refined.
In this guide, you’ll learn how to achieve that caramelized, buttery crust while keeping the kernels juicy inside. I’ll walk you through each step, from selecting the freshest ears to mastering the butter blend, so you can replicate that unforgettable flavor at home, no matter the season.
I’m thrilled to share this recipe with you—let’s fire up the grill and bring a burst of summer to your table, even if it’s a chilly winter night.
🌟 Why This Recipe Will Captivate You
Grilled corn with garlic butter isn’t just a side; it’s an experience that awakens the senses and brings people together around the grill.
- ✨ Irresistible Flavor Fusion: The sweet crunch of corn meets the aromatic depth of garlic and butter, while a whisper of smoked paprika adds a subtle smoky intrigue.
- ✨ Effortless Preparation: With only a handful of ingredients and a quick 10‑minute prep, this dish fits perfectly into busy weeknight dinners or relaxed weekend cookouts.
- ✨ Versatile Pairings: It shines alongside grilled meats, seafood, or as a standalone snack, making it adaptable to any menu theme.
- ✨ Health‑Conscious Twist: By using unsalted butter and fresh herbs, you control sodium while still indulging in a rich, satisfying taste.
- ✨ Crowd‑Pleaser: Whether you’re feeding kids, friends, or a formal gathering, the familiar comfort of corn appeals to all ages.
- ✨ Year‑Round Enjoyment: Thanks to indoor grills or stovetop grill pans, you can savor this dish any time of year, regardless of weather.
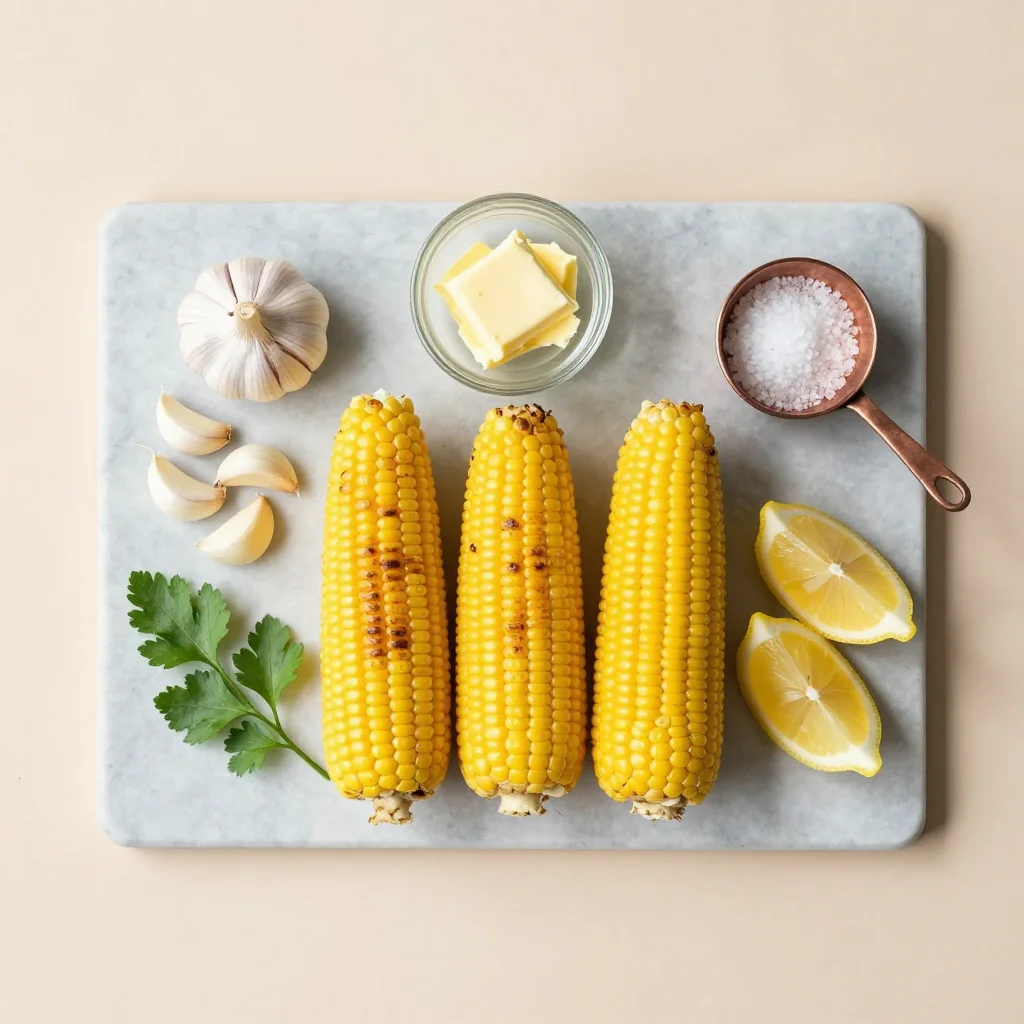
🥗 Ingredients
📝 Complete Ingredient List
For the Corn:
For the Garlic Butter:
Optional Garnish:
🔍 Focus on Key Ingredients
Fresh Corn
Fresh corn provides a natural sweetness that deepens when caramelized on the grill. Choose corn that’s still in season for the best flavor, but even out‑of‑season corn can work if you select the ones with milky, bright kernels. The husk protects the kernels during grilling, allowing them to steam before they char.
Garlic Butter
The butter acts as a conduit for flavor, melting into the corn’s crevices and delivering a glossy finish. Using unsalted butter lets you control the salt level precisely, while the minced garlic infuses a pungent aroma that balances the corn’s sweetness. Adding parsley and lemon zest introduces a fresh, herbaceous lift that prevents the dish from feeling heavy.
Smoked Paprika
Smoked paprika adds a subtle, earthy smokiness without overwhelming the natural corn flavor. It also contributes a warm, reddish hue that makes the final presentation pop. If you prefer a milder taste, you can substitute with regular sweet paprika.
🔄 Quick Substitutions
| If you don’t have... | Use instead... |
|---|---|
| Unsalted butter | Regular butter (reduce added salt) |
| Fresh parsley | Dried parsley (½ tsp) |
| Smoked paprika | Regular paprika or chipotle powder (¼ tsp) |
👨🍳 Step‑by‑Step Instructions
Follow these detailed steps to achieve perfectly charred corn with a luscious garlic butter coating. Each phase is designed to build flavor layers while keeping the process approachable.
📋 Phase 1: Preparation & Mise en Place
Gather, clean, and prep all components before you fire up the grill.
Prep the Corn
Remove the husks and silk from each ear of corn. Rinse the ears under cold water to wash away any remaining silk strands. Pat them dry with a clean kitchen towel. Lightly brush each ear with a teaspoon of olive oil to prevent sticking on the grill.
Make the Garlic Butter
In a medium bowl, combine the softened butter, minced garlic, chopped parsley, lemon zest, and smoked paprika. Use a fork to mash everything together until a smooth, fragrant paste forms. Season with a pinch of salt and pepper, tasting as you go to ensure balance.
🔥 Phase 2: Grilling & Basting
Transform the prepared corn on a hot grill, basting frequently for maximum flavor.
Preheat the Grill
Heat your grill to medium‑high, about 400°F (200°C). If using a charcoal grill, allow the coals to turn gray and ashy before placing the corn. A properly heated grill ensures a quick sear without overcooking the interior.
Grill the Corn
Place the ears directly on the grill grates, turning every 2‑3 minutes. After the first turn, brush a generous layer of the garlic butter onto the exposed kernels. Continue rotating and basting until the corn is lightly charred in spots and the butter has melted into a glossy coat, about 12‑15 minutes total.
Final Baste and Finish
In the last minute of grilling, give the corn one final brush of butter, then sprinkle a pinch of smoked paprika for extra color. Remove the corn from the grill and let it rest for 2 minutes; this allows the butter to set and the flavors to meld.
✨ Phase 3: Finishing Touches & Serving
Add the final garnish and present the dish beautifully.
Check for Doneness
Pierce a kernel with a fork; it should be tender yet firm. The kernels should be bright yellow with a few caramelized edges. If any kernels feel hard, give the corn an extra minute on the grill.
Dress the Corn
Transfer the corn to a serving platter. Sprinkle freshly grated Parmesan and chopped chives over the top for an added layer of umami and color contrast. A final drizzle of any remaining garlic butter adds shine.
Serve Immediately
Serve the corn hot, with lemon wedges on the side for a bright squeeze. Pair with grilled chicken, fish tacos, or a crisp salad for a complete meal. The buttery aroma will draw everyone to the table.
💡 Expert Tips & Tricks
🛒 Choosing the Right Ingredients
Freshness is the cornerstone of great corn. Look for ears that feel heavy for their size, indicating plump kernels. The husks should be bright green and tightly wrapped; wilted or dry husks often signal older corn. When selecting butter, opt for high‑fat European‑style butter for a richer mouthfeel, and always let it soften at room temperature before mixing.
🔪 Preparation Techniques
Removing the silk can be tedious; a quick trick is to pull the husk back, soak the ear in a bowl of water for a minute, then shake off the loosened silk. For the garlic butter, use a micro‑plane to grate garlic for a finer texture that melds seamlessly with the butter, preventing gritty bites.
🌡️ Mastering the Grill
Keep the grill lid closed as much as possible; this creates an oven‑like environment that cooks the corn evenly. If you notice flare‑ups, move the corn to a cooler part of the grill and finish cooking indirectly. A grill thermometer helps maintain the ideal 400°F temperature.
🍽️ Presentation & Service
For a polished look, serve the corn standing upright in a shallow bowl, with a small brush and extra butter on the side. Providing a small butter knife or a silicone brush lets guests add more butter to taste. Adding a splash of fresh lemon juice right before serving brightens the buttery richness.
🏆 Pro Tips
Professional chefs rely on precision and timing to turn simple dishes into unforgettable experiences.
- 🎯 Control the Char: By positioning the corn over indirect heat for the first 5 minutes, you ensure the kernels steam fully. Then finish over direct flame for 2‑3 minutes to achieve that coveted char without burning the butter.
- 🎯 Butter Emulsion: Whisk a teaspoon of warm water into the butter before adding garlic and herbs. This creates an emulsion that coats the corn more evenly and prevents the butter from separating on high heat.
- 🎯 Flavor Layering: Add a pinch of smoked sea salt at the very end. The smoky mineral notes amplify the paprika and garlic, creating a complex flavor profile that lingers on the palate.
- 🎯 Heat Management: If using a gas grill, preheat on high, then reduce to medium once the corn is on. This prevents the butter from burning while still delivering a quick sear.
- 🎯 Garnish Timing: Sprinkle Parmesan and chives after the corn is off the grill. Hot kernels melt the cheese just enough for a silky texture without turning it rubbery.
- 🎯 Resting Period: Allow the corn to rest for 2 minutes after grilling. This short pause lets the butter re‑absorb into the kernels, delivering a juicier bite.
"Great food is about timing, balance, and the love you stir into every bite." — Thomas Keller
🔄 Variations & Adaptations
The beauty of this recipe lies in its flexibility. Below are several ways to tailor it to different dietary preferences and flavor cravings.
🥬 Vegetarian / Vegan Version
Replace the butter with a plant‑based alternative such as vegan garlic herb spread or melted coconut oil mixed with garlic and herbs. Use nutritional yeast instead of Parmesan for a cheesy note. The result stays rich and satisfying while being fully vegan.
- Vegan butter (4 tbsp) – melt and mix with garlic, parsley, lemon zest, smoked paprika.
- Nutritional yeast (2 tbsp) – sprinkle after grilling for a cheesy finish.
🌶️ Flavor Variations
Play with global spice blends to give the corn an entirely new personality. Below are three popular twists.
Spicy Mexican
Add ½ tsp chipotle powder to the butter and finish with a squeeze of lime and a sprinkle of cotija cheese. The smoky heat pairs beautifully with the corn’s natural sweetness.
Mediterranean
Incorporate 1 tsp dried oregano and replace lemon zest with a drizzle of extra‑virgin olive oil and crumbled feta after grilling. The herbaceous notes complement the buttery base.
Asian Fusion
Mix 1 tsp soy sauce, ½ tsp toasted sesame oil, and a pinch of five‑spice powder into the butter. Garnish with toasted sesame seeds and chopped scallions for an umami‑rich twist.
⚠️ Dietary Adaptations
Gluten‑Free
This recipe is naturally gluten‑free. Ensure any added garnish, such as Parmesan, is certified gluten‑free if cross‑contamination is a concern.
Lactose‑Free
Substitute the butter with lactose‑free margarine or a blend of olive oil and dairy‑free butter. The flavor remains buttery while accommodating lactose intolerance.
Low‑Calorie
Use 2 tbsp of butter mixed with 2 tbsp of low‑fat Greek yogurt for a lighter coating. Reduce the amount of oil used for brushing the corn and skip the Parmesan garnish.
👶 Kid‑Friendly Version
Kids love the sweet taste of corn, so keep the seasoning mild. Omit the smoked paprika and use a smaller amount of garlic. Offer a side of honey‑drizzled corn for an extra sweet treat that encourages little eaters to enjoy vegetables.
📦 Storage & Reheating
🧊 Conservation
Refrigerator
- Duration: 2 days
- Container: Airtight glass container
- Tip: Store the butter mixture separately and re‑baste before reheating for maximum flavor.
Freezer
- Duration: 1 month
- Method: Wrap each ear tightly in foil, then place in a zip‑top freezer bag.
- Thawing: Transfer to the refrigerator overnight before reheating.
💡 For best texture, reheat the corn rather than eating it cold; the butter may solidify and affect mouthfeel.
♨️ Reheating
🔥 Oven (Recommended)
- Preheat to 180°C (350°F).
- Place corn on a baking sheet, cover loosely with foil.
- Heat for 10‑12 minutes.
- Remove foil, brush with remaining garlic butter, and bake an additional 3 minutes for a fresh glaze.
⚡ Microwave (Quick)
- Place corn on a microwave‑safe plate, cover with a microwave‑safe lid.
- Heat on medium power for 2 minutes, then flip and heat another 1‑2 minutes.
- Stir in a small spoonful of butter after heating.
🍳 Stovetop
Heat a cast‑iron skillet over medium heat, add a splash of oil, and sear the corn for 2‑3 minutes per side, brushing with butter as you go.
🍷 Perfect Pairings
🥗 Side Dishes
- Grilled Caesar Salad: The crisp romaine and tangy dressing balance the buttery corn.
- Mexican Street Corn Salad (Esquites): Adds a creamy, spicy contrast.
- Quinoa & Black Bean Salad: Provides protein and a fresh, herbaceous note.
🍷 Wine & Beverage Pairings
- Vermentino: Its bright acidity and citrus notes cut through the richness of the butter.
- Riesling (off‑dry): The slight sweetness mirrors the corn’s natural sugars.
- Non‑Alcoholic: Sparkling lemonade with a splash of rosemary-infused water.
🍰 To Complete the Meal
Start with a light citrus‑y appetizer like shrimp ceviche, follow with the grilled corn as the main side, and finish with a refreshing key‑lime tart. The progression from bright to buttery to tangy ensures a harmonious dining experience.
❓ Frequently Asked Questions
Q: Can I use frozen corn kernels instead of fresh ears?
Yes, you can, but the texture will differ. Thaw the kernels completely, pat them dry, and toss with a little oil before grilling. Expect a slightly softer bite and less natural sweetness compared to fresh corn.
Q: How do I avoid the butter burning on the grill?
Apply the butter in thin layers and keep the grill temperature at medium‑high rather than high. Using indirect heat for the first part of cooking also prevents direct exposure to flame, reducing the risk of burning.
Q: Is it necessary to brush the corn with oil before grilling?
Brushing with a light coat of oil helps prevent sticking and encourages even browning. If you prefer a lower‑fat version, you can skip the oil and rely solely on the butter for moisture, but be prepared for a few more stuck spots.
Q: What’s the best way to store leftover butter mixture?
Transfer the unused garlic butter to an airtight container and refrigerate for up to 3 days. It can also be frozen in ice‑cube trays for individual portions, then thawed as needed.
Q: Can I add cheese directly into the butter mixture?
Absolutely! Mixing in 2 tbsp of grated Parmesan or Pecorino into the butter before applying adds a deeper umami flavor and a slightly thicker coating.
Q: How far in advance can I prep the garlic butter?
The garlic butter can be prepared up to 24 hours ahead. Keep it refrigerated, and bring it to room temperature before the final basting step to ensure easy spreading.
🎉 Let’s Get Cooking!
This grilled corn with garlic butter brings together the comfort of a classic side and the excitement of bold flavors. By following each step, you’ll achieve a golden, buttery crust that makes every bite unforgettable. Whether you’re hosting a backyard barbecue, a cozy family dinner, or simply craving a taste of summer, this recipe delivers on taste, texture, and visual appeal.
I can’t wait to see how you make this dish your own—feel free to experiment with spices, herbs, or even a drizzle of honey for a sweet‑savory twist. Share your photos, ask questions, and leave a rating below. Your feedback helps the community grow and inspires new culinary adventures.
Have you tried this recipe?
Leave a comment and rating below! Share your photos on Instagram with #GrilledCornDelight to be featured.
Corn on the Cob Grilled with Garlic Butter
A smoky, buttery treat that turns humble corn into a summer‑long celebration of flavor.
📝 Ingredients
For the Corn
For the Garlic Butter
Optional Garnish
👨🍳 Instructions
- Prep the corn – Remove husks and silk, rinse, pat dry, and brush with olive oil.
- Make garlic butter – Combine butter, garlic, parsley, lemon zest, and smoked paprika; season.
- Preheat grill – Set to medium‑high (≈400°F/200°C).
- Grill corn – Place ears on grill, turn every 2‑3 minutes, basting with butter each turn.
- Final char – Add a last brush of butter and a pinch of paprika, grill 2 minutes more.
- Rest – Remove corn, let rest 2 minutes.
- Garnish – Sprinkle Parmesan and chives, drizzle any remaining butter.
- Serve – Offer lemon wedges and enjoy hot.
🥗 Nutritional Information (per serving)
*Values are estimates based on standard ingredient sizes.


💬 Comments & Reviews
Leave a Comment
[Comments will appear here once readers share their thoughts]