I’m going to start with a confession that might make you raise an eyebrow: I once burned a batch of pancakes so badly that the smoke alarm sang a duet with my neighbor’s cat. That disaster sparked a relentless quest for the perfect fluffy breakfast, and after countless trials, I finally nailed it. The result? Coconut Cream Pancakes that are so airy they practically float off the plate, and so buttery they could convince a hardened dairy skeptic to convert. I dare you to taste this and not go back for seconds. This isn’t just another pancake recipe; it’s a game‑changing breakfast that will rewrite your morning routine.
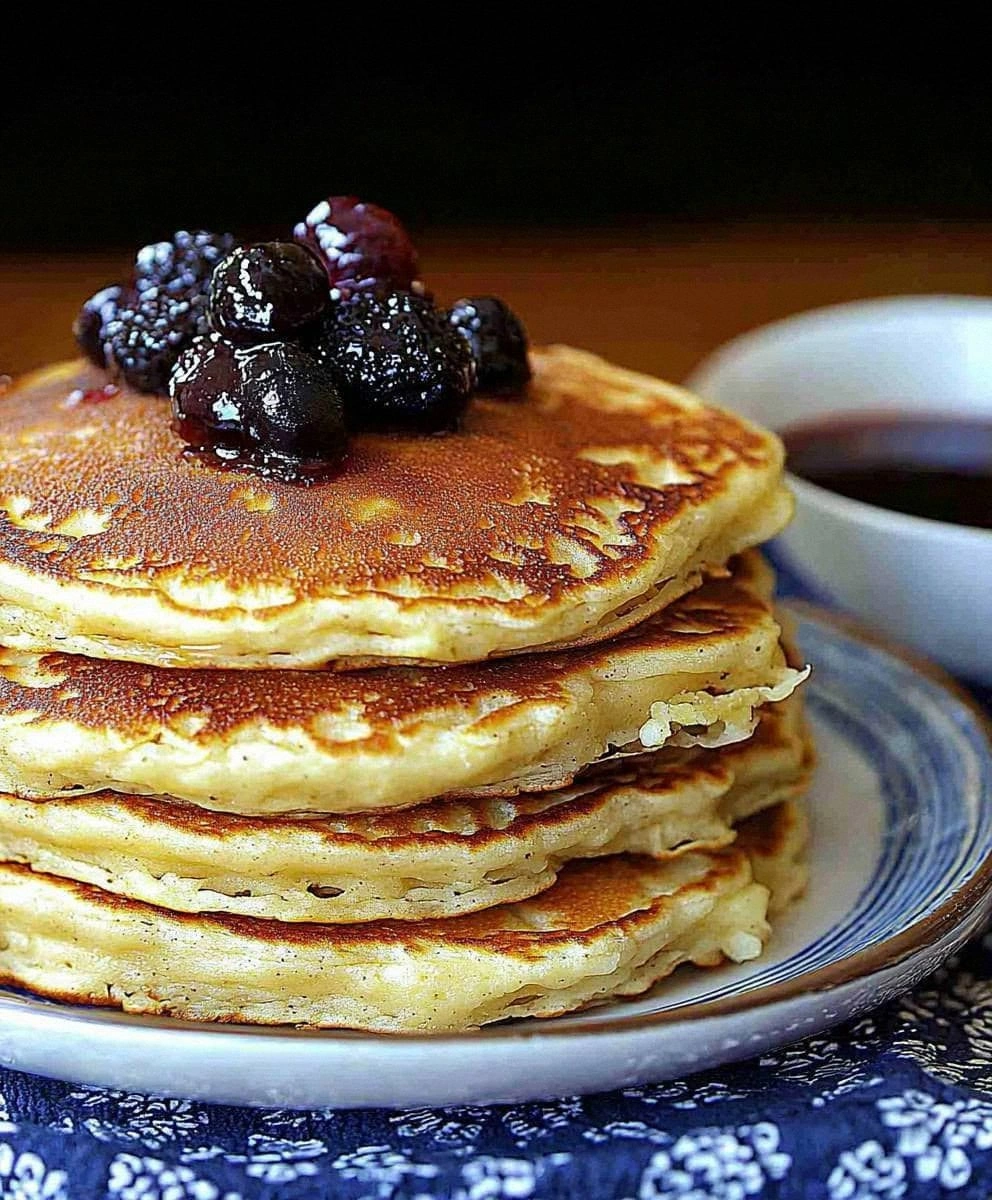
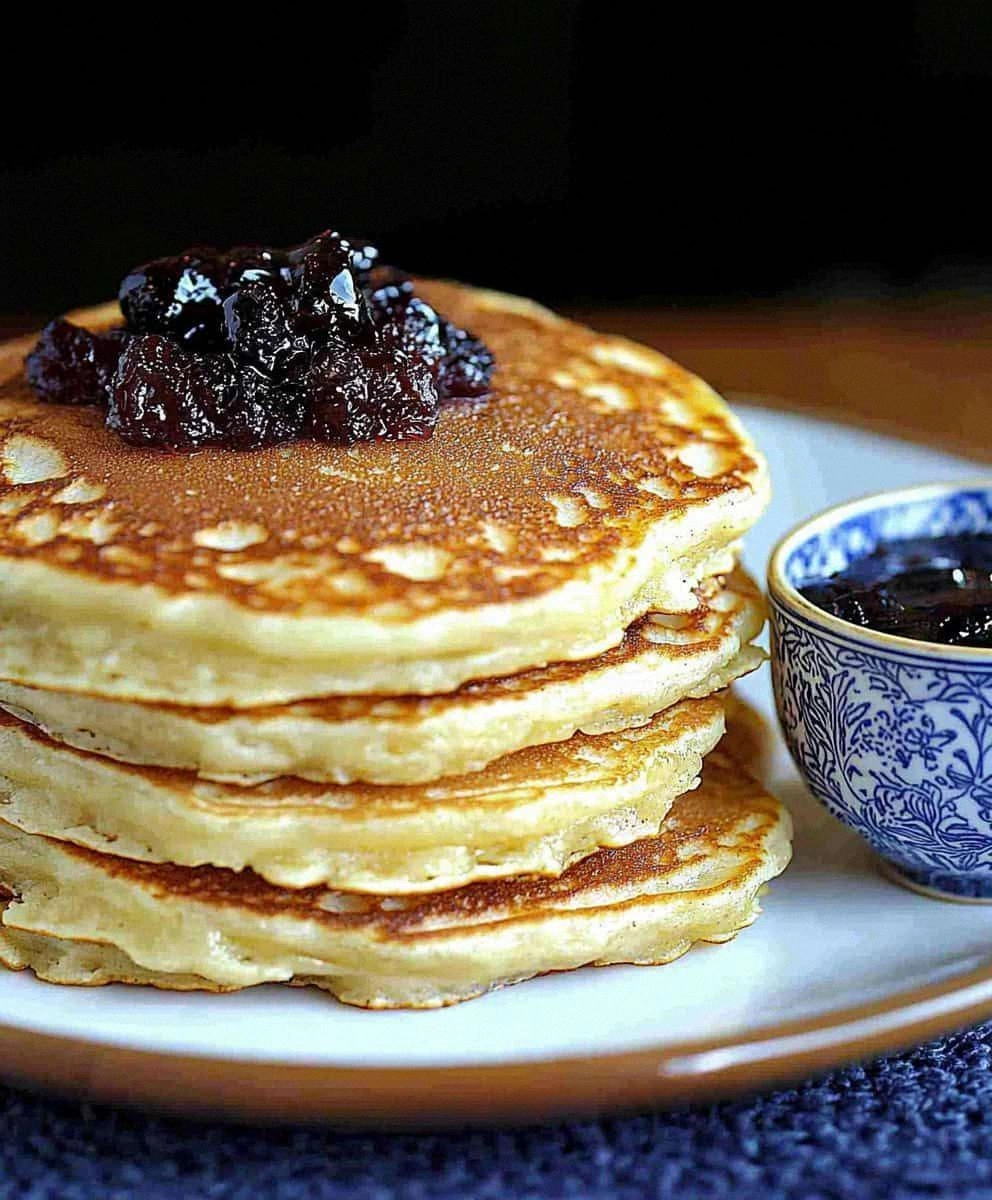
Picture this: the kitchen bathed in the soft glow of sunrise, the scent of coconut mingling with a whisper of vanilla, and a gentle sizzle that tells you something magical is happening on the stove. You hear the faint pop of bubbles as the batter meets the pan, feel the heat radiating from the skillet, and see the edges of each pancake turning a golden‑brown that looks like a sunrise in miniature. When you finally bite in, the texture is a cloud‑like cushion that cradles the sweet coconut cream, while the subtle crunch of shredded coconut adds a surprise that makes your taste buds do a happy dance. If you’ve ever struggled with pancakes that turn out rubbery or flat, you’re not alone — and I’ve got the fix.
What makes this version stand out is a secret weapon: coconut cream. Most recipes settle for milk or water, but coconut cream injects a richness that rivals a bakery’s secret batter. It’s the difference between a pancake that’s merely good and one that feels like a tropical vacation on a plate. I’ll also be throwing in a tiny trick with melted coconut oil that guarantees a crisp edge without sacrificing that melt‑in‑your‑mouth interior. Most recipes get this completely wrong. Here’s what actually works, and trust me, it’s pure magic.
Now, I’m not just going to dump a list of ingredients and expect you to wing it. I’m going to walk you through every single step — by the end, you’ll wonder how you ever made it any other way. And yes, I’ll spill the beans on a few kitchen hacks that will make you look like a pro even if you’ve never flipped a pancake in your life. Okay, ready for the game‑changer? Let’s dive in.
What Makes This Version Stand Out
- Flavor Explosion: The combination of coconut milk, coconut cream, and vanilla creates a tropical aroma that’s impossible to ignore. It’s like a beach vacation in every bite.
- Feather‑Light Texture: The whipped batter traps air, resulting in pancakes that rise higher than your expectations and stay fluffy for hours.
- Simplicity: Only ten core ingredients, most of which you probably already have in your pantry. No fancy gadgets required.
- Unique Ingredient: Coconut cream adds a richness that dairy milk can’t match, turning a humble breakfast into a decadent treat.
- Crowd‑Pleaser: Even the most skeptical eaters admit these pancakes are “the best version you’ll ever make at home.” I’ve watched grown‑ups beg for seconds.
- Ingredient Quality: Using full‑fat coconut milk and cream ensures the perfect balance of moisture and flavor without any artificial boosters.
- Cooking Method: A gentle medium‑low heat and a brief rest period create a golden crust while keeping the interior cloud‑soft.
- Make‑Ahead Potential: These pancakes freeze beautifully, so you can prep a weekend stash and enjoy breakfast any day.
Inside the Ingredient List
The Flavor Base
Coconut milk is the liquid backbone of this batter. Its natural sweetness and subtle nuttiness replace the blandness you’d get from regular milk. If you opt for the carton version, make sure it’s the full‑fat kind; skim will make the pancakes sad and dense. A good tip is to shake the can before opening so the cream and water are evenly mixed, giving you a smoother batter. If you’re allergic to coconut, a blend of oat milk and a splash of almond butter can mimic the richness, but you’ll lose that unmistakable tropical note.
The Texture Crew
All‑purpose flour is the structural hero, but the secret to fluffiness is the ratio of wet to dry ingredients. Too much flour and you’ll get a pancake that feels like a cardboard cutout; too little and it’ll be a soggy mess. The 2 tablespoons of sugar aren’t just for sweetness—they also aid in browning, giving you those coveted caramelized edges. Baking powder is the leavening agent that creates the lift; a tablespoon is just right for a four‑serving batch. The pinch of salt amplifies every flavor, making the coconut taste brighter.
The Unexpected Star
Coconut cream is the game‑changer. It’s thicker than coconut milk and adds a velvety richness that turns an ordinary pancake into a luxurious treat. When melted coconut oil is folded in, it creates tiny pockets of fat that melt during cooking, forming a crisp, buttery crust. If you’re watching calories, you can substitute half the coconut cream with almond milk, but the pancakes will lose some of that signature decadence.
The Final Flourish
Shredded coconut is optional, but it adds a delightful chew and an extra burst of coconut flavor. Sprinkle it on top of the batter just before cooking, and you’ll hear a faint crackle as it toasts. For those who love a bit of crunch, toast the shredded coconut lightly in a dry pan before folding it in. The egg acts as a binder, ensuring the pancake holds together while still staying airy. Finally, vanilla extract ties the whole flavor profile together, giving a sweet aromatic finish that lingers on the palate.
Everything's prepped? Good. Let's get into the real action...
The Method — Step by Step
In a large mixing bowl, whisk together the 1 cup all‑purpose flour, 2 tablespoons sugar, 1 tablespoon baking powder, and 1/2 teaspoon salt. Take a moment to appreciate the faint perfume of the dry ingredients—this is the foundation of flavor. I like to sift them just once to avoid any lumps, which ensures a silky batter later. Watch out: if you over‑mix at this stage, gluten will develop and you’ll lose that coveted fluffiness.
In a separate bowl, combine 1 cup coconut milk, 1/4 cup coconut cream, 1 large egg, 2 tablespoons melted coconut oil, and 1 teaspoon vanilla extract. Whisk vigorously until the mixture looks glossy and the oil is fully incorporated. The moment you hear the batter start to thicken, you’ll know the emulsification is happening.
Kitchen Hack: Warm the coconut milk and cream slightly (no more than 35°C) before mixing; this prevents the butter from solidifying and creates a smoother batter.Create a well in the center of the dry ingredients and pour the wet mixture into it. Using a rubber spatula, fold the two together until just combined. You’ll see streaks of flour disappear, and the batter will look slightly lumpy—that’s perfect. Resist the urge to over‑mix; a few small lumps are the secret to airy pancakes. Let the batter sit for 5 minutes—this is the rest period where the flour hydrates and the baking powder gets to work.
If you’ve opted for the optional shredded coconut, gently fold 1/2 cup shredded coconut into the rested batter now. The coconut will add texture and a toasty aroma as it hits the pan. Watch out: too much coconut can weigh the batter down, so keep it to the suggested amount unless you’re aiming for a denser, more indulgent bite.
Heat a non‑stick skillet or a cast‑iron griddle over medium‑low heat. Add a thin drizzle of coconut oil—just enough to coat the surface. When the oil shimmers but isn’t smoking, you’re ready. The sizzle you hear as the batter hits the pan is the first sign of success.
Watch Out: If the pan is too hot, the outside will burn before the inside cooks, leaving you with a pancake that’s black on the edges and raw in the middle.Using a 1/4‑cup measuring scoop, pour batter onto the skillet, spacing them about 2 inches apart. The batter should spread gently; if it spreads too quickly, the pan is too hot. Let the pancakes cook for 2‑3 minutes or until bubbles form on the surface and the edges start to look set. That moment when the edges pull away from the pan is your cue to flip.
Flip each pancake with a thin spatula and cook the other side for another 1‑2 minutes. You’ll notice a golden‑brown hue that looks like a sunrise—exactly what we’re aiming for. Press lightly on the center; it should spring back, indicating a fully set interior. Transfer the finished pancakes to a warm plate and keep them covered with foil to retain heat.
Once all pancakes are cooked, drizzle them generously with maple syrup or honey and add fresh fruit like sliced bananas or berries if you like. The sweet drizzle mingles with the coconut flavor, creating a symphony of taste that’s both tropical and comforting. Serve immediately while the pancakes are still steaming hot. And now the fun part: watch your guests devour them with the kind of gusto usually reserved for dessert.
That’s it — you did it. But hold on, I’ve got a few more tricks that’ll take this to another level. From plating tips that make your breakfast look Instagram‑ready to a secret butter glaze that adds a glossy finish, stay with me here — this is worth it.
Insider Tricks for Flawless Results
The Temperature Rule Nobody Follows
Most home cooks crank the heat to “high” because they think it speeds things up. In reality, a medium‑low setting (around 325°F on a stovetop thermometer) gives the batter time to set without scorching. I once tried cooking on high and ended up with pancakes that looked perfect on the outside but were raw in the middle. Trust me, patience is the secret sauce. Keep the heat steady and you’ll get that uniform rise we all crave.
Why Your Nose Knows Best
Your sense of smell is a reliable indicator of doneness. When the pancakes start to emit a buttery, slightly caramelized aroma, you’re close to the flip point. If you rely solely on visual cues, you might miss the perfect moment and end up with a pancake that’s either undercooked or over‑browned. So, keep that nose open—if it smells like a tropical sunrise, you’re golden.
The 5‑Minute Rest That Changes Everything
Allowing the batter to rest for exactly five minutes after mixing is non‑negotiable. During this pause, the flour fully absorbs the liquids, and the baking powder gets a chance to release carbon dioxide. Skipping this step leads to dense, flat pancakes that lack the airy lift we love. I’ve seen people rush this part and swear they “don’t have time.” Trust me, five minutes is a tiny price to pay for pancake perfection.
The Flip Timing Trick
When you see bubbles forming and the edges looking set, that’s your signal. But here’s a pro tip: use a thin, flexible spatula and slide it under the pancake at a slight angle. If the pancake slides easily, it’s ready. If it sticks, give it another 30 seconds. This avoids tearing the pancake and preserves that beautiful dome shape. I once flipped too early and ended up with a pancake that looked like a deflated balloon—never again.
The Final Glaze
For an extra glossy finish, melt a tablespoon of coconut oil with a drizzle of maple syrup in a tiny saucepan. Brush this glaze over each pancake just before serving. The glaze adds a subtle sheen and a hint of extra coconut flavor that makes the dish feel restaurant‑grade.
Creative Twists and Variations
This recipe is a playground. Here are some of my favorite ways to switch things up:
Banana‑Coconut Bliss
Mash one ripe banana into the wet mixture before adding the egg. The banana adds natural sweetness and a subtle fruit flavor that pairs beautifully with the coconut. Top with extra banana slices and a drizzle of honey for a breakfast that feels like a tropical smoothie bowl.
Chocolate Chip Dream
Fold in 1/3 cup dark chocolate chips just after the rest period. The chips melt slightly during cooking, creating pockets of gooey chocolate that contrast with the coconut’s lightness. This version is perfect for kids (and adults who refuse to grow up).
Spiced Autumn
Add 1/2 teaspoon ground cinnamon and a pinch of nutmeg to the dry ingredients. The warm spices turn the pancakes into a cozy, fall‑ready dish that pairs nicely with caramelized apples. Serve with a dollop of vanilla Greek yogurt for extra tang.
Savory Coconut Pancakes
Skip the sugar and add 1/4 teaspoon smoked paprika and 2 finely chopped scallions to the batter. Top with a fried egg and a drizzle of sriracha mayo for a brunch that blurs the line between sweet and savory. The coconut cream still provides richness, making the savory version surprisingly comforting.
Berry‑Burst Explosion
Gently fold a cup of fresh mixed berries (blueberries, raspberries, blackberries) into the batter right before cooking. The berries burst as they heat, releasing juices that create pockets of tangy sweetness throughout the pancake. Finish with a spoonful of whipped coconut cream for an indulgent treat.
Storing and Bringing It Back to Life
Fridge Storage
Place cooled pancakes in an airtight container and store them in the refrigerator for up to three days. Layer parchment paper between each pancake to prevent them from sticking together. When you’re ready to eat, reheat them in a toaster oven or a dry skillet over low heat for 2‑3 minutes per side.
Freezer Friendly
Stack the pancakes between sheets of parchment paper and seal them in a freezer‑safe zip‑top bag. They’ll keep for up to two months. To reheat, pop them straight from the freezer into a hot skillet, adding a tiny splash of water (about a tablespoon) to create steam that revives the fluffiness.
Best Reheating Method
The secret to restoring that cloud‑like texture is gentle steam. Place the pancakes on a microwave‑safe plate, sprinkle a few drops of water around them, and cover with a damp paper towel. Microwave on high for 30‑45 seconds, then finish with a quick sear in a hot pan for that crisp edge. The result? Pancakes that taste as fresh as the day they were made.