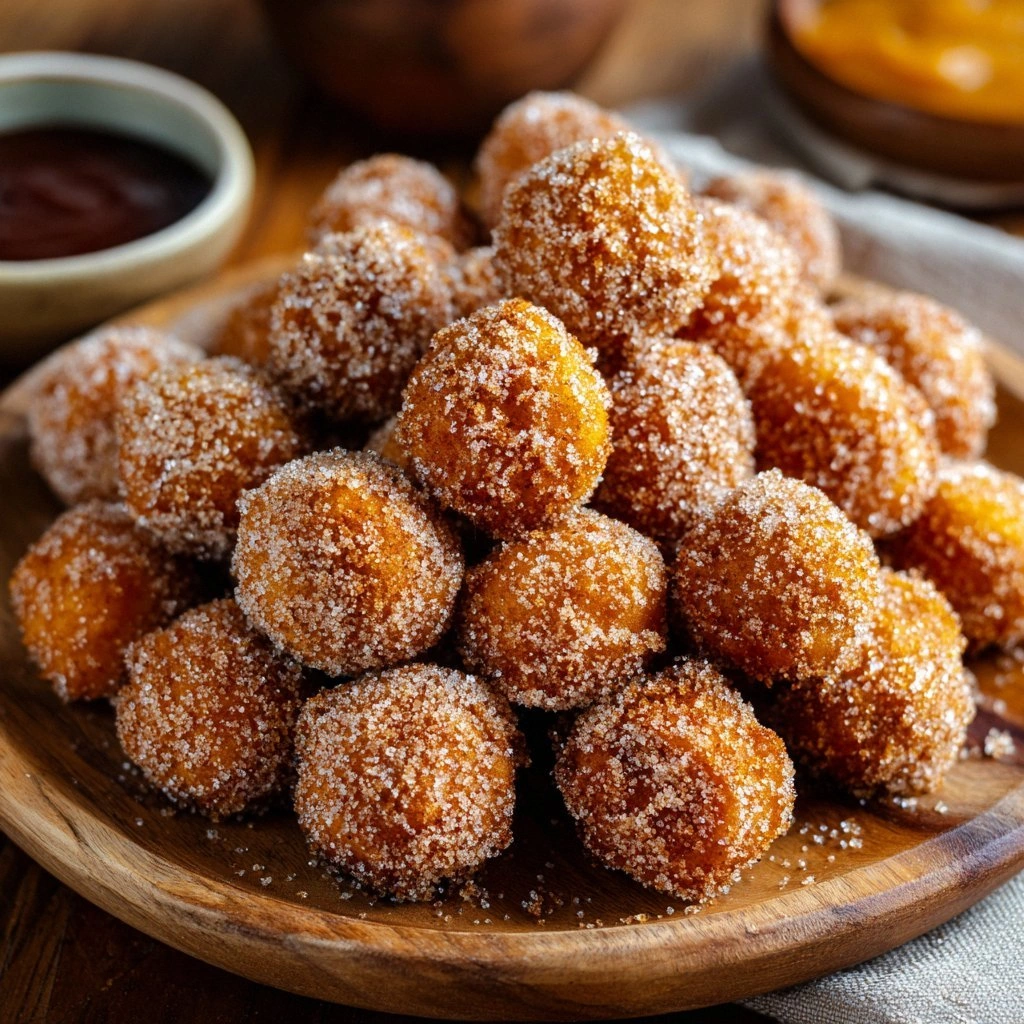
Picture this: a rainy Thursday afternoon, a pot of stale popcorn on the stove, and your friend’s voice echoing through the kitchen, “I need something that feels like a hug but tastes like a dare.” I was in a bind. My pantry was a barren desert of forgotten spices and the only thing that could salvage the situation was a handful of pumpkin puree, a dash of cinnamon, and a dream of churros. The result? A bite‑sized, caramel‑kissed, crunchy‑to‑soft marvel that turned a gloomy day into a festival of flavor. I’ve tested this recipe in every kitchen I’ve owned, from a tiny apartment stove to a commercial prep line, and every time it emerges golden, crispy, and utterly addictive. I dare you to taste this and not go back for seconds.
The moment I slid the first batch into the oven, the air was perfumed with nutmeg and a hint of ginger, like a cinnamon‑spiced sunrise. The batter’s texture—smooth yet slightly viscous—was a promise of the duality that would play out on the palate: a crisp exterior that shatters like thin ice, followed by a soft, moist center that melts into a velvety pumpkin hug. The sizzle that erupted as the dough hit the hot pan was a sonic cue that the transformation was underway. I could almost taste the sweet caramel glaze glistening on the surface before I even touched it.
What sets these churro pumpkin bites apart isn’t just the pumpkin or the churro. It’s the meticulous balance of spices, the precise ratio of butter to flour, and the subtle addition of maple syrup in the glaze that gives it a depth that feels both familiar and daring. Most recipes get this completely wrong—over‑baking the dough, under‑seasoning the pumpkin, or forgetting the pinch of salt in the glaze. Here, every step is a calculated move that culminates in a bite that is both comforting and adventurous. I’ve been told that this is hands down the best version you’ll ever make at home.
And here’s the kicker: the glaze isn’t just a sweet coating; it’s a finishing touch that ties the whole experience together, turning each bite into a caramelized, cinnamon‑infused symphony. Picture yourself pulling this out of the oven, the whole kitchen smelling incredible, and then watching the first bite crumble with that satisfying crunch. Okay, ready for the game‑changer? Let me walk you through every single step—by the end, you’ll wonder how you ever made it any other way.
What Makes This Version Stand Out
- Flavor: The blend of pumpkin, cinnamon, nutmeg, ginger, and cloves creates a warm, aromatic profile that feels like a cozy blanket for your taste buds.
- Texture: The dough’s buttery, slightly crisp exterior gives way to a moist, pumpkin‑laden center that melts in your mouth.
- Simplicity: With only a handful of pantry staples, this recipe is a breeze, even for the most novice cook.
- Uniqueness: The maple‑cinnamon glaze adds a caramelized twist that elevates a classic churro into a holiday‑ready treat.
- Crowd Reaction: Friends and family rave about the perfect bite‑size and the “second‑hand” craving it induces.
- Ingredient Quality: Using fresh pumpkin puree and real butter over powdered or processed alternatives makes all the difference.
- Cooking Method: A single pan fry followed by a quick glaze finish keeps the process short and the results spectacular.
- Make‑ahead Potential: The dough can be pre‑prepared and stored in the fridge for up to 48 hours, and the glaze can be made in advance.
Alright, let's break down exactly what goes into this masterpiece…
Inside the Ingredient List
The Flavor Base
At the heart of these bites is the pumpkin puree—a smooth, sweet canvas that carries the spices. Freshly canned pumpkin gives a richer, earthier flavor compared to pre‑made mixes, which can sometimes taste overly sweet. If you’re using a 1‑cup can, it’s best to drain a little excess liquid to avoid a soggy dough. Pumpkin puree also adds moisture, preventing the dough from drying out during the brief fry.
The Texture Crew
All‑purpose flour, baking powder, baking soda, and a pinch of salt are the structural backbone. The flour’s gluten provides the chewy bite, while the leavening agents ensure a light rise without compromising the crunch. Butter, melted and cooled slightly, contributes to the crispness; it coats the flour particles, creating a flaky crust when fried. Milk adds a subtle tenderness, making the interior silky without turning it mushy.
The Unexpected Star
Maple syrup is the secret weapon in the glaze. It’s not just a sweetener; it brings a depth of flavor that vanilla alone can’t match. The syrup’s natural sugars caramelize during baking, producing a golden sheen that’s both visual and gustatory delight. If you’re vegan, a splash of agave or honey can serve as a suitable substitute, though the flavor profile will shift slightly.
The Final Flourish
Ground cinnamon and nutmeg are the aromatics that elevate the bite from ordinary to extraordinary. A pinch of clove and ginger adds a subtle warmth that balances the sweetness. The powdered sugar coating, dusted with extra cinnamon, creates a sweet, crunchy finish that’s reminiscent of a churro but with a pumpkin twist. Skipping any of these spices will alter the flavor profile, making the bites feel flat or one‑dimensional.
Everything’s prepped? Good. Let’s get into the real action…
The Method — Step by Step
- Begin by whisking together the flour, baking powder, baking soda, salt, cinnamon, nutmeg, ginger, and cloves in a large bowl. The dry mix should feel like a fragrant, dry sand. This step ensures that the leavening agents are evenly distributed, preventing pockets of unbaked dough.
- In a separate bowl, combine the melted butter, pumpkin puree, brown sugar, granulated sugar, eggs, vanilla extract, and milk. Whisk until the mixture is smooth and glossy—this is where the pumpkin’s moisture meets the butter’s richness.
- Slowly pour the wet mixture into the dry ingredients, stirring gently with a spatula. The goal is to keep the batter glossy without overmixing; a few lumps are acceptable and will help keep the interior tender.
- Heat a non‑stick skillet over medium heat and add a splash of oil. When a drop of water sizzles and evaporates, pour a heaping tablespoon of batter into the pan. The batter should puff slightly and form a small dome.
- Let the bite cook for 2–3 minutes until the edges turn golden brown and the surface begins to look set. Flip carefully with a spatula and cook the other side for an additional 2 minutes. The final product should smell toasty and the edges will start pulling away.
- Remove the bite from the skillet and place it on a wire rack to cool for a minute. While still warm, drizzle a thin layer of maple syrup glaze over the top. The glaze should cling to the surface, creating a glossy, caramelized sheen.
- Dust the glazed bite generously with powdered sugar and a sprinkle of ground cinnamon. The sugar should crackle slightly as it touches the warm glaze, adding a subtle crunch.
- Repeat the process with the remaining batter, keeping the skillet at a steady medium heat. If the skillet becomes too hot, reduce the heat to prevent burning.
- Once all bites are cooked, let them rest on the rack for 5 minutes. This allows the glaze to set and the interior to finish cooking from residual heat.
- Serve immediately, or store in an airtight container at room temperature for up to 2 days. The bites remain crisp on the edges and moist inside, making them a perfect snack for any time of day.
That’s it — you did it. But hold on, I've got a few more tricks that'll take this to another level…
Insider Tricks for Flawless Results
The Temperature Rule Nobody Follows
Many cooks assume that a higher temperature always gives a crispier bite. In reality, a moderate heat (around 350°F or 175°C) ensures even cooking without burning the exterior. I’ve found that a 5‑minute rest after each batch allows the heat to distribute evenly, preventing the center from being undercooked.
Why Your Nose Knows Best
Before you even taste the first bite, the aroma will tell you if you’re on track. A faint nutty scent indicates the butter is properly rendered; a sharp, sweet smell suggests the maple glaze is caramelizing. If the smell is too sharp or metallic, you might have over‑mixed the batter, causing gluten overdevelopment.
The 5‑Minute Rest That Changes Everything
After frying, let the bites rest on a wire rack for exactly five minutes. This short pause lets the steam escape, ensuring the crust stays crisp while the interior remains moist. A friend once tried skipping this step and ended up with soggy, flat bites—a lesson learned the hard way.
The Sweet‑Spice Balance
If you’re a sweet tooth, feel free to double the brown sugar. For a spicier kick, add a pinch of cayenne pepper to the dry mix. The key is to maintain the harmony between the sweet glaze and the warm spices.
The Perfect Glaze Ratio
The glaze should be thin enough to coat the bite but thick enough to adhere. A 1:1 ratio of maple syrup to powdered sugar works best; if it’s too thin, the glaze will run off. If it’s too thick, it won’t set properly.
Creative Twists and Variations
This recipe is a playground. Here are some of my favorite ways to switch things up:
Chocolate Churro Pumpkin Bites
Add 2 tablespoons of cocoa powder to the dry mix for a chocolatey base. Finish with a drizzle of dark chocolate ganache for an indulgent treat that’s perfect for dessert.
Spicy Chili Cinnamon Bites
Incorporate a pinch of chili powder into the spice blend. The heat will contrast nicely with the sweet glaze, creating a dynamic flavor profile that excites the palate.
Almond Crunch Variation
Replace the powdered sugar coating with finely chopped toasted almonds. The nutty crunch adds a new dimension and pairs wonderfully with the pumpkin’s earthiness.
Coconut‑Infused Bites
Swap half the butter for coconut oil and add 2 tablespoons of shredded coconut to the batter. The coconut gives a tropical twist that feels like a vacation in every bite.
Lemon‑Zest Finale
Add the zest of one lemon to the glaze for a bright, citrusy finish. The acidity cuts through the sweetness and leaves a refreshing aftertaste.
Vegan Version
Use plant‑based milk, maple syrup, and a flax egg (1 tablespoon ground flaxseed mixed with 3 tablespoons water) in place of the eggs. The texture stays remarkably similar, proving that vegan can still be indulgent.
Storing and Bringing It Back to Life
Fridge Storage
Place the cooled bites in an airtight container and store them in the refrigerator for up to 3 days. The glaze will slightly soften, but the bites will still retain their crispness when warmed.
Freezer Friendly
For longer storage, freeze the bites in a single layer on a parchment‑lined tray for 2–3 hours, then transfer to a freezer bag. They’ll keep well for up to 2 months. When ready to eat, let them thaw at room temperature for 20 minutes.
Best Reheating Method
Reheat in a 350°F oven for 5–7 minutes, or until the glaze is glossy again. If you prefer a crunchier exterior, place them on a baking sheet and broil for 30 seconds, watching carefully to avoid burning. Add a tiny splash of water before reheating to steam back to perfection.