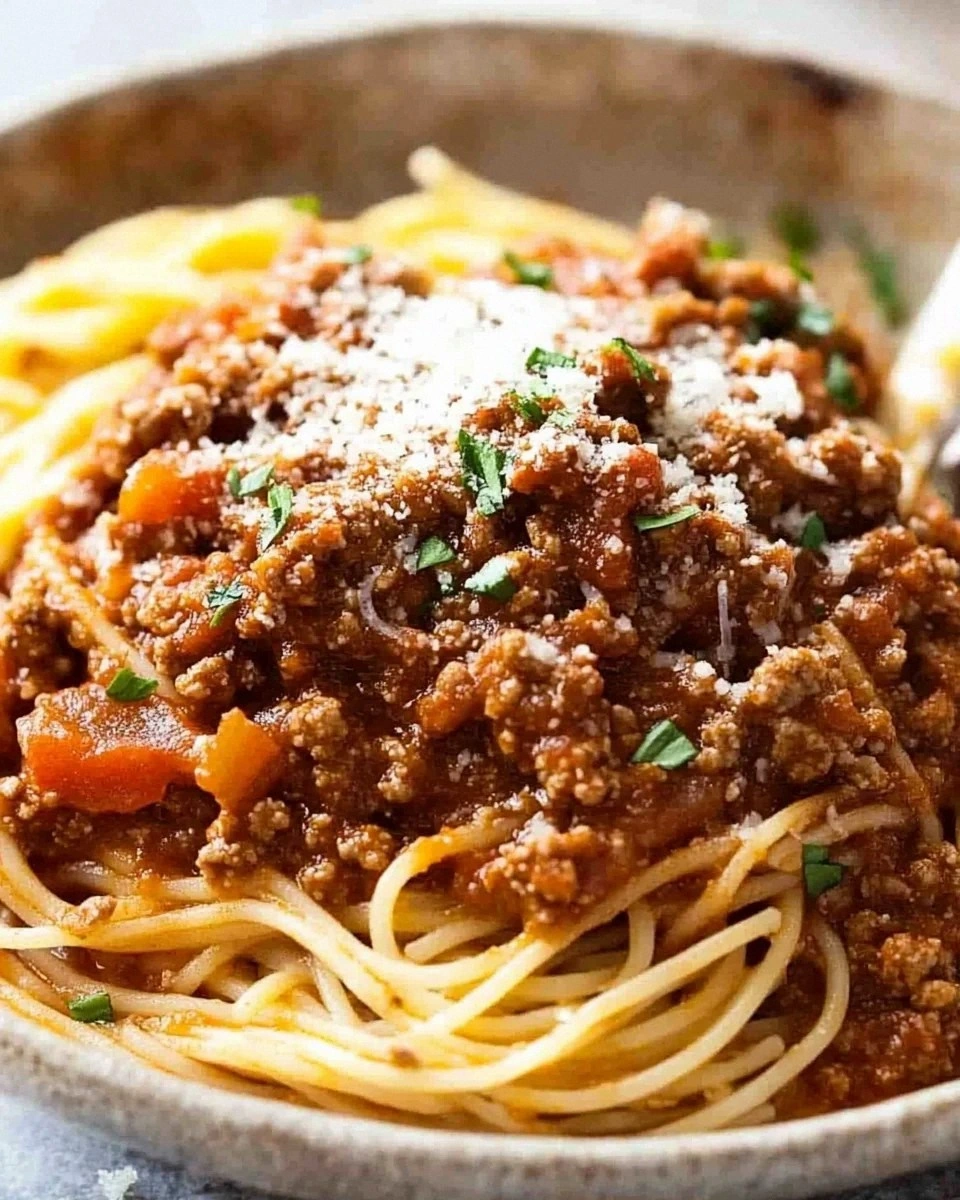
Picture this: the kitchen is a battlefield, pans clanging, a pot of boiling water sputtering like a dragon, and you’re standing in the middle of it all, arms covered in flour, a stubborn Italian sausage in one hand and a measuring cup in the other. I was trying to salvage a dinner that had gone sideways—my spaghetti had been overcooked, the sauce had turned into a sad, watery mess, and my family was already on the verge of a culinary revolt. I remembered a recipe I’d seen on a cooking show, a version that promised to turn any pasta disaster into a showstopper. And so I decided to give it a shot, armed with a bag of sausage, a handful of cheeses, and an unshakeable belief that this could be the best thing I’d ever made at home.
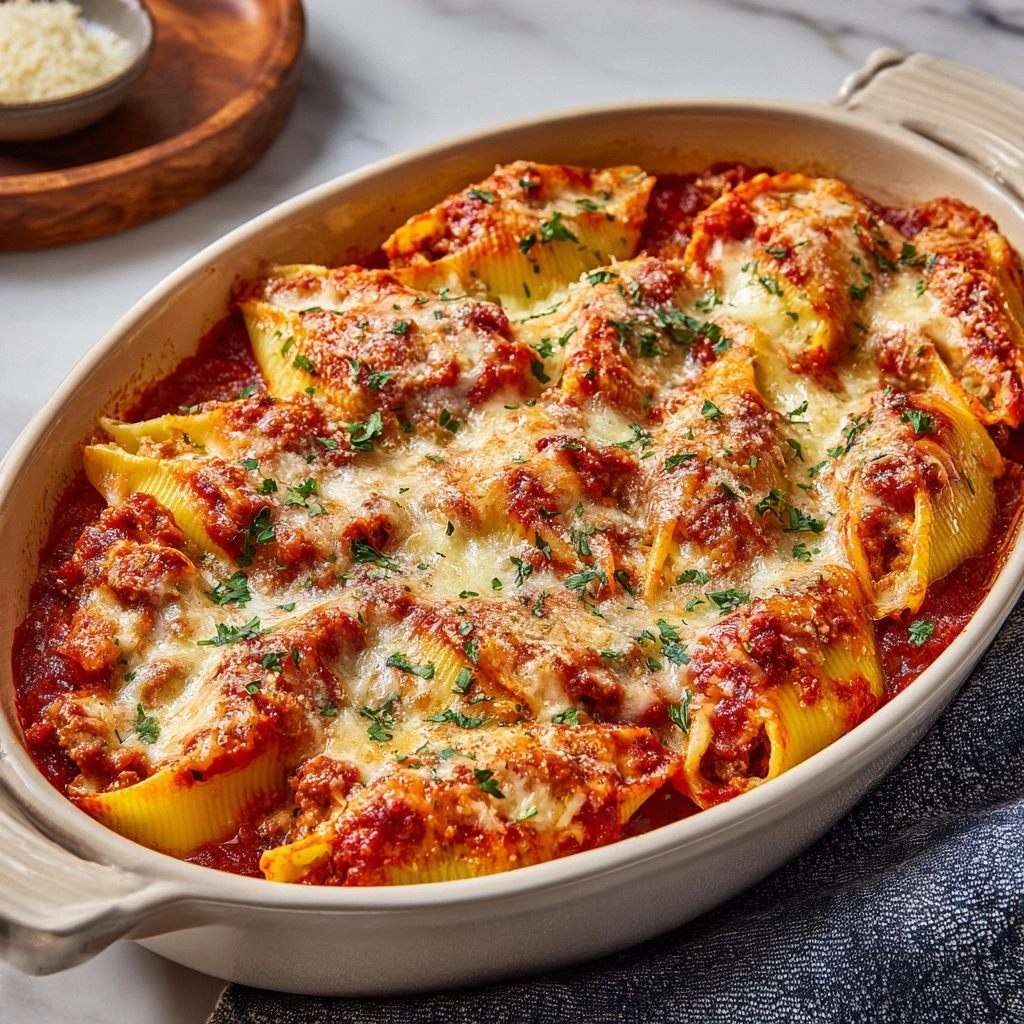
I swear, the moment I started stuffing the shells, the air filled with a buttery, garlicky aroma that made my mouth water. The shells, like little paper boats, were waiting, their glossy surfaces reflecting the flicker of the stove. The sausage, browned to a caramelized perfection, released a savory perfume that danced with the basil and parsley. The cheeses—ricotta, mozzarella, Parmesan—melded together like a molten, golden river, each bite promising a burst of umami. The kitchen felt like a secret laboratory where flavors were being coaxed into a harmonious symphony.
What sets this version apart is not just the combination of ingredients; it’s the method that turns a simple stuffed shell into a masterpiece. I’ve tweaked the ratio of cheeses to achieve a creamy yet slightly chunky texture, I’ve pre‑cooked the sausage to lock in juices, and I’ve added a splash of marinara to keep the shells moist without drowning them. The result? Shells that are tender, pockets that are ooze‑y, and a sauce that coats the pasta like velvet, with a crisp, golden crust that shatters like thin ice when you bite into it. I dare you to taste this and not go back for seconds.
If you’ve ever struggled with stuffed shells—too dry, too soggy, or just plain bland—this is the fix you’ve been waiting for. The secret lies in balancing the cheese, seasoning the sausage, and baking just enough to create a bubbly, caramelized top. By the end of this post, you’ll wonder how you ever made it any other way. Let me walk you through every single step—by the end, you’ll wonder how you ever made it any other way.
What Makes This Version Stand Out
- Taste: The blend of ricotta, mozzarella, and Parmesan creates a layered flavor profile that lingers on the palate, unlike the flat taste of standard stuffed shells.
- Texture: The sausage is browned to lock in juices, giving each shell a moist center while the top forms a golden, slightly crunchy crust.
- Simplicity: With only a handful of ingredients and a straightforward assembly, this recipe is perfect for busy weeknights.
- Uniqueness: The addition of fresh herbs and a splash of marinara turns the classic into a dish that feels fresh and adventurous.
- Crowd Reaction: Friends who taste it often say, “I can’t believe you made this at home,” and it’s a guaranteed crowd‑pleaser at dinner parties.
- Ingredient Quality: Using high‑quality sausage and cheeses elevates the dish, making it feel restaurant‑level.
- Cooking Method: The bake‑then‑broil technique locks in moisture and creates a caramelized finish without overcooking.
- Make‑ahead Potential: You can assemble the shells a day in advance and bake them fresh, saving time on busy evenings.
Alright, let's break down exactly what goes into this masterpiece…
Inside the Ingredient List
The Flavor Base
The cornerstone of this dish is the sausage. A 1‑pound pack of Italian sausage, whether spicy or mild, delivers the heartiness that anchors the filling. Browning the sausage not only caramelizes its natural sugars but also concentrates its savory notes, giving the shells a deeper, richer flavor. If you skip this step, the filling will taste flat, as though you’re missing the soul of the dish. For a vegetarian version, substitute a plant‑based sausage or crumbled tofu seasoned with Italian herbs.
The Texture Crew
The cheeses—1 cup shredded mozzarella, ½ cup ricotta, and ½ cup grated Parmesan—create a creamy, slightly gooey interior that contrasts beautifully with the crisp shell exterior. Mozzarella provides the melt, ricotta adds moisture and body, and Parmesan introduces a nutty sharpness that balances the richness. If you omit any of these, the filling will either become too dry or too runny. A good rule of thumb: use equal parts mozzarella and ricotta for a silky texture, and a splash of Parmesan to finish.
The Unexpected Star
The secret weapon in this recipe is the ½ cup marinara sauce, added to the filling. It keeps the shells from drying out during baking and gives the top a glossy sheen. The sauce also introduces a subtle tomato sweetness that cuts through the fattiness of the sausage and cheese. If you prefer a drier filling, reduce the marinara to ¼ cup, but expect a less dramatic crust.
The Final Flourish
Fresh herbs—1 tablespoon chopped parsley and 1 tablespoon chopped basil—add brightness and a burst of color. Garlic powder, a pinch of salt, and pepper to taste season the filling to perfection. The 1 tablespoon olive oil helps bind everything together and gives the shells a glossy finish. Finally, the breadcrumbs (¼ cup) sprinkled on top before broiling add a delightful crunch that contrasts with the gooey center. If you’re a fan of extra cheese, a ¼ cup of shredded cheddar or Pecorino can be folded in for an indulgent twist.
Everything’s prepped? Good. Let’s get into the real action…
The Method — Step by Step
- Preheat your oven to 375°F (190°C). This temperature is critical for ensuring the shells cook through without burning the cheese. While the oven warms, bring a large pot of salted water to a rolling boil. The water should be so salty that it tastes like sea. Once boiling, drop the shells in, cooking them for 8–10 minutes or until al dente. Drain and set aside.
- Brown the sausage. In a large skillet over medium‑high heat, crumble the sausage and cook until it’s no longer pink, about 5–6 minutes. Stir frequently so the pieces stay separate and release their juices. Once browned, transfer the sausage to a bowl and let it cool slightly; this step locks in flavor and prevents the filling from becoming greasy.
- Mix the filling. In a medium bowl, combine the browned sausage, ricotta, mozzarella, Parmesan, ½ cup marinara, garlic powder, salt, pepper, parsley, basil, and olive oil. Stir until the mixture is creamy and well‑combined. The consistency should be thick enough to hold its shape but still spoonable. Taste and adjust seasoning if necessary; you want a balanced, savory flavor.
- Stuff the shells. Using a small spoon or a piping bag, fill each shell with the cheese‑sausage mixture. Don’t overfill; a generous amount is fine, but leaving a little space at the top prevents the filling from spilling out during baking. Arrange the stuffed shells in a single layer on a baking sheet lined with parchment paper.
- Cover with sauce. Lightly drizzle the remaining marinara sauce over the tops of the stuffed shells. This extra sauce layer helps the cheese melt evenly and creates a glossy finish. If you prefer a thicker sauce, mix a bit of the sauce with the filling before stuffing.
- Bake the shells. Place the baking sheet in the preheated oven and bake for 20 minutes. The cheese should be melted and the shells tender. At this point, you’ll notice the edges starting to pull away, signaling that the shells are almost ready.
- Broil for the finish. Switch the oven to broil mode and broil the shells for 2–3 minutes, or until the top is bubbling and slightly crisp. This step creates that coveted caramelized crust that shatters like thin ice when you bite. Watch closely—broilers can vary, so keep a safe distance to prevent burning.
- Rest and serve. Remove the baking sheet from the oven and let the shells rest for 5 minutes. This allows the cheese to set slightly, making it easier to serve without it oozing everywhere. Plate the shells, sprinkle with fresh herbs, and drizzle a little extra marinara if desired. Serve immediately while the cheese is still molten.
That’s it — you did it. But hold on, I’ve got a few more tricks that'll take this to another level…
Insider Tricks for Flawless Results
The Temperature Rule Nobody Follows
Many cooks bake stuffed shells at a higher temperature, hoping for a faster cook. I’ve discovered that 375°F (190°C) is the sweet spot that allows the shells to cook evenly without overbrowning the cheese. Lower temperatures can result in soggy shells, while higher temperatures can cause the cheese to burn before the pasta is done. Keep the oven at 375°F and trust the process.
Why Your Nose Knows Best
During baking, the aroma of melting cheese and caramelized sausage will start to fill the kitchen. Use this as a cue to check the shells. When the scent is rich and slightly nutty, the shells are almost ready. Trust your senses; they’re more reliable than a timer when it comes to cooking.
The 5-Minute Rest That Changes Everything
Allowing the shells to rest after broiling is not just a courtesy; it’s essential. This brief pause lets the cheese set, preventing it from spilling everywhere when you plate the dish. A quick 5‑minute rest also lets the flavors meld, making each bite more cohesive. Skip this step, and you’ll end up with a messy, under‑seasoned plate.
Breadcrumbs for Crunch
Adding breadcrumbs to the top before broiling creates a delightful crunch that contrasts the gooey interior. Use panko for extra crunch or regular breadcrumbs for a subtle texture. Toast the breadcrumbs in a small pan with a splash of olive oil before sprinkling them on the shells for an extra layer of flavor.
Make‑Ahead Magic
If you’re planning a dinner party, assemble the shells the night before. Store them covered in the refrigerator, then bake them fresh in the morning. This saves time and ensures each guest gets a hot, freshly baked shell. Just remember to add a splash of marinara before broiling to keep the tops moist.
Cheese Variations for the Adventurous
Swap mozzarella for provolone or fontina for a deeper, richer flavor. Adding a sprinkle of smoked gouda can give the dish a subtle smoky undertone. For a tangy twist, incorporate a tablespoon of feta into the filling. Experimenting with cheeses is a great way to keep the dish exciting.
Creative Twists and Variations
This recipe is a playground. Here are some of my favorite ways to switch things up:
Spicy Jalapeño Shells
Add diced jalapeños to the sausage mixture for a fiery kick. The heat pairs beautifully with the creamy cheese, creating a contrast that’s both comforting and exciting. This variation is perfect for those who like a little heat.
Spinach & Feta Surprise
Fold in a cup of sautéed spinach and a tablespoon of crumbled feta. The spinach adds a subtle earthiness while the feta introduces a tang that balances the richness of the sausage. This version is a great way to sneak in some greens.
Vegan Delight
Use a plant‑based sausage and replace all dairy cheeses with vegan mozzarella, vegan ricotta, and nutritional yeast for a cheesy flavor. This version is completely dairy‑free yet still satisfies the craving for gooey, cheesy goodness.
Cheddar & Bacon Boost
Crack in a handful of cooked, crumbled bacon and ¼ cup shredded cheddar. The bacon adds smoky crunch, while cheddar gives a sharp, melty contrast to the mozzarella. This variation is a hit with bacon lovers.
Herb‑Infused Parmesan
Blend fresh oregano, thyme, and rosemary into the Parmesan. This gives the top layer a fragrant, herbal aroma that elevates the dish to a gourmet level. It’s a simple tweak that makes a big difference.
Sun‑Dried Tomato Twist
Chop sun‑dried tomatoes and mix them into the filling. The tomatoes add a sweet, umami burst that complements the sausage. This variation is ideal for those who enjoy a bit of Mediterranean flair.
Storing and Bringing It Back to Life
Fridge Storage
Store cooked shells in an airtight container for up to 3 days in the refrigerator. The filling may firm up slightly, but reheating will restore its creamy texture. When ready to serve, reheat in a 350°F oven for 10–12 minutes.
Freezer Friendly
Freezer‑freeze assembled shells (not baked) for up to 2 months. Wrap tightly in plastic wrap and place in a freezer bag. When ready to cook, bake directly from frozen at 375°F for 25–30 minutes, then broil for 2 minutes to finish.
Best Reheating Method
To bring frozen or refrigerated shells back to life, add a splash of water to the baking dish before reheating. The steam helps keep the shells moist and prevents the cheese from drying out. Heat at 350°F for 10–12 minutes, then broil for 2 minutes for a crisp top.