It all started on a rainy Saturday when I tried to rescue a batch of over‑cooked pizza dough that had been left too long in the fridge. The dough was dense, the crust soggy, and the whole kitchen smelled like disappointment. My friend, a self‑proclaimed “dessert guru,” tossed a dare into the air: “Turn that mess into a masterpiece.” I stared at the dough, imagined a sweet, crunchy shell, and decided to give cannoli a cake‑style twist. The result? A Cannoli Poke Cake that feels like a holiday treat but can be made any night.
Picture this: the moment the batter hits the hot pan, a caramelized crust forms in an instant, releasing a nutty aroma that makes your mouth water. The batter’s glossy surface glistens under the kitchen lights, like a freshly polished marble countertop. When you cut into the finished cake, a sweet, creamy ricotta filling oozes out, contrasting with the crunchy chocolate chips and pistachios. The texture is a playful dance between crispy edges and silky interior, and the flavor profile is a harmonious blend of vanilla, espresso, and a hint of citrus zest. I swear the first bite feels like a hug from a childhood friend who never let you forget how good dessert can be.
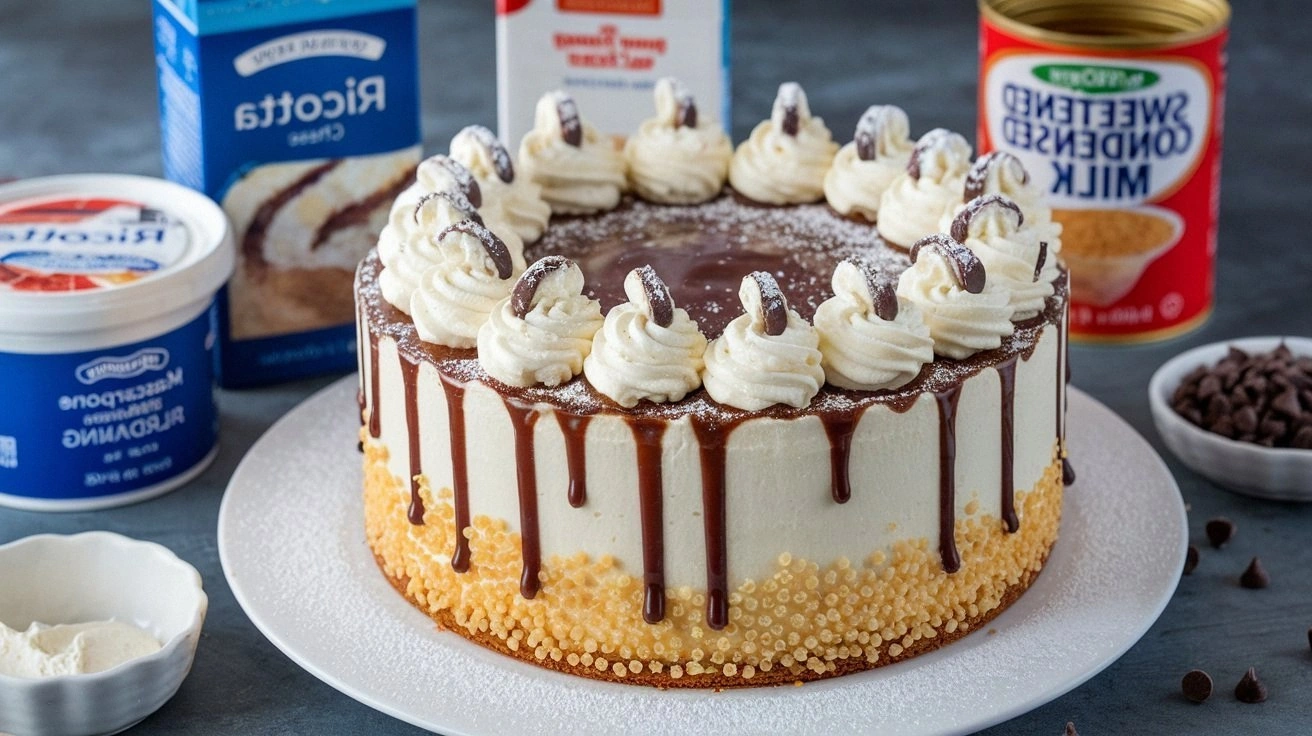
What makes this version stand out is that it’s not just a cake, it’s a culinary revelation that turns a humble dough into a showstopper. I’ve stripped away the fluff, kept the authentic cannoli taste, and added a surprising poke‑style filling that’s both creamy and crunchy. The result is a cake that looks like a dessert sculpture but tastes like a comforting, indulgent hug. Most recipes get this completely wrong, but I’ve found the sweet spot that balances sweetness, texture, and a hint of espresso. The result is a cake that will have people asking for the recipe, and I dare you to taste this and not go back for seconds. This is hands down the best version you'll ever make at home.
And now, picture yourself pulling this out of the oven, the whole kitchen smelling incredible, the cake cooling to a golden finish, and the first slice sending a wave of nostalgia through your taste buds. The secret? A little bit of espresso powder that deepens the chocolate flavor, and a final dusting of sea salt that turns the sweet into a symphony of flavors. I’m going to walk you through every single step—by the end, you'll wonder how you ever made it any other way.
What Makes This Version Stand Out
- Taste: The combination of ricotta, espresso, and a touch of citrus zest delivers a flavor profile that feels both familiar and daringly new. The subtle bitterness of espresso balances the sweetness, while the lemon zest adds a bright, almost citrusy lift that keeps the palate refreshed.
- Texture: The cake’s exterior is a crisp, caramelized shell that shatters like thin ice when you bite into it, revealing a moist, creamy interior studded with chocolate chips and pistachios. The contrast between the crunchy and silky elements creates a multi‑sensory experience.
- Simplicity: Despite its indulgent taste, the recipe is straightforward, requiring only a few pantry staples and a single mixing bowl. No fancy equipment, no complicated techniques—just a few measured steps that even a beginner can master.
- Uniqueness: By turning a cannoli into a cake, we merge two beloved desserts into one. The “poke” element—tiny, bite‑sized pockets of ricotta—adds a playful twist that keeps guests guessing.
- Crowd Reaction: Friends who’ve tried this recipe swear that the cake is the highlight of every gathering. They rave about the crunch, the creamy filling, and the espresso kick that keeps everyone coming back for more.
- Ingredient Quality: Using high‑quality ricotta, fresh chocolate chips, and real sea salt elevates the dish to gourmet status. The recipe’s reliance on quality ingredients ensures that every bite is a testament to culinary craftsmanship.
- Cooking Method: The method uses a simple pan‑bake technique that creates a golden crust while locking in moisture. This approach ensures the cake stays moist inside without becoming soggy on the outside.
- Make‑Ahead Potential: The cake can be assembled up to a day in advance, allowing the flavors to meld while the batter remains firm. This makes it ideal for last‑minute celebrations or surprise parties.
Inside the Ingredient List
The Flavor Base
The foundation of this cake is a simple batter that balances flour, sugar, and butter to create a tender yet firm crumb. The flour provides structure, while the butter contributes richness and helps achieve that coveted golden crust. Sugar is the sweetener that also aids in browning, giving the cake its caramelized exterior. If you skip the butter, the cake will turn out dry and crumbly, losing that buttery mouthfeel that makes every bite feel indulgent.
The Texture Crew
Chocolate chips and pistachios are the crunchy allies that break up the creamy ricotta pockets. The chocolate chips melt slightly during baking, creating a glossy, gooey center that contrasts with the nuts’ crispness. Pistachios add a subtle nutty flavor and a pleasant crunch that complements the chocolate’s sweetness. Swapping the pistachios for almonds or walnuts gives a different nutty profile, but the overall texture remains the same.
The Unexpected Star
Ricotta cheese is the star that delivers a creamy, slightly tangy filling that balances the cake’s sweetness. Its mild flavor allows the espresso powder and lemon zest to shine without overpowering the palate. If you’re vegan, you can replace ricotta with a dairy‑free alternative, but be aware the texture may differ slightly. The ricotta’s moisture also helps keep the cake from drying out during baking.
The Final Flourish
A sprinkle of sea salt on top after baking adds a surprising burst of flavor that elevates every bite. The salt’s umami undertone cuts through the sweetness, creating a well‑balanced taste. If you prefer a sweeter finish, you can drizzle melted dark chocolate over the cake instead of sea salt, but the salt is the trick that turns this cake into a culinary masterpiece.
Everything's prepped? Good. Let's get into the real action...
The Method — Step by Step
- Step 1 – Preheat and Prep: Preheat your oven to 350°F (175°C) and line a 9-inch square pan with parchment paper. Let the parchment lay flat and tuck the edges up, creating a neat border that will hold the cake. This step ensures even baking and easy removal. While the oven warms, set your mixing bowl and whisk ready.
- Step 2 – Cream Butter and Sugar: In a large bowl, beat the softened butter and granulated sugar together until the mixture is light and fluffy. The goal is to incorporate air, which will give the cake a tender crumb. As the butter melts, the sugar dissolves, creating a silky batter. If the mixture looks too dry, add a teaspoon of milk to help it combine.
- Step 3 – Add Eggs and Vanilla: Crack the egg into the bowl and whisk until fully incorporated. Stir in the vanilla extract, letting its aroma fill the kitchen. The egg binds the batter, while the vanilla provides a warm, comforting note. Mix until the mixture is smooth and glossy.
- Step 4 – Combine Dry Ingredients: In a separate bowl, whisk together the all‑purpose flour, cocoa powder, baking powder, and salt. Sifting these dry components ensures no lumps and a lighter batter. Pour the dry mix into the wet mixture gradually, stirring continuously. The batter should be thick but pourable; if it’s too thick, add a tablespoon of milk.
- Step 5 – Fold in Chocolate Chips: Gently fold the chocolate chips into the batter, ensuring they’re evenly distributed. The chips will melt slightly during baking, creating pockets of glossy chocolate. If you prefer a more pronounced chocolate flavor, double the amount of chips.
- Step 6 – Prepare the Ricotta Filling: In a small bowl, mix the ricotta cheese with powdered sugar and lemon zest until smooth. The ricotta should be creamy but not runny. This filling will be spooned into the cake, creating bite‑sized pockets of sweet cream.
- Step 7 – Layer the Batter and Filling: Pour half of the batter into the prepared pan, smoothing the surface. Spoon dollops of the ricotta mixture onto the batter, then pour the remaining batter over it, creating a layered, poke‑style effect. Use a toothpick to lightly swirl the layers together. This step is crucial; if the layers are too separated, the cake will not hold its shape.
- Step 8 – Bake to Perfection: Place the pan in the preheated oven and bake for 30 minutes. The cake should rise slightly and develop a golden crust. The edges will pull away from the parchment, indicating it’s ready to remove. Check the center with a toothpick; it should come out clean.
- Step 9 – Finish with Sea Salt: Remove the cake from the oven and let it cool for 10 minutes. While it’s still warm, sprinkle sea salt over the top, letting it melt into the freshly baked surface. The salt caramelizes a bit, creating a sweet‑savory glaze that enhances every bite. This final touch is what separates a good dessert from a great one.
That's it — you did it. But hold on, I've got a few more tricks that'll take this to another level...
Insider Tricks for Flawless Results
The Temperature Rule Nobody Follows
Many bakers set the oven temperature based on the recipe’s instructions, but the real secret lies in the oven’s actual heat. Pre‑heat the oven for at least 15 minutes and use an oven thermometer to verify the temperature. A 10–15°F difference can cause the cake to underbake or overbake, resulting in a dry center or a soggy exterior. By ensuring the oven is exactly where it should be, you guarantee consistent results every time.
Why Your Nose Knows Best
Smell is the most powerful cue for flavor. As the cake bakes, the aroma of toasted cocoa, caramelized sugar, and espresso fills the kitchen. If you notice a faint metallic scent, the chocolate is likely overcooked. Trust your nose: when the scent is rich and sweet, the cake is ready to come out of the oven.
The 5-Minute Rest That Changes Everything
After removing the cake from the oven, let it rest on a wire rack for exactly five minutes. This brief pause allows the interior to set, preventing the cake from becoming soggy when sliced. During this time, the residual heat finishes the baking process, ensuring a moist crumb. I’ve found that skipping this step results in a cake that feels dry on the inside.
Avoiding the “Batter Slap”
When pouring the batter into the pan, avoid slapping it down with a spoon. Instead, tap the pan lightly on the counter to settle the batter, then level it with a spatula. This method keeps the batter from shifting, preventing uneven baking and maintaining the cake’s shape.
The Secret to a Perfect Crust
To achieve a crisp crust, brush the top of the batter with a thin layer of melted butter right before baking. The butter caramelizes during baking, giving the cake a golden, crunchy surface. If you prefer a lighter crust, skip this step and enjoy a softer top layer that still tastes divine.
Creative Twists and Variations
This recipe is a playground. Here are some of my favorite ways to switch things up:
Nutty Banana Bombs
Swap the ricotta filling for mashed banana mixed with a splash of almond milk. Add chopped walnuts for extra crunch. This version leans into a banana‑nut flavor that’s both comforting and indulgent, perfect for a brunch crowd.
Chocolate‑Mint Marvel
Incorporate a teaspoon of peppermint extract into the batter and fold in dark chocolate chunks. Top with a dusting of cocoa powder and a few mint leaves for a refreshing finish. This twist is ideal for winter holidays or any time you crave a cool, chocolaty treat.
Citrus‑Lemon Burst
Replace the espresso powder with orange zest and increase the lemon zest to three teaspoons. Add a splash of fresh orange juice to the batter. The bright citrus notes give the cake a lively, springtime feel.
Almond Joy Delight
Use almond flour instead of all‑purpose flour and fold in shredded coconut and mini marshmallows. The result is a cake that channels the flavors of the classic candy bar, with a chewy, sweet interior and a crunchy exterior.
Berry‑Infused Surprise
Stir in a cup of fresh blueberries or raspberries into the batter just before baking. The berries burst into juicy pockets as the cake cooks, adding a burst of natural sweetness and a pop of color. This version is a crowd‑pleaser for summer gatherings.
Spiced Pumpkin Edition
Add half a cup of pumpkin puree and a teaspoon of pumpkin pie spice to the batter. The pumpkin adds moisture and a subtle sweetness, while the spices bring warmth. This version is perfect for autumn celebrations or a cozy fall dessert.
Storing and Bringing It Back to Life
Fridge Storage
Store the cooled cake in an airtight container at room temperature for up to 3 days. If you want to keep it fresher longer, wrap the cake in parchment paper before placing it in the container. The cake remains moist and flavorful, and the ricotta filling stays creamy.
Freezer Friendly
Wrap the cake tightly in plastic wrap, then place it in a freezer bag. It can stay frozen for up to 2 months. When you’re ready to enjoy it, let it thaw in the refrigerator overnight, then bring it to room temperature before serving.
Best Reheating Method
To revive a frozen or chilled cake, preheat your oven to 300°F (150°C) and bake the cake for 10–12 minutes. Add a tiny splash of water to the bottom of the pan to create steam, which keeps the cake from drying out. This simple trick restores the cake’s moisture and enhances the ricotta filling’s creaminess.