I remember the night I was in a culinary crisis: my kitchen smelled like burnt toast, my skillet was a blackened mess, and I had no idea how to salvage a batch of overcooked beans. I stared at the can of black beans, the same one that had survived countless other experiments, and thought, “If I can turn this into something delicious, I’ll finally have a recipe that doesn’t end in disaster.” That moment sparked a fire in me that still burns every time I pull a fresh batch of taquitos from the oven. The aroma that follows—a warm, earthy scent of cumin mingled with the bright pop of fresh cilantro—prepares the palate even before the first bite. The sizzle as the tortillas hit the hot pan is a soundtrack that says, “This is going to be good.”
Picture yourself pulling these taquitos from the oven, the whole kitchen smelling incredible, the edges crisping to a golden brown that shatters like thin ice. The first bite is a burst of creamy cheese melting into the smoky beans, followed by a subtle heat from the jalapeño that dances across your tongue. The texture is a harmonious contrast: a crunchy shell, a soft, hearty filling, and a whisper of fresh green onion that adds a bright, almost citrusy note. I dare you to taste this and not go back for seconds. I’ve been honest—half the batch vanished before anyone else could try it.
Most recipes get this completely wrong. They either overcook the beans, under-season the filling, or let the tortillas become soggy. The secret to my version is a simple, almost magical technique that ensures every taquito is crisp, flavorful, and ready to be devoured. It’s a blend of timing, seasoning, and a touch of love that turns a humble can of beans into a crowd-pleasing appetizer. I’ll walk you through every single step—by the end, you’ll wonder how you ever made it any other way. This isn’t just a recipe; it’s a culinary revelation that will become your new go-to for parties, game nights, or a quick weeknight dinner.
Let me walk you through every single step—by the end, you’ll wonder how you ever made it any other other way. The journey starts with a simple can of black beans, a handful of cheese, and a handful of fresh herbs that together create a flavor profile that is both comforting and exciting. The technique is so straightforward that even a kitchen rookie can master it, yet the result feels like something you would find in a high-end taqueria. And if you’re skeptical, just wait until you see the first bite: the cheese melts into a velvety sauce that coats the beans like velvet, while the tortillas stay crisp and flaky. It’s a perfect marriage of texture and taste that will keep you coming back for more.
What Makes This Version Stand Out
Flavor: The combination of cumin, chili powder, and garlic powder creates a depth that is unmistakably Mexican, yet the fresh cilantro and green onions add a bright, almost citrusy lift that cuts through the richness of the cheese.
Crispiness: The tortillas are fried to a golden perfection that provides a satisfying crunch with every bite, unlike the soggy, microwaved alternatives many people fall back on.
Ease: With just a few pantry staples and a 30‑minute cook time, this recipe is a breeze for busy weeknights, yet it still feels gourmet enough for a weekend gathering.
Flexibility: Swap the Monterey Jack for a sharper cheddar, or add a splash of lime juice for a tangy twist—each variation keeps the base intact while offering a new flavor profile.
Make‑Ahead: The assembled taquitos can be stored in the fridge for up to 48 hours or frozen for longer, making them a perfect make‑ahead snack for busy families.
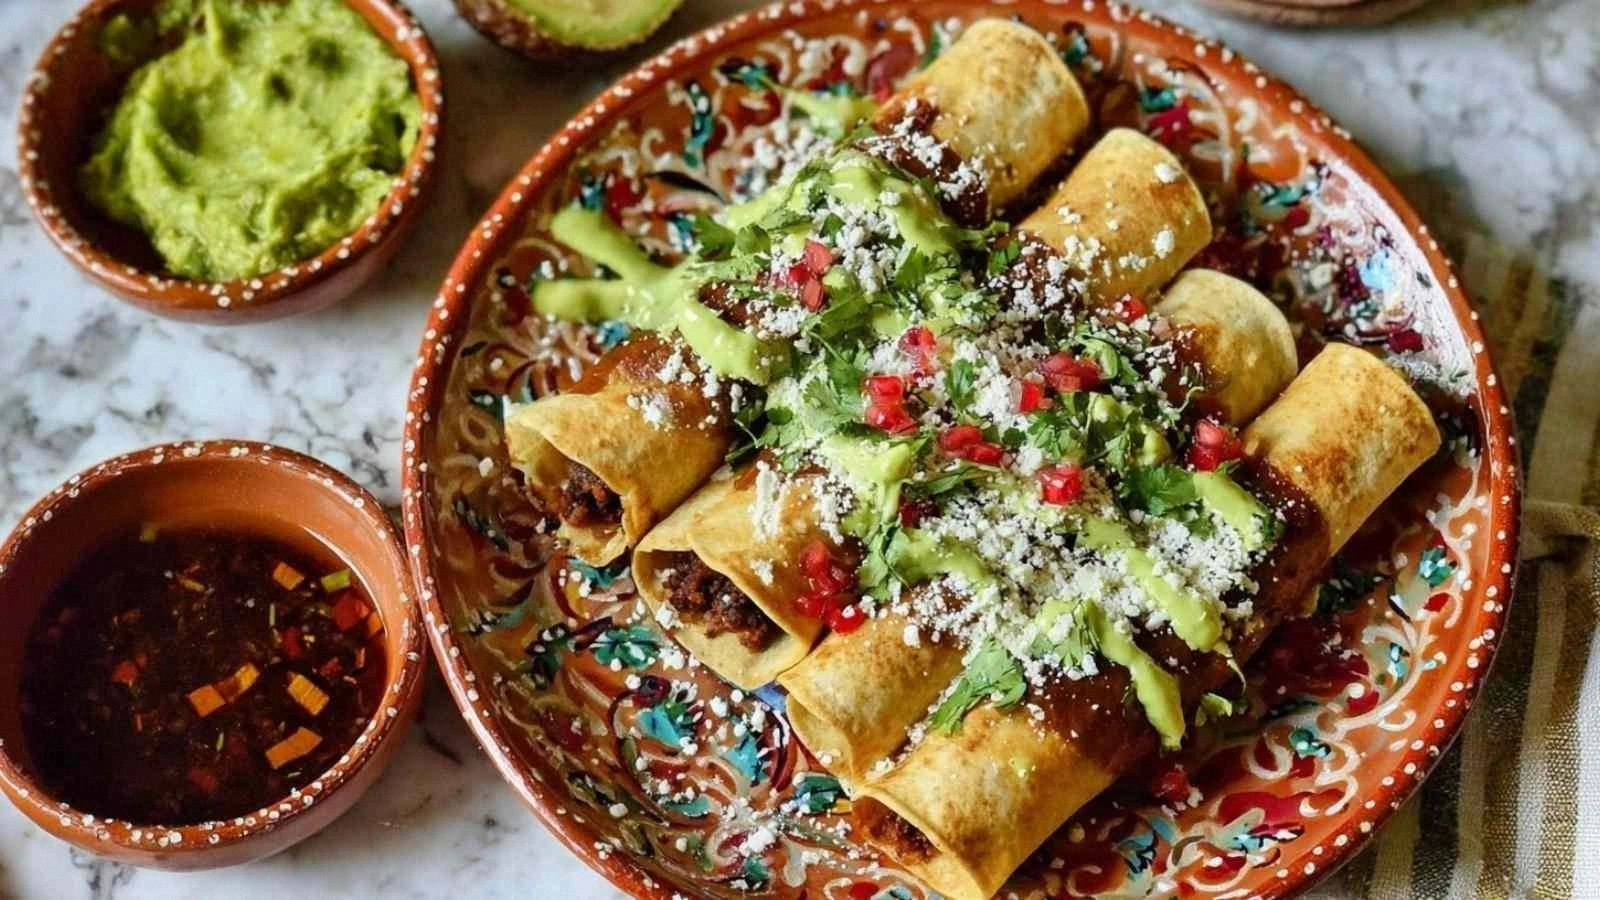
Presentation: Served on a rustic wooden platter with a side of guacamole, these taquitos look as good as they taste, making them a visual highlight at any gathering.
Nutrition: Packed with protein from beans and cheese, and fiber from the tortillas, this dish offers a balanced meal that satisfies without the guilt.
Community: Friends and family rave about the flavor and texture—most people ask for a second plate before the first one finishes, proving the recipe’s crowd‑pleasing power.
Alright, let’s break down exactly what goes into this masterpiece…
Inside the Ingredient List
The Flavor Base
The 15‑oz can of black beans is the heart of this dish, offering a creamy texture that balances the crispness of the tortilla. The beans should be rinsed and drained to reduce excess sodium, which helps keep the seasoning from overpowering the natural flavor. If you prefer a thicker filling, mash half of the beans with a fork before adding the rest; this creates a velvety consistency that clings to the tortilla. Skipping the beans would strip the dish of its hearty, protein‑rich core, making it a flimsy, unsatisfying snack. When selecting a can, look for one that’s low in sodium or choose a plain variety to have full control over the seasoning.
The cumin adds a warm, earthy undertone that’s essential for an authentic Mexican flavor. A pinch of cumin can make or break the dish, so don’t be shy about adding a generous amount. If you’re sensitive to cumin’s heat, use a mild variety or reduce the quantity slightly. Cumin pairs beautifully with the subtle sweetness of the beans, creating a flavor profile that is both comforting and exciting. Remember, cumin’s aroma is a key indicator of freshness—if it smells dull, consider buying a new jar.
Chili powder brings a gentle heat and depth that complements the cumin and garlic powder. It also adds a subtle smoky note that enhances the overall flavor. If you’re new to chili powder, start with a small amount and adjust to taste; too much can overpower the delicate balance of the dish. This spice is versatile—feel free to experiment with different blends, such as a smoky chipotle or a sweet ancho, to customize the heat level. The result is a filling that’s complex yet approachable, suitable for both seasoned foodies and beginners.
Garlic powder provides a subtle, sweet bite that rounds out the savory profile of the beans. It’s a convenient alternative to fresh garlic, especially when you’re short on time. If you’re a garlic lover, consider adding a dash of freshly minced garlic to intensify the flavor. However, be careful not to overdo it, as garlic can quickly dominate the dish. This spice works best when blended evenly with the other seasonings, ensuring a harmonious taste that lingers on the palate.
The Texture Crew
The shredded Monterey Jack or cheddar cheese is the creamy, melty component that binds the filling together. It also provides a rich, buttery flavor that contrasts with the earthy beans. If you’re looking for a sharper bite, cheddar offers a more robust taste, while Monterey Jack delivers a milder, buttery finish. The cheese should be at room temperature before adding it to the mixture; this ensures it melts evenly without clumping. Skipping the cheese would result in a dry, uncoated filling that lacks the luscious, gooey texture that makes these taquitos irresistible.
Green onions add a fresh, oniony crunch that brightens the dish and provides a subtle sharpness. They also contribute a mild, slightly sweet flavor that balances the heat from the jalapeño. When chopping green onions, include both the white and green parts for a layered flavor profile. If you’re not a fan of raw onions, lightly sauté them before adding them to the filling to mellow their bite. The green onions also add a pop of color, making the dish visually appealing.
Fresh cilantro offers a bright, citrusy note that cuts through the richness of the cheese and beans. Its aroma is unmistakably fresh, and it adds a layer of complexity that elevates the dish from simple to extraordinary. The cilantro should be washed thoroughly and chopped finely to release its oils. If you’re sensitive to cilantro, consider using parsley as a substitute, although it will change the flavor profile. The absence of cilantro would make the dish less vibrant and slightly flat.
The jalapeño provides a kick of heat that adds excitement to each bite. It also contributes a subtle green color that makes the filling visually appealing. Slice the jalapeño finely to ensure even distribution of heat throughout the filling. If you prefer a milder dish, remove the seeds and membranes before slicing; this reduces the heat without compromising flavor. A well‑balanced jalapeño is the difference between a bland and a memorable dish.
The Unexpected Star
The corn tortillas are the vehicle that carries the filling to your taste buds. They should be soft enough to fold without breaking, yet sturdy enough to hold the beans and cheese. Warm the tortillas in a dry skillet or microwave before filling to make them pliable and prevent them from tearing. Using corn tortillas instead of flour adds a subtle sweetness and a firmer texture that complements the filling. If you’re unable to find corn tortillas, flour tortillas can be used, but the flavor profile will shift slightly.
Cooking spray or neutral oil is essential for achieving that coveted golden crispness. The oil creates a barrier that prevents the tortillas from sticking to the pan and allows them to develop a crunchy exterior. A light coating is enough; too much oil can make the taquitos greasy. If you’re looking to reduce calories, consider using a spray instead of pouring oil. Skipping the oil entirely will result in a soggy, unappetizing texture.
Salt to taste is the final seasoning that ties all the components together. It’s crucial to season the filling and the tortillas separately to avoid a salty overload. Use a pinch of salt on the filling and a light dusting on the tortillas after frying. Salt enhances the flavors of the beans, cheese, and spices, creating a harmonious balance. Too much salt can overpower the dish, so be mindful of the amount you add.
The Final Flourish
The combination of beans, cheese, and spices creates a filling that is both hearty and flavorful. The filling should be warm and creamy, with the cheese melted and the spices evenly distributed. When assembling the taquitos, use a small amount of filling to prevent overfilling, which can cause the tortillas to tear. The filling’s consistency should be thick enough to stay inside the tortilla but not so thick that it clumps. A well‑balanced filling is the cornerstone of a successful taquito.
The final step is to fry the assembled taquitos until they’re golden brown and crispy. The heat should be medium to medium‑high; too low and the tortillas will become soggy, too high and they’ll burn. Use a non‑stick skillet for even cooking and to prevent sticking. The frying process also allows the flavors to meld, creating a cohesive taste that’s greater than the sum of its parts. A well‑fried taquito is an edible masterpiece that satisfies both the eyes and the palate.
Everything’s prepped? Good. Let’s get into the real action…
The Method — Step by Step
- Prep the Filling: Drain the black beans and place them in a medium bowl. Add the shredded cheese, chopped green onions, cilantro, jalapeño, cumin, chili powder, garlic powder, and a pinch of salt. Toss everything together until the beans are coated with the spices and the cheese is evenly distributed. The filling should feel moist but not runny; if it’s too dry, add a splash of water or a bit of cheese to moisten it. This step ensures a flavorful base that will carry the taquitos.
- Warm the Tortillas: Heat a large skillet over medium heat and lightly spray it with cooking oil. Warm each tortilla for about 20 seconds on each side, just until pliable. Keep the tortillas warm by wrapping them in a clean towel while you work on the filling. Warm tortillas are less likely to tear when you roll them, which is essential for a clean presentation. The tortillas should feel soft enough to fold without resistance.
- Assemble the Taquitos: Spoon a generous amount of the bean mixture onto the center of each tortilla. Fold the sides in, then roll tightly from the bottom up. If the filling spills, use a small spoon to push it back inside. The goal is a neat, compact roll that holds together when fried. A well‑assembled taquito will keep its shape and flavor during the frying process.
- Heat the Oil: Pour about 1 tablespoon of neutral oil into the skillet and let it heat until shimmering but not smoking. The oil should be hot enough that a drop of water sizzles and evaporates almost immediately. This temperature ensures a crisp exterior while cooking the filling evenly. If the oil is too cool, the taquitos will absorb too much oil and become greasy. If it’s too hot, the tortillas will burn before the filling heats through.
- Fry the Taquitos: Gently place the rolled taquitos in the skillet, seam side down, and fry for 2–3 minutes on each side. Watch for the edges to turn golden brown and the cheese inside to melt. The key is to maintain a steady medium heat; adjust the flame as needed. A well‑fried taquito will have a crunchy shell that gives way to a warm, melty interior. Flip carefully to avoid tearing the tortilla.
- Drain Excess Oil: Once all taquitos are fried, transfer them to a paper towel‑lined plate to absorb any excess oil. This step keeps the taquitos from becoming soggy and maintains that crisp exterior. The paper towels will also absorb any stray oil that could make the plate greasy. Make sure to leave them on the plate for a minute to let the excess drip off. The result is a clean, appetizing plate of taquitos.
- Let Them Rest: Allow the taquitos to rest for 1–2 minutes before serving. This short rest lets the cheese set slightly, preventing it from oozing out when you bite into them. It also gives the filling time to cool a touch, which makes the first bite less hot. Resting the taquitos also allows the flavors to meld together for a more cohesive taste. This small step elevates the overall eating experience.
- Plate and Serve: Arrange the taquitos on a platter, optionally drizzling a little lime juice over the top for extra brightness. Serve with a side of guacamole, salsa, or a simple lime‑coriander dip to complement the flavors. The presentation should be colorful and inviting, with the green cilantro and jalapeño slices adding a pop of color. The aroma of freshly fried taquitos will draw everyone to the table. And remember, the best part is sharing them with friends and family.
That’s it — you did it. But hold on, I’ve got a few more tricks that will take this to another level and help you avoid the most common pitfalls.
Insider Tricks for Flawless Results
The Temperature Rule Nobody Follows
Many cooks assume that a higher heat will always give a crispier result, but that’s not always true. The key is to maintain a steady medium heat that allows the filling to heat through without burning the tortilla. If you’re unsure, test the oil by sprinkling a single bean in the skillet; if it sizzles immediately, you’re good. If the oil smokes, lower the flame; if the filling takes too long to heat, increase it slightly. Consistency is crucial for even cooking, and a steady temperature ensures every taquito is golden and delicious.
Why Your Nose Knows Best
The aroma of cumin and garlic powder is a powerful indicator that your filling is properly seasoned. When the beans begin to emit a warm, nutty scent, it’s a sign that the spices are fully integrated. If the beans smell bland, give them a few more minutes of seasoning or add a pinch more cumin. The smell is a reliable cue that the flavors are balanced before you even taste them. Trust your nose; it’s a seasoned chef’s secret weapon.
The 5‑Minute Rest That Changes Everything
After frying, a brief rest period lets the cheese set slightly, preventing it from oozing out when you bite. This rest also allows the spices to settle into the beans, creating a more cohesive flavor profile. A friend tried skipping this step and ended up with a gooey mess that was difficult to eat. The rest period is a small investment that pays off with a cleaner, more refined bite. Even seasoned chefs recommend it for the best results.
The Secret to Crispy Tortillas
The tortilla’s crispness is largely determined by the oil’s temperature and the amount of oil used. Use a light spray instead of pouring oil, which keeps the taquitos from becoming greasy. If you’re using a cast‑iron skillet, preheat it slowly to avoid hot spots that burn the tortillas. The key is a quick, high‑heat sear that locks in the exterior while keeping the interior tender. This technique is often used by professional chefs to achieve that perfect crunch.
The Perfect Filling Consistency
The filling should be thick enough to stay inside the tortilla but not so thick that it clumps. Adding a splash of water or a bit of cheese can help achieve the right consistency. If the mixture is too dry, the tortillas will tear; if it’s too wet, the taquitos will become soggy. A quick test is to press a small amount of the filling between your fingers; it should hold shape but still be pliable. Mastering this balance is the difference between a mediocre and a spectacular dish.
The Power of Fresh Herbs
Fresh cilantro and green onions add brightness and a burst of flavor that cuts through the richness of the cheese and beans. Chop them finely to distribute their flavors evenly. If you’re not a fan of cilantro, parsley can be a good substitute, though it will change the flavor profile slightly. Adding a splash of lime juice just before serving will enhance the freshness and add a citrusy zing that lifts the dish. The herbs are the final touch that elevates the entire experience.
Creative Twists and Variations
This recipe is a playground. Here are some of my favorite ways to switch things up:
Spicy Chipotle Taquitos
Swap the jalapeño for a tablespoon of chipotle in adobo for a smoky, spicy kick. Add a splash of adobo sauce to the filling for depth. The result is a bold, smoky flavor that pairs perfectly with a creamy avocado dip. This variation is great for fans of heat who want something more complex than a jalapeño.
Mediterranean Bean Taquitos
Replace the black beans with chickpeas for a Mediterranean twist. Add diced sun‑dried tomatoes and a sprinkle of oregano. Finish with a drizzle of olive oil and a squeeze of lemon juice. The chickpeas provide a nuttier flavor that complements the herbs, creating a fresh, zesty dish.
Cheese‑Only Taquitos
For a low‑carb version, omit the beans entirely and use a mixture of shredded cheese, spinach, and diced bell pepper. The filling will be rich and creamy, with a slight crunch from the pepper. This variation is ideal for keto or low‑carb diners who still crave that classic taquito experience.
Breakfast Taquitos
Add scrambled eggs to the filling and replace the cheese with a sprinkle of shredded cheddar. Toss in a handful of diced ham or bacon for extra protein. These breakfast taquitos are a fun twist that can be served with a side of fresh fruit or a light yogurt dip.
Vegan Taquitos
Use a plant‑based cheese substitute and ensure the tortillas are certified vegan. Add diced bell peppers, corn, and a splash of nutritional yeast for a cheesy flavor. This variation is perfect for those who want a plant‑based option that still delivers on taste and texture.
Sweet & Savory Taquitos
Mix in a tablespoon of maple syrup or agave nectar to the filling for a subtle sweetness that balances the heat. Add diced pineapple or mango for a tropical twist. Serve with a drizzle of honey or a sprinkle of sea salt to finish. This sweet and savory combo is a crowd‑pleaser at parties.
Storing and Bringing It Back to Life
Fridge Storage
Cool the taquitos to room temperature before placing them in an airtight container. Store them in the fridge for up to 48 hours. The crispness may slightly soften, but they’ll still taste great. When ready to serve, let them sit at room temperature for 10 minutes before reheating. This helps restore some of the original texture and flavor.
Freezer Friendly
Wrap each taquito individually in plastic wrap, then place them in a freezer bag. They’ll stay fresh for up to 3 months. When you’re ready to eat, thaw them overnight in the fridge. The individual wrapping prevents them from sticking together and makes portion control easy. Freezing also locks in the flavors for a future feast.
Best Reheating Method
Reheat the taquitos in a 350°F oven for 10–12 minutes, or until they’re heated through. For a crispier finish, place them on a baking sheet and broil for 1–2 minutes. Adding a tiny splash of water before reheating will create steam, restoring the tortilla’s crispness. The oven method preserves the texture better than a microwave, which can make them soggy.