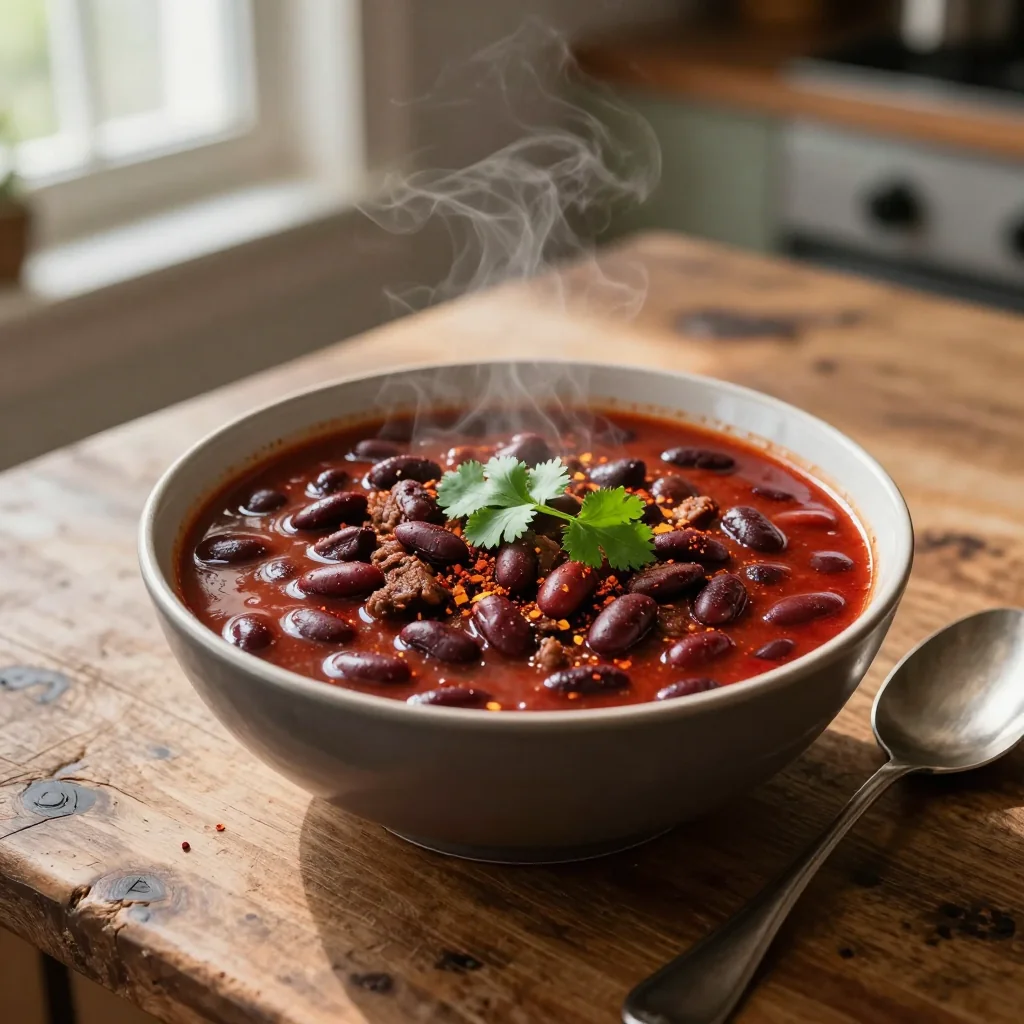
A robust, comforting bowl that blends tender beef, smoky spices, and hearty kidney beans – perfect for any season.

I still remember the first time I tasted a bowl of chili that made my heart race with excitement. It was a chilly autumn evening in a tiny mountain town, and a local chef served me a steaming pot of beef chili that seemed to glow from within. The aroma of cumin, smoked paprika, and a whisper of cayenne wrapped around me like a warm blanket, while the tender beef and plump kidney beans sang in perfect harmony. That moment sparked a lifelong love affair with hearty, spice‑laden soups that can turn any day into a celebration.
Chili, at its core, is a dish that transcends borders. Originating from the American Southwest, it has been embraced worldwide, morphing into countless regional variations. My version leans on the classic Tex‑Mex foundation but adds a touch of depth with fresh bell peppers and a splash of beef broth that keeps the texture silky yet robust. It’s the kind of dish that feels both familiar and adventurous, making it a centerpiece for family gatherings or a solo comfort meal after a long workday.
In this guide, you’ll discover how to build layers of flavor step by step, why each ingredient matters, and how to adapt the recipe for different dietary needs. I’ll also share pro tips that I’ve gathered over years of cooking, from mastering the perfect sear on ground beef to balancing heat without overwhelming the palate. By the end, you’ll have a reliable, crowd‑pleasing chili that you can tweak to suit any taste.
So grab your apron, fire up the stove, and let’s embark on this flavorful journey together. Your taste buds are in for a treat!
🌟 Why This Recipe Will Capture Your Heart
Beef Chili with Kidney Beans is more than just a meal; it’s an experience that delivers comfort, nutrition, and endless versatility.
- ✨ Deep, Layered Flavor: Each spice is added at a strategic moment, allowing the aromatics to bloom before the meat locks them in, resulting in a complex, lingering taste.
- ✨ Balanced Nutrition: Lean ground beef provides high‑quality protein, while kidney beans add fiber, iron, and a satisfying creaminess without excess fat.
- ✨ Easy Scaling: The built‑in portion adjuster lets you serve two, four, or even twelve people without recalculating each ingredient manually.
- ✨ One‑Pot Convenience: All steps happen in the same pot, reducing cleanup and allowing flavors to meld as the dish simmers.
- ✨ Customizable Heat: Adjust the cayenne or add fresh jalapeños for extra kick, or tone it down for a milder family‑friendly version.
- ✨ Perfect for Meal Prep: This chili freezes beautifully, making it a ready‑to‑heat option for busy weekdays.
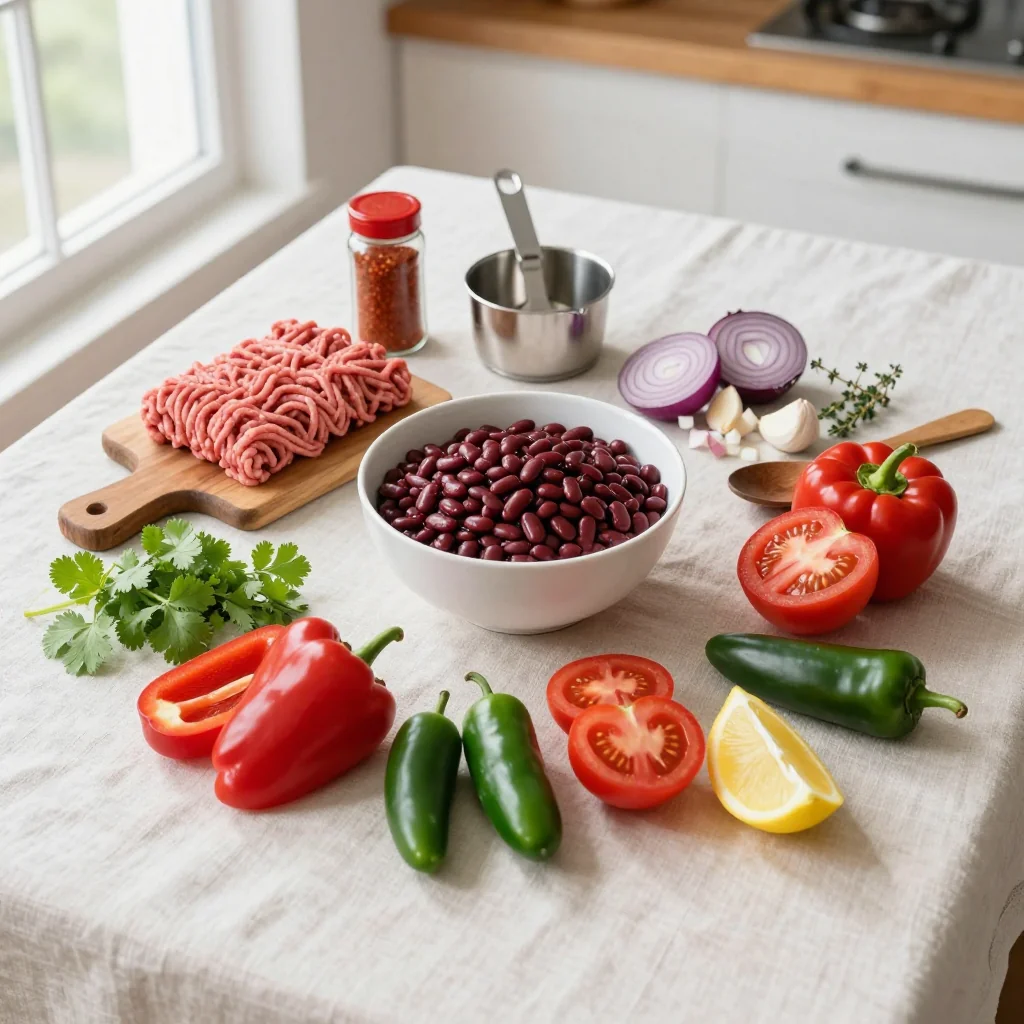
🥗 Ingredients
📝 Complete Ingredient List
For the Chili:
For the Garnish:
🔍 Focus on Key Ingredients
Ground Beef
Ground beef is the backbone of this chili, delivering a rich, meaty flavor that anchors the spices. Choose beef with a modest fat content (15–20%) for juiciness; the fat renders during browning, creating a flavorful base. If you opt for leaner meat, add a tablespoon of olive oil to prevent a dry texture.
Kidney Beans
Kidney beans bring a buttery softness and a subtle earthiness that balances the heat. Rinse canned beans thoroughly to remove excess sodium and improve texture. For a firmer bite, briefly blanch dried beans before adding them to the pot.
Chili Powder & Smoked Paprika
The chili powder provides the classic Southwest heat, while smoked paprika adds a deep, wood‑smoked nuance. Together they create a layered spice profile that deepens as the chili simmers. Adjust the amount of cayenne if you prefer milder or hotter results.
🔄 Quick Substitutions
| If you don’t have… | Use instead… |
|---|---|
| Ground beef | Ground turkey or plant‑based mince |
| Kidney beans | Black beans or pinto beans |
| Beef broth | Vegetable broth or water with a bouillon cube |
👨🍳 Step‑by‑Step Instructions
Follow these detailed steps to create a chili that’s fragrant, flavorful, and perfectly balanced.
📋 Phase 1: Preparation & Mise en Place
Gather, measure, and prep all ingredients before you start cooking.
Dice the vegetables
Begin by dicing the onion, red bell pepper, and green bell pepper into uniform ½‑inch cubes. This ensures even cooking and a consistent texture throughout the chili. Mince the garlic cloves finely; a finer mince releases more aromatic oils during sautéing. Set the diced vegetables aside in a large bowl.
Measure spices and liquids
Scoop out chili powder, cumin, smoked paprika, and cayenne into a small bowl. Stir them together so they blend evenly. Measure the beef broth, diced tomatoes, and drained kidney beans. Having everything measured before you start cooking reduces the risk of over‑cooking or burning.
🔥 Phase 2: Browning & Simmering
Develop flavor through browning and then let the chili meld together.
Sauté aromatics and brown the beef
Heat a large, heavy‑bottomed pot over medium‑high heat. Add olive oil, then the diced onion and bell peppers. Sauté for 4‑5 minutes until they soften and the onion becomes translucent. Push the vegetables to the side, add the ground beef, and break it up with a wooden spoon. Brown the meat for 6‑8 minutes, stirring occasionally, until it loses its pink color and develops a deep, caramelized crust.
Incorporate garlic and spices
Add the minced garlic to the pot and stir for 30 seconds until fragrant. Sprinkle the chili powder, cumin, smoked paprika, and cayenne over the mixture. Cook for another minute, allowing the spices to toast lightly; this releases their essential oils and deepens the flavor profile.
Add tomatoes, broth, and beans
Pour in the diced tomatoes with their juices, followed by the beef broth. Stir to combine, then add the drained kidney beans. Bring the mixture to a gentle boil, then reduce the heat to low and let it simmer uncovered for 30‑35 minutes. Stir occasionally to prevent sticking and to allow the flavors to meld.
✨ Phase 3: Finishing Touches & Serving
Finalize the dish, adjust seasoning, and plate beautifully.
Check seasoning and texture
Taste the chili and season with salt and pepper as needed. If you prefer a richer broth, add a splash more beef broth or a teaspoon of tomato paste. The chili should be thick but still slightly soupy; adjust by simmering longer if it’s too watery.
Prepare garnish
While the chili rests, grate the cheddar cheese, scoop the sour cream into a small bowl, chop fresh cilantro, and slice the avocado. These toppings add contrasting textures and coolness that balance the heat.
Plate and garnish
Ladle generous portions of chili into bowls. Sprinkle shredded cheddar over the top, add a dollop of sour cream, scatter cilantro, and arrange avocado slices on the side. Serve with warm crusty bread or a side of rice if desired.
Enjoy immediately
Serve the chili hot, encouraging guests to stir the toppings into the broth for a burst of flavor. This dish is best enjoyed fresh but also holds up wonderfully for leftovers.
💡 Expert Tips & Tricks
🛒 Choosing the Right Ingredients
Opt for grass‑fed ground beef when possible; it has a richer flavor and better fat distribution. Look for kidney beans that are plump and free of cracks. Fresh bell peppers should feel firm and have glossy skins. If using canned tomatoes, select a brand without added sugar or excessive salt.
🔪 Preparation Techniques
Use a sharp chef’s knife to dice vegetables uniformly; this ensures they cook at the same rate. When browning meat, avoid stirring constantly; let it sit for a minute to develop a crust before flipping. This Maillard reaction adds depth to the final flavor.
🌡️ Mastering the Cooking Process
Keep the heat low once the chili reaches a boil. A gentle simmer allows the beans to absorb the spices without breaking down. If the chili thickens too quickly, add a splash of broth or water. Conversely, if it remains too thin after 35 minutes, uncover and let it reduce.
🍽️ Presentation & Service
Serve the chili in wide, shallow bowls to showcase the vibrant colors of the peppers and beans. A drizzle of lime juice just before serving brightens the flavors. Pair with a rustic wooden spoon for a homestyle feel, and consider a side of cornbread for added texture.
🏆 Pro Chef Secrets
Elevate your chili from great to restaurant‑quality with these professional insights.
- 🎯 Layered Spice Timing: Add half of the chili powder during the sauté stage for a subtle background note, then stir in the remaining half midway through simmering to keep the heat vibrant without overwhelming the palate.
- 🎯 Deglazing for Depth: After browning the beef, pour a splash of beef broth and scrape the fond (brown bits) from the bottom of the pot. This liquid carries concentrated flavor that enriches the entire dish.
- 🎯 Controlled Heat Management: Use a heavy‑bottomed pot to distribute heat evenly, preventing hot spots that can scorch the beans. If the pot begins to stick, lower the flame and add a teaspoon of water.
- 🎯 Finishing with Acid: A squeeze of fresh lime or a dash of apple cider vinegar at the end balances the richness and brightens the spice profile, a technique chefs use to finish many Mexican‑style dishes.
- 🎯 Texture Contrast: For an extra crunch, toast a handful of pumpkin seeds and sprinkle them on top just before serving. The nutty crunch contrasts beautifully with the soft beans.
- 🎯 Freezing Without Sacrificing Flavor: Cool the chili to room temperature, then portion into airtight containers. When reheating, add a tablespoon of broth per serving to restore moisture lost during freezing.
“A great chili is built on patience, balance, and the willingness to let flavors marry over time.” — Chef Thomas Keller
🔄 Variations & Adaptations
This chili is a versatile canvas. Below are several ways to customize it for dietary preferences, flavor cravings, and seasonal twists.
🥬 Vegetarian / Vegan Version
Replace ground beef with a plant‑based mince (such as soy or pea protein) and use vegetable broth instead of beef broth. Add a cup of diced mushrooms for a meaty texture. Top with vegan cheddar and a dollop of cashew‑based sour cream for a fully plant‑based experience.
- Plant‑based mince – 450 g
- Vegetable broth – 240 ml
- Vegan cheddar – 60 g
- Cashew sour cream – 60 g
🌶️ Flavor Variations
Adjust the spice palette to explore new culinary territories. Below are three popular twists.
Spicy Inferno
Double the cayenne, add 1 finely chopped jalapeño, and stir in 1 tsp of chipotle powder for smoky heat. Serve with a drizzle of hot sauce.
Mediterranean Twist
Replace cumin with 1 tsp of dried oregano, add a handful of Kalamata olives, and finish with crumbled feta cheese. The result is a bright, herbaceous chili.
Asian Fusion
Swap smoked paprika for 1 tbsp of hoisin sauce, add 1 tsp of grated ginger, and garnish with sliced green onions and toasted sesame seeds. Serve over jasmine rice for a comforting bowl.
⚠️ Dietary Adaptations
Gluten‑Free
This recipe is naturally gluten‑free. Ensure any broth or canned tomatoes you use are labeled gluten‑free to avoid cross‑contamination.
Lactose‑Free
Omit the cheddar cheese or replace it with a lactose‑free cheese alternative. Use coconut‑based sour cream or a dairy‑free yogurt for the garnish.
Low‑Calorie
Use 90/10 lean ground beef, reduce the oil to a teaspoon, and increase the proportion of vegetables. Serve with a side of cauliflower rice to cut carbs while keeping the dish satisfying.
👶 Kid‑Friendly Version
Tone down the heat by omitting cayenne and reducing chili powder to 1 tbsp. Add a sweet element with ½ cup of corn kernels. Serve with a side of soft tortilla chips for easy scooping.
📦 Storage & Reheating
🧊 Conservation
In the Refrigerator:
- Duration: 4 days
- Recommended container: airtight glass jar
- Tip: Store the garnish separately to keep cheese and avocado fresh.
In the Freezer:
- Duration: 3 months
- Method: Portion into freezer‑safe bags, remove excess air, label with date.
- Defrosting: Thaw overnight in the refrigerator or use the microwave’s defrost setting.
💡 For best texture, reheat gently on the stove and stir in a splash of broth to revive moisture.
♨️ Reheating
🔥 Oven (Recommended):
- Preheat to 180 °C (350 °F).
- Cover the pot with aluminum foil.
- Heat for 20‑25 minutes, stirring halfway.
- Remove foil and continue for 5‑7 minutes to develop a slight crust on the top.
⚡ Microwave (Quick):
- Place portion in a microwave‑safe bowl, cover with a vented lid.
- Heat on medium power for 2‑3 minutes, stir.
- Continue in 30‑second intervals until hot.
🍳 Stovetop:
Transfer to a saucepan, add ¼ cup of broth, and simmer over low heat, stirring frequently, for 5‑7 minutes.
🍷 Perfect Pairings
🥗 Side Dishes
- Fresh Cornbread: A slightly sweet, buttery cornbread balances the heat and adds a comforting texture.
- Simple Green Salad: Mixed greens with a light lime vinaigrette refresh the palate between bites.
- Mexican Rice: Fluffy rice cooked with tomatoes and cilantro soaks up the chili’s flavorful broth.
🍷 Wine & Beverage Pairings
- Zinfandel: Its ripe fruit notes and soft tannins complement the smoky spices.
- Malbec: Offers dark fruit flavors that echo the beef’s richness.
- Non‑Alcoholic: A chilled hibiscus iced tea provides a tart contrast that cuts through the richness.
🍰 Completing the Meal
Begin with a light avocado‑lime starter, follow the chili as the main course, and finish with a silky churro‑style cinnamon doughnut or a slice of lime cheesecake. The sweet‑spicy progression will leave guests delighted.
❓ Frequently Asked Questions
Q: Can I use fresh kidney beans instead of canned?
Yes, you can use dried kidney beans. Soak them overnight, then cook them until tender (about 1‑1½ hours). Drain and add them to the chili during the simmering stage. This method yields a firmer bean texture and reduces sodium.
Q: How do I make the chili less spicy?
Reduce or omit the cayenne pepper, and cut the chili powder in half. Adding a tablespoon of tomato paste or a splash of cream can also mellow the heat. For a quick fix, stir in a dollop of yogurt or extra sour cream before serving.
Q: What’s the best way to store leftover chili?
Cool the chili to room temperature, then transfer it to an airtight container. Refrigerate for up to four days or freeze for up to three months. Keep the garnish separate to maintain texture.
Q: My beans turned mushy—what went wrong?
Over‑cooking the beans can cause them to break down. Add the beans during the last 30 minutes of simmering and keep the heat low. If you prefer firmer beans, pre‑cook them separately and add them just before serving.
Q: Can I substitute the beef broth with another liquid?
Absolutely. Vegetable broth works well for a lighter flavor, while a splash of dark beer adds depth. If you use water, consider adding a bouillon cube or a tablespoon of tomato paste for extra richness.
Q: Is it possible to make this recipe ahead of time?
Yes. Prepare the chili up to the simmering stage, then let it cool and refrigerate. Reheat gently before serving, adding a bit more broth if needed. The flavors actually improve after a few hours as the spices meld.
🎉 Let’s Get Cooking!
This Beef Chili with Kidney Beans is a celebration of bold flavors, comforting textures, and culinary flexibility. From the first aromatic sauté to the final garnish, each step builds a dish that’s both hearty and nuanced. Whether you’re feeding a family, hosting a game‑day gathering, or preparing meals for the week, this chili delivers nutrition, warmth, and satisfaction in every spoonful.
I hope you enjoy making and sharing this recipe as much as I enjoy cooking it. Remember, the beauty of chili lies in its adaptability—feel free to tweak spices, swap proteins, or experiment with toppings. Your personal touch will make each pot uniquely yours.
Have you tried this recipe?
Leave a comment and rating below! Share your photos on Instagram with #BeefChiliLove for a chance to be featured.
Beef Chili with Kidney Beans
A robust, comforting bowl of spicy beef and beans that’s perfect any time of year.
📝 Ingredients
Chili Base
Garnish
👨🍳 Instructions
- 1
Sauté onion and peppers in olive oil until softened.
- 2
Add ground beef and brown thoroughly.
- 3
Stir in garlic and all spices; cook for 1 minute.
- 4
Pour in tomatoes, broth, and beans; bring to a boil.
- 5
Reduce heat and simmer 30‑35 minutes, stirring occasionally.
- 6
Season with salt and pepper; adjust thickness if needed.
- 7
Prepare garnish: shred cheese, scoop sour cream, chop cilantro, slice avocado.
- 8
Ladle chili into bowls and top with garnish.
- 9
Serve hot with crusty bread or rice.
- 10
Enjoy and share your feedback!
🥗 Nutritional Information (per serving)
*Values are estimates based on standard ingredient brands.


💬 Comments & Reviews
Leave a Comment
No comments yet. Be the first to share your thoughts!