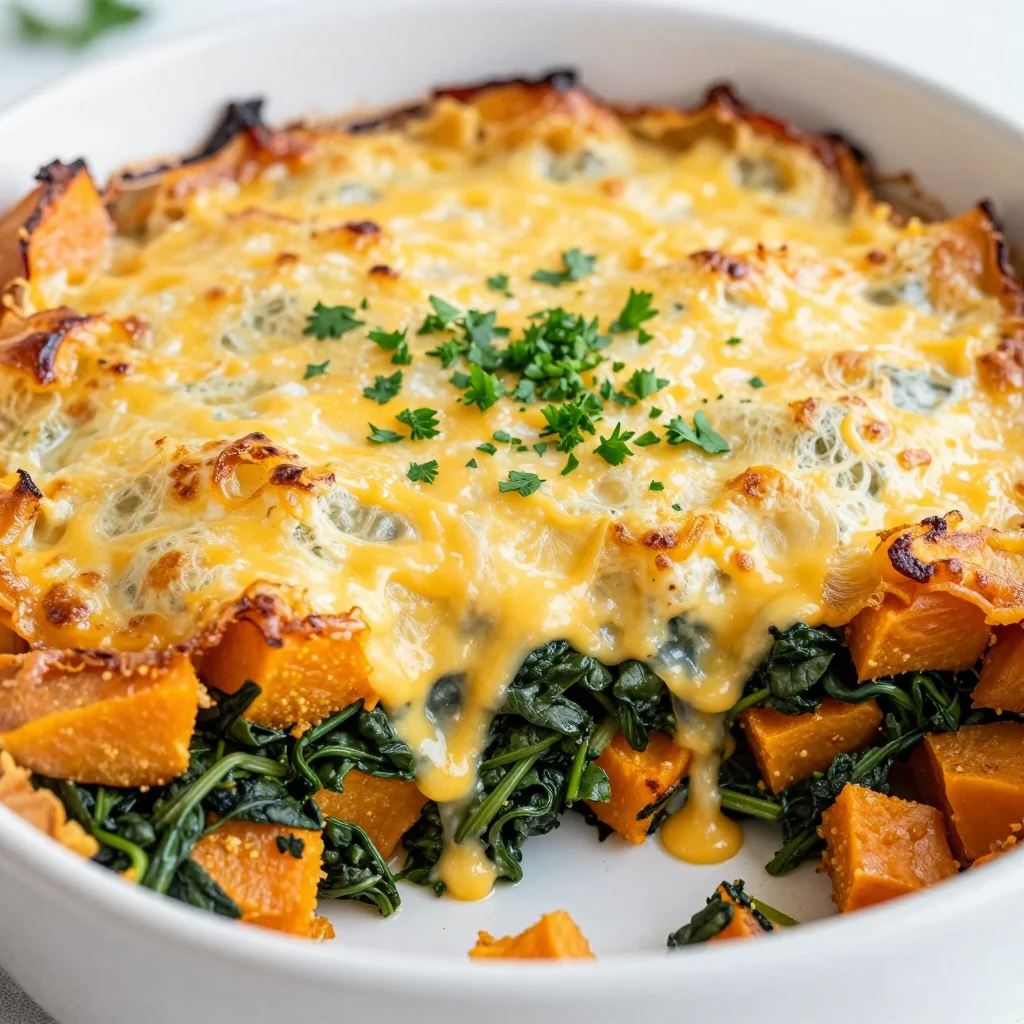
I still remember the Great Chicken Catastrophe of 2019. There I was, hosting my first dinner party in my tiny apartment kitchen, armed with nothing but good intentions and a pack of boneless, skinless chicken breasts that looked like they could feed a small army. Two hours later, my guests were politely chewing what resembled shoe leather while I died inside. The chicken was dry, stringy, and tasted like disappointment wrapped in a thin layer of desperation. That night, I swore I'd crack the code for perfectly juicy baked chicken or die trying.
Fast forward through months of obsessive testing, dozens of rubbery failures, and one memorable incident involving a smoke alarm and my neighbor's concerned knock, I finally stumbled upon a method so foolproof it made me want to shout from the rooftops. This isn't just another baked chicken recipe — this is the recipe that will make you the hero of weeknight dinners, the star of meal prep Sundays, and the person everyone asks for cooking advice. The secret lies not in fancy equipment or hard-to-find ingredients, but in understanding exactly what chicken breasts need to stay moist and flavorful.
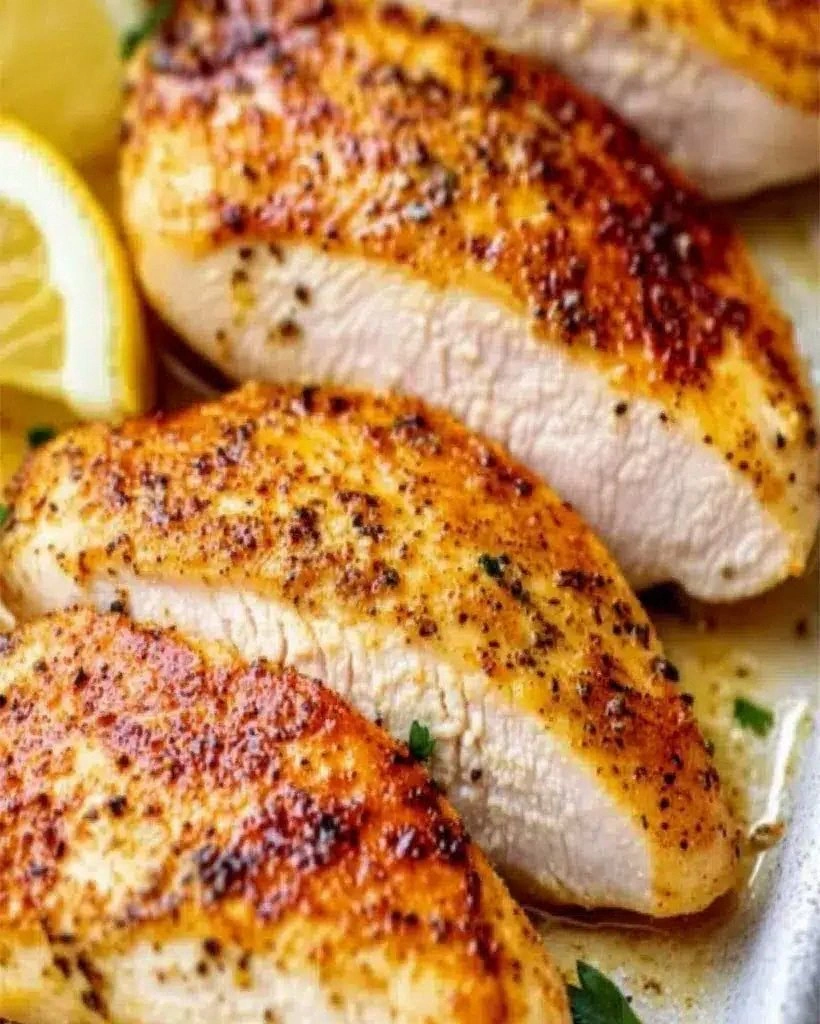
Picture this: You pull a baking dish from the oven, the chicken breasts glistening with a golden-brown crust, juices pooling in the bottom of the pan like liquid gold. The aroma fills your kitchen — not the sad, dry smell of overcooked poultry, but the mouthwatering scent of herbs, butter, and perfectly seasoned meat. You slice into one breast and it practically sighs, releasing a flood of juices so abundant you could mop them up with a piece of crusty bread. This is what we're achieving today, and trust me, once you taste this chicken, you'll never go back to your old method.
Here's the kicker — most recipes get this completely wrong. They tell you to bake chicken until it reaches 165°F, but by the time it gets there, it's already overcooked. They skip the crucial brining step or use the wrong temperature. They don't understand that chicken breasts are like sponges that need careful handling. Today, I'm sharing the technique that professional chefs use in restaurants but rarely reveal to home cooks. Let me walk you through every single step — by the end, you'll wonder how you ever made it any other way.
What Makes This Version Stand Out
This isn't just another baked chicken recipe floating around the internet. After perfecting this method through countless trials (and yes, many errors), I can confidently say this is hands down the best version you'll ever make at home. The difference lies in the details that other recipes gloss over — the science behind why we do what we do, and the small touches that elevate this from basic protein to crave-worthy dinner.
- Brine Magic: A quick 15-minute saltwater bath transforms even the most basic grocery store chicken into something that tastes like it came from a high-end butcher shop. The salt solution breaks down tough muscle proteins, allowing the meat to retain more moisture during cooking.
- Temperature Precision: Forget everything you've heard about cooking chicken to death. We pull these beauties at exactly 150°F and let carryover cooking finish the job, resulting in meat so juicy it practically drips.
- Flavor Layering: Instead of just sprinkling seasoning on top, we create a paste that adheres to every surface, ensuring each bite explodes with flavor. No bland, tasteless chicken here.
- Butter Basting: Halfway through baking, we spoon melted butter and juices over the top, creating a self-basting system that keeps everything moist while building that gorgeous golden crust.
- Rest and Relax: Most home cooks skip this crucial step, but letting the chicken rest for five minutes allows the juices to redistribute throughout the meat instead of flooding your cutting board.
- Make-Ahead Friendly: This recipe doubles or triples beautifully, making it perfect for Sunday meal prep. The chicken stays moist in the fridge for up to four days, getting even more flavorful as it sits.
- One-Pan Wonder: Everything bakes on a single sheet pan, meaning minimal cleanup and maximum flavor as the vegetables cook in those incredible chicken drippings.
- Guaranteed Results: I've tested this method with every type of chicken breast — thick, thin, organic, conventional, even those suspiciously plump ones from the discount bin. Every single time, the results are perfect.
Alright, let's break down exactly what goes into this masterpiece...
Inside the Ingredient List
The Flavor Foundation
Great chicken starts with understanding what each ingredient brings to the party. The chicken itself is obviously the star, but not all breasts are created equal. Skip those giant, mutant-sized ones that look like they came from a turkey — they're pumped with solution and cook unevenly. Look for medium-sized breasts, about 6-8 ounces each, with a natural shape and pale pink color. If you can only find the massive ones, butterfly them or pound them to even thickness, otherwise you'll end up with dry edges and raw centers.
Salt is your best friend here, and I'm not talking about that sad iodized stuff in your grandmother's shaker. Kosher salt has larger, flakier crystals that dissolve beautifully in the brine and season the meat evenly without making it taste like a salt lick. Don't even think about using table salt — the smaller grains make the brine too salty and can actually start curing the chicken, giving it a weird, almost pickled flavor.
Black pepper adds subtle heat and complexity, but here's what most recipes miss: you need to grind it fresh. Pre-ground pepper has lost most of its volatile oils, leaving you with dusty, one-dimensional heat that tastes like cardboard. Invest in a good pepper mill and grind it coarser than you think you should — those little pepper flecks create tiny explosions of flavor when you bite into the finished chicken.
The Texture Crew
Olive oil isn't just for preventing sticking — it creates a protective barrier that helps the chicken retain moisture while encouraging even browning. But here's the key: use regular olive oil, not extra-virgin. The delicate flavors of expensive EVOO get destroyed by high heat, and you're just wasting money. Save the good stuff for finishing dishes, not for the initial cooking.
Butter brings the magic, baby. Not only does it add incredible flavor, but the milk proteins brown and create those gorgeous, crispy edges that shatter like thin ice when you cut into them. I use salted butter because it adds another layer of seasoning, but if you're watching your sodium, unsalted works too — just add a pinch more salt to your seasoning blend.
Garlic powder might seem basic, but it's essential here. Fresh garlic burns at high temperatures, turning bitter and acrid. Garlic powder distributes evenly and provides that savory backbone that makes people ask, "What did you put in this?" Don't substitute with garlic salt — you'll lose control over the seasoning.
The Unexpected Star
Smoked paprika is my secret weapon for baked chicken that tastes like it came off a grill. It adds depth, color, and a subtle smokiness that tricks your brain into thinking this chicken spent time over an open flame. Start with regular smoked paprika, but once you're hooked, try the hot variety for a gentle background heat that builds slowly.
Onion powder rounds out the flavor profile, adding sweetness and umami that makes the chicken taste more complex than it has any right to be. Combined with the garlic powder, it creates that savory base that keeps people coming back for more. If you're out of onion powder, you can use a tiny bit of onion salt and reduce the added salt accordingly.
The real game-changer is a touch of brown sugar. Just a teaspoon helps the chicken caramelize and develop those gorgeous, dark edges that taste like candy. Don't worry — it won't make your chicken taste sweet. The sugar balances the savory elements and helps create that restaurant-quality crust that makes everyone think you're a better cook than you actually are.
The Final Flourish
Fresh herbs take this from good to unforgettable, but timing matters. Dried herbs go into the seasoning blend because they need heat to release their oils, but fresh herbs get sprinkled on at the end so they stay bright and punchy. I keep it simple with parsley because it's available year-round, but thyme or rosemary would be incredible too.
Lemon zest might seem like an afterthought, but it's the spark that makes all the other flavors pop. The citrus oils cut through the richness and add a freshness that keeps the chicken from feeling heavy. Zest it directly over the chicken so those volatile oils land right where you want them instead of getting lost on your cutting board.
Everything's prepped? Good. Let's get into the real action...
The Method — Step by Step
- Start with the brine — and don't skip this step, I beg you. Dissolve 1/4 cup kosher salt in 4 cups of warm water in a large bowl. The water should taste like the ocean but not make you gag. If it's too salty, add more water; if you can't taste the salt, add more. Submerge your chicken breasts completely, adding more water if needed. Let them bathe for 15 minutes while you prep everything else. This is when the magic begins — the salt starts breaking down proteins, creating space for water to move in and stay there during cooking.
- While the chicken brines, create your seasoning paste. In a small bowl, combine 2 tablespoons olive oil, 1 tablespoon melted butter, 2 teaspoons each garlic powder and onion powder, 1 teaspoon smoked paprika, 1 teaspoon brown sugar, 1/2 teaspoon black pepper, and 1/2 teaspoon salt. Mix until it forms a thick paste that smells incredible. This isn't just seasoning — it's flavor armor that will protect your chicken from drying out while adding layers of complexity. The paste consistency ensures it sticks to every surface instead of falling off like dry rubs do.
- Prep your pan like a pro. Line a rimmed baking sheet with parchment paper or foil for easy cleanup, but don't just lay it flat. Crumple it first, then smooth it out — this creates tiny air pockets that help circulate heat around the chicken. If you're adding vegetables, toss them with a bit of oil and spread them around the outside of where the chicken will go. Carrots, potatoes, and onions work beautifully here, cooking in those glorious chicken drippings.
- Preheating matters more than you think. Set your oven to 400°F and give it a full 15 minutes to come to temperature. Most ovens lie about being ready — they'll beep when they're close, but not truly at temperature. If you have an oven thermometer, use it. While you wait, remove the chicken from the brine and pat it very dry with paper towels. Moisture is the enemy of browning, and we want that gorgeous crust.
- Now comes the fun part — getting messy. Rub that seasoning paste all over the chicken, using your hands to massage it into every nook and cranny. Don't be shy here; this is therapeutic. Flip them over and get the bottoms too. The paste should coat each breast completely but not be gloppy. If you have extra, toss it with your vegetables or save it for another use.
- Arrange the chicken on the pan like you're setting up a still life painting. Give each breast space — they shouldn't touch or they'll steam instead of brown. If you're cooking more than four, use two pans rather than crowding. Crowded chicken releases too much moisture and you'll end up with pale, sad meat. Position the thicker ends toward the outside of the pan where it's hotter.
- Into the oven they go, but here's where most recipes get it wrong. Set your timer for just 15 minutes. When it dings, pull the pan out and quickly spoon some of the melted butter that's collected in the corners over each breast. This is the basting step that makes restaurant chicken so good. Don't worry about being perfect — just get some of those juices flowing over the top. Add a few pats of butter directly on the chicken if it looks dry.
- Back in for another 10-15 minutes, but here's the crucial part — start checking the temperature early. Insert your thermometer into the thickest part, being careful not to hit the pan. When it reads 150°F, pull them out immediately. They'll rise to the safe 165°F as they rest. This is the temperature rule that changes everything. If you wait for 165°F in the oven, you'll have dry chicken — guaranteed.
- The rest period is non-negotiable. Transfer the chicken to a clean plate and tent loosely with foil. Don't wrap it tight or it'll steam and lose that beautiful crust. Five minutes is the minimum, but up to 10 is even better. During this time, the juices redistribute throughout the meat instead of running out when you cut it. This is when chicken transforms from good to legendary.
- Finally, the moment of truth. Slice into one breast and watch how the juices run clear but abundant. The inside should be white with just a hint of pink at the very center — that's carryover cooking doing its job. Sprinkle with fresh parsley and lemon zest, then serve with those incredible vegetables that have been roasting in the chicken fat. I dare you to taste this and not go back for seconds.
That's it — you did it. But hold on, I've got a few more tricks that'll take this to another level...
Insider Tricks for Flawless Results
The Temperature Rule Nobody Follows
Here's the thing about chicken that drives me absolutely bonkers — everyone parrots "cook to 165°F" without understanding what that actually means. That's the temperature where salmonella dies instantly, but it's also the temperature where chicken starts turning into sawdust. The USDA is being extra cautious for the lowest common denominator who might not handle food safely. But here's what actually works: chicken held at 150°F for 3 minutes is just as safe as 165°F for 1 second. When you pull it at 150°F and let it rest, carryover cooking keeps it above 150°F for way more than 3 minutes. The result? Juicy, tender chicken that'll make you weep with joy instead of chewing sadness.
A friend tried skipping this step once — let's just say it didn't end well. She served chicken cooked to 175°F because she was terrified of food poisoning. It was so dry that we literally couldn't swallow it without massive gulps of water. Don't be like Sarah. Trust the thermometer, trust the process, and trust that science is on your side here.
Why Your Nose Knows Best
Your sense of smell is your most underutilized cooking tool. When the chicken is perfectly done, your kitchen will smell like a savory, herby paradise. If it starts smelling sharp or acrid, you've gone too far. That smell is the proteins breaking down and the juices evaporating away. The best chicken I've ever made filled my apartment with an aroma so enticing that my neighbor knocked to ask what I was cooking. That sizzle when it hits the pan? Absolute perfection. Learn to trust these sensory cues — they're more reliable than any timer.
I always tell people to set their timer for 5 minutes less than they think they need, then start paying attention with all their senses. Look for the juices running clear, listen for the gentle sizzle that indicates proper browning, and definitely trust your nose when it tells you something magical is happening in your oven.
The 5-Minute Rest That Changes Everything
I know you're hungry. I know the chicken looks amazing. But if you cut into it immediately, you'll watch all those precious juices flood your cutting board instead of staying in the meat where they belong. Five minutes feels like an eternity when you're starving, but it's the difference between good chicken and life-changing chicken. During this rest, the proteins relax and reabsorb the moisture they lost during cooking. The internal temperature evens out, ensuring no dry spots. Plus, this gives you time to finish your sides or pour yourself a well-deserved glass of wine.
Picture yourself pulling this out of the oven, the whole kitchen smelling incredible, and instead of diving in immediately, you practice patience. You tent it loosely, maybe drizzle those pan juices over the top, and when you finally slice into it, the chicken rewards your restraint by being impossibly juicy and tender. This is worth it.
The Even Thickness Trick
Chicken breasts are naturally uneven — thick on one end, paper-thin on the other. This is why they cook unevenly and you end up with dry edges and raw centers. The solution is so simple it feels like cheating. Place each breast between plastic wrap and gently pound the thick end with a meat mallet or rolling pin until it's an even thickness throughout. Don't go crazy here — you're not making chicken cutlets, just evening things out. This 30-second step ensures every bite cooks perfectly and you don't have to choose between raw chicken or dry chicken.
Seasoning Timing Matters More Than You Think
Most people season their chicken right before cooking, but here's what actually works: season it after the brine and let it sit for at least 10 minutes. This gives the salt time to penetrate the meat rather than just sitting on the surface. Even better? Season it the night before and let it rest uncovered in the fridge. The surface dries out slightly, which promotes better browning, and the flavors have time to really meld. This is restaurant-level thinking that takes zero extra effort but delivers maximum results.
If you've ever struggled with chicken that tastes bland despite being coated in seasoning, you're not alone — and I've got the fix. The overnight method transforms supermarket chicken into something that tastes like it came from a specialty butcher. The difference is so dramatic that I plan my chicken meals a day ahead now, just for this extra flavor boost.
Creative Twists and Variations
This recipe is a playground. Here are some of my favorite ways to switch things up:
Mediterranean Dream Chicken
Swap the smoked paprika for regular, add a teaspoon of dried oregano and a pinch of cinnamon to the seasoning blend. After the first basting, scatter cherry tomatoes, sliced red onion, and Kalamata olives around the chicken. The tomatoes burst and create this incredible sauce with the chicken juices. Finish with fresh oregano and a squeeze of lemon. This version tastes like summer vacation in the Greek islands, even in the middle of winter.
Spicy Honey Butter Chicken
Add a teaspoon of chili powder and a pinch of cayenne to the seasoning paste. During the final basting, drizzle each breast with honey — just a teaspoon each. The honey caramelizes and creates this sticky, spicy-sweet glaze that's absolutely addictive. My spice-loving friends can't get enough of this version. Serve it over rice to soak up every drop of that incredible sauce.
Everything Bagel Chicken
Replace the regular seasoning with everything bagel seasoning — yes, the whole 2 tablespoons. Mix it with the oil and butter as usual. The result is chicken coated in garlicky, oniony, seedy goodness that tastes like your favorite bagel but in protein form. This is my go-to when I want something different but don't have time for elaborate preparations.
Lemon Herb Explosion
Add the zest of two lemons and a tablespoon of fresh thyme to the seasoning paste. Stuff a few lemon slices under each breast before baking — they'll steam and infuse the chicken with bright citrus flavor. This version is incredibly fresh and perfect for spring. The lemon zest in the paste caramelizes and creates these little bursts of sunshine throughout the chicken.
Asian-Inspired Umami Bomb
Replace the salt with soy sauce in the brine, and add a teaspoon of five-spice powder and grated ginger to the seasoning paste. During the final basting, brush with a mixture of soy sauce and honey. The result is chicken that's savory, slightly sweet, and incredibly complex. Serve with steamed rice and quick-pickled vegetables for a complete meal that tastes like it came from your favorite Asian fusion restaurant.
Smoky BBQ Style
Double the smoked paprika and add a teaspoon of cumin and a touch of brown mustard to the paste. During the last 5 minutes of cooking, brush with your favorite BBQ sauce. The sauce caramelizes but doesn't burn, creating that sticky, finger-licking coating that makes BBQ so addictive. This version is perfect for summer cookouts when you want BBQ flavor but don't want to fire up the grill.
Storing and Bringing It Back to Life
Fridge Storage
Let the chicken cool completely before storing — hot chicken in the fridge creates condensation that leads to soggy skin and potential bacterial growth. Store in an airtight container with the juices spooned over the top to keep everything moist. It'll stay perfect for up to 4 days, though I'll be honest — mine never lasts that long. The flavors actually deepen and improve after a day in the fridge, making this ideal for meal prep. Just remember to bring it to room temperature before reheating for best results.
Freezer Friendly
This chicken freezes beautifully, but there's a trick to keeping it from getting rubbery. Let it cool completely, then wrap each breast individually in plastic wrap, pressing out as much air as possible. Place the wrapped portions in a freezer bag with the air squeezed out. They'll keep for up to 3 months without losing quality. Thaw overnight in the fridge, not on the counter, and add a splash of chicken broth when reheating to restore moisture. The texture won't be quite as perfect as fresh, but it's miles better than most frozen chicken options.
Best Reheating Method
Whatever you do, don't microwave this chicken — it'll turn to rubber faster than you can say "leftovers." Instead, place the chicken in a baking dish with a splash of chicken broth or water, cover with foil, and warm in a 300°F oven for about 10 minutes. The gentle heat and steam rehydrates the meat without overcooking it. If you're in a hurry, you can reheat it in a skillet with a lid and a tablespoon of water over medium-low heat. The key is low and slow — patience pays off here.