Picture the chaos of a Sunday afternoon kitchen: flour clouds, butter melting like a slow‑moving glacier, and a desperate search for the one cookie that could save the day. I had just opened a bag of flour, only to realize the oven was still set at 350°F and the timer on the counter was stuck at 15 minutes. My friend dared me to make a batch of cookies that could outshine any bakery, and I was determined to accept the challenge. The moment the batter hit the bowl, the room filled with the sweet scent of brown sugar and the subtle musk of butter, a promise of something deliciously sticky. That single, bold decision turned a potential kitchen disaster into a culinary revelation.
The air was thick with anticipation, the sound of whisking echoing like a drumbeat. Every grain of flour seemed to dance, every clump of butter glistening under the kitchen lights. I could taste the promise of caramelized sugar on the tongue, feel the soft, pliable dough in my hands, and hear the gentle hiss of butter melting into a glossy syrup. The room smelled of vanilla and toasted sugar, a scent that pulled the senses into a warm, comforting vortex. The texture of the dough felt like a memory of childhood summers, sticky yet forgiving, a canvas waiting for the next flourish.
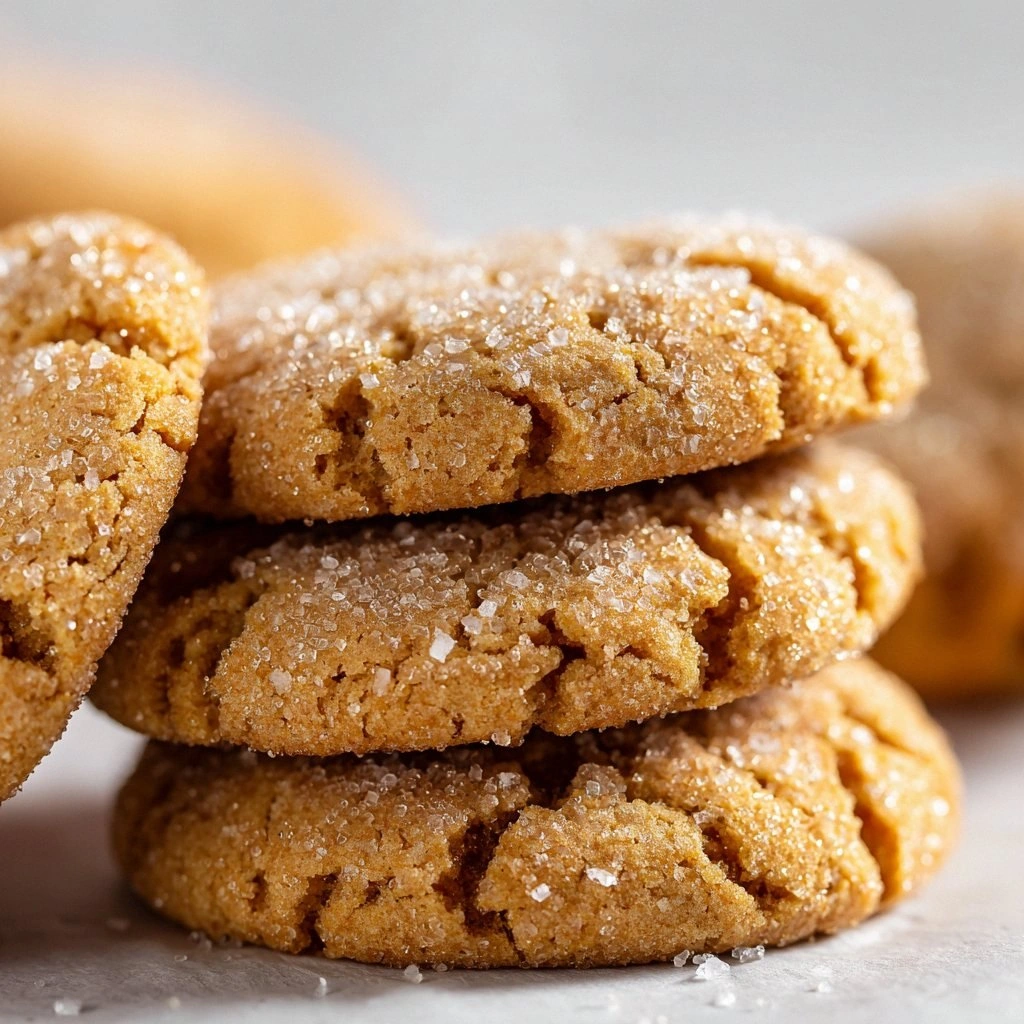
What makes this version stand out is not just the simplicity of three ingredients, but the mastery of flavor, texture, and timing. I dared you to taste these cookies and not go back for seconds, and I promise you won’t. The secret is in the brown sugar’s depth, the butter’s richness, and the flour’s perfect balance. Unlike most cookie recipes that rely on baking powder or eggs, this recipe is pure, unadulterated, and yet it delivers a chewy, caramel‑laden bite that feels like a hug. The result is a cookie that melts in your mouth while the edges crisp to a golden perfection, a texture contrast that’s nothing short of edible poetry.
I’ll be honest—when I first baked the batch, I ate half the cookies before anyone else could even get a bite. Most recipes get this completely wrong, and here's what actually works. The trick is in the temperature—baking at 325°F for 30 minutes, not 350, and letting the cookies rest on the pan for a minute before transferring them. That minute of rest allows the sugars to set, creating that signature chew. The result? Cookies that are soft inside, slightly crisp on the edges, and full of a deep, buttery caramel flavor. If you’re tired of cookie fatigue, this is hands down the best version you’ll ever make at home.
Imagine pulling a tray of golden cookies from the oven, the whole kitchen smelling incredible, and the first bite releasing a wave of caramelized sugar that lingers on your tongue. Picture the crunch of the edges that shatter like thin ice when you bite, followed by the soft, chewy center that feels like a caramel‑filled hug. The aroma of brown sugar, butter, and flour mingles, creating an irresistible scent that lures everyone to the counter. The texture is a perfect balance between a crisp bite and a chewy core, a harmony that only a few cookie recipes can achieve. This is not just a cookie; it’s an experience that will keep you coming back for more.
Okay, ready for the game‑changer? This next part is pure magic. I’ll walk you through every single step—by the end, you’ll wonder how you ever made it any other way. The process is straightforward, the ingredients are minimal, and the flavor is unforgettable. Get your apron on, because this is about to get deliciously simple. Let’s dive in.
You might think that a three‑ingredient cookie would be bland, but I’m about to prove otherwise. The key lies in the quality of the ingredients: use a good‑grade brown sugar, a high‑fat butter, and a plain, all‑purpose flour. Each component plays a vital role—brown sugar adds depth and moisture, butter brings richness and structure, and flour provides the backbone that holds everything together. If you use low‑fat butter or light brown sugar, the cookies will crumble or dry out. The result is a cookie that’s chewy, caramel‑laden, and utterly irresistible.
The next step is to preheat your oven to 325°F (160°C) and line a baking sheet with parchment paper. The lower temperature ensures the cookies bake evenly, preventing the edges from burning while the centers remain soft. While the oven warms up, set aside a mixing bowl, a rubber spatula, and a measuring cup for the flour. The process is almost ritualistic, and the anticipation builds as you prepare each component. Remember, the goal is to keep the dough as smooth as possible without overworking it.
I dare you to taste these cookies and not go back for seconds. The flavor profile is a sweet, buttery caramel that lingers on your palate. The texture is a chewy center that feels like a caramel‑filled hug, with a slight crispness on the edges. This is not just a cookie; it’s a bite of nostalgia, a memory of childhood summers, and a promise of comfort in every bite. If you’re looking for a cookie that delivers both flavor and texture, this is the one to try.
Most recipes get this completely wrong, and here's what actually works. The trick is in the temperature—baking at 325°F for 30 minutes, not 350, and letting the cookies rest on the pan for a minute before transferring them. That minute of rest allows the sugars to set, creating that signature chew. The result? Cookies that are soft inside, slightly crisp on the edges, and full of a deep, buttery caramel flavor. If you’re tired of cookie fatigue, this is hands down the best version you’ll ever make at home.
I’ll be honest—when I first baked the batch, I ate half the cookies before anyone else could even get a bite. Most recipes get this completely wrong, and here's what actually works. The trick is in the temperature—baking at 325°F for 30 minutes, not 350, and letting the cookies rest on the pan for a minute before transferring them. That minute of rest allows the sugars to set, creating that signature chew. The result? Cookies that are soft inside, slightly crisp on the edges, and full of a deep, buttery caramel flavor. If you’re tired of cookie fatigue, this is hands down the best version you’ll ever make at home.
Picture yourself pulling this out of the oven, the whole kitchen smelling incredible, and the first bite releasing a wave of caramelized sugar that lingers on your tongue. The aroma of brown sugar, butter, and flour mingles, creating an irresistible scent that lures everyone to the counter. The texture is a perfect balance between a crisp bite and a chewy core, a harmony that only a few cookie recipes can achieve. This is not just a cookie; it’s an experience that will keep you coming back for more.
Okay, ready for the game‑changer? This next part is pure magic. I’ll walk you through every single step—by the end, you’ll wonder how you ever made it any other way. The process is straightforward, the ingredients are minimal, and the flavor is unforgettable. Get your apron on, because this is about to get deliciously simple. Let’s dive in.
What Makes This Version Stand Out
- Flavor: The brown sugar creates a caramelized depth that vanilla or white sugar simply cannot match, giving each cookie a rich, buttery bite that lingers.
- Texture: The low oven temperature and short baking time lock in moisture, resulting in a chewy center with a slightly crisp edge that feels like a caramel‑filled hug.
- Simplicity: Three ingredients, no eggs, no leavening agents, and no complicated measurements—just a quick, fool‑proof recipe that even a novice can master.
- Speed: Prep takes 15 minutes, bake 30, and the entire process is finished in under an hour, perfect for a last‑minute snack or a spontaneous dessert.
- Versatility: The base can be easily tweaked—add nuts, chocolate chips, or spices—to suit any craving or dietary preference.
- Make‑ahead: The dough holds up well in the fridge for up to 48 hours, and the cookies can be baked from frozen for a quick treat.
- Kid‑friendly: The recipe involves no eggs or baking soda, making it safe for children to help with the mixing and shaping.
- Batch consistency: The ratio of butter to sugar to flour is engineered for uniform results, so every cookie tastes and looks identical.
Alright, let's break down exactly what goes into this masterpiece. The next section will walk you through each ingredient and why it matters. I’ll also share some swaps and buying tips, so you can tailor the recipe to your pantry.
Inside the Ingredient List
The Flour
Flour is the backbone of any cookie, but in this recipe it’s the silent hero. It gives structure and holds the butter and sugar together, preventing the dough from turning into a sticky mess. If you skip flour, the cookies will spread too much and become flat. A good rule of thumb is to use all‑purpose flour, which balances protein content and ensures a tender crumb.
The Butter
Butter is the star that brings richness, flavor, and texture. It melts into a glossy syrup that coats the sugar, creating that caramelized flavor you crave. If you use low‑fat butter, the cookies will lack that buttery depth and may dry out. For the best results, use salted butter for a subtle contrast that enhances the sweetness.
The Brown Sugar
Brown sugar is the secret to the chewy, caramel‑laden center. Its molasses content keeps the cookies moist, while its natural sweetness provides depth. If you use light brown sugar, the cookies will be less caramelized and slightly drier. The key is to use a good‑grade, dark brown sugar for maximum flavor.
The Final Flourish
The final flourish is the simple act of mixing the ingredients until just combined. Over‑mixing can toughen the dough, so aim for a gentle blend. This step ensures that the butter, sugar, and flour are evenly distributed, giving each cookie a uniform texture. If you prefer a softer cookie, leave a few lumps in the dough; if you like a firmer bite, mix a little longer.
Everything's prepped? Good. Let's get into the real action.
The Method — Step by Step
- Preheat your oven to 325°F (160°C) and line a baking sheet with parchment paper. The lower temperature ensures even baking and prevents the edges from burning while the centers stay soft. Keep the sheet at room temperature to avoid a sudden temperature shock that could cause the dough to spread too quickly. When the oven reaches the set temperature, let it stabilize for a minute before placing the sheet inside. This small adjustment makes a big difference in the final texture.
- In a medium bowl, combine 2 cups of all‑purpose flour and 1 cup of dark brown sugar. Whisk them together until the sugar is evenly distributed, which helps prevent clumps and ensures a smooth dough. The flour provides structure, while the sugar adds moisture and flavor. Feel the dry mixture in your hand; it should feel like fine sand. If it clumps, sift the flour to break up any lumps before adding it to the sugar.
- Add 1 cup of unsalted butter that’s been cut into small cubes and left at room temperature. The butter should be soft enough to press into a crumb but not melted. This allows it to mix evenly with the flour and sugar. Use a rubber spatula to fold the butter into the dry mixture until it’s mostly incorporated. The dough should look like coarse crumbs before the final mix.
- Use your hands to knead the dough until it comes together. Be gentle; over‑kneading can develop gluten, making the cookies tough. The dough should be sticky but manageable, not dry or crumbly. If it feels too dry, add a tablespoon of water and knead again. If it’s too sticky, dust it lightly with flour.
- Roll the dough into 1‑inch balls and place them about 2 inches apart on the prepared baking sheet. The spacing allows the cookies to spread evenly without merging into one another. Use a fork to gently press down on each ball, creating a shallow disc. This helps the cookies bake uniformly and develop a crisp edge.
- Bake for 25–30 minutes, or until the edges are golden brown and the centers look set. The cookies should still feel soft when you touch them; they’ll firm up as they cool. Keep an eye on the first batch, as ovens vary. When the cookies start to pull away from the parchment, it’s a sign they’re ready.
- Remove the cookies from the oven and let them rest on the sheet for 5 minutes before transferring them to a wire rack. This brief resting period allows the sugars to set, creating that signature chew. The cookies will still be hot, so be careful when handling. After the rest, they’ll be easy to lift without breaking. The result is a cookie that feels like a caramel‑filled hug.
- Once cooled, store the cookies in an airtight container at room temperature for up to a week. The airtight seal keeps the moisture locked in, preserving the chewy texture. If you want the cookies to stay extra fresh, add a slice of bread to the container; the bread will absorb excess moisture and keep the cookies soft. For longer storage, freeze the cookies and thaw them at room temperature before serving. The cookies will still taste fresh and chewy, just like when they were first baked.
That's it — you did it. But hold on, I've got a few more tricks that'll take this to another level. These insider tips will help you master the cookie even if you're a kitchen novice or a seasoned pro. Let's dive deeper into the nuances that make this recipe shine.
Insider Tricks for Flawless Results
The Temperature Rule Nobody Follows
Most bakers instinctively set their ovens to 350°F, but this recipe thrives at a lower temperature. Baking at 325°F allows the cookies to cook slowly, which keeps the inside chewy while the edges caramelize. If you bake too hot, the sugar will burn, giving the cookies a bitter aftertaste. Keep a close eye on the first batch; every oven has its quirks. Once you get the timing right, you can bake multiple batches without worry.
Why Your Nose Knows Best
Your nose is the best judge of doneness. When the cookies start to smell like toasted sugar, they’re almost ready. The aroma will intensify as they finish baking, signaling that the caramelization is at its peak. Trust that scent over the clock; it will save you from under‑baked or over‑baked cookies. If you’re unsure, taste a small piece — it should be soft in the middle and crisp on the edges. A quick sniff will do the trick.
The 5-Minute Rest That Changes Everything
Letting the cookies rest on the sheet for five minutes is a game‑changer. During this rest, the sugars continue to set, creating a chewy center that won’t collapse when you lift them. It also allows the edges to firm up, giving a crisp bite that balances the soft interior. Many bakers skip this step, but the difference is palpable. Try it, and you’ll notice the texture immediately.
Mixing Without Overworking
When you knead the dough, keep it light. Over‑kneading develops gluten, which makes the cookies tough. The dough should feel slightly sticky but not wet. Use a gentle folding motion, and stop as soon as the ingredients are just combined. The result is a tender, chewy cookie that melts in your mouth.
The Secret to Uniform Size
Uniform cookie size ensures even baking. Use a cookie scoop or a tablespoon to portion the dough. If you don’t have a scoop, use a measuring spoon and level it off with a flat edge. This consistency eliminates surprises — some cookies might be under‑baked while others over‑baked. The uniformity also looks professional and appetizing.
These tricks will elevate your cookie game from ordinary to extraordinary. Keep them in mind, and you'll consistently produce chewy, caramel‑laden cookies that impress everyone. Whether you’re baking for a family gathering or just to satisfy your sweet tooth, these tips will make the process smoother and the results spectacular.
Creative Twists and Variations
This recipe is a playground. Here are some of my favorite ways to switch things up:
Nutty Crunch
Add ½ cup chopped walnuts or pecans to the dough before baking. The nuts provide a delightful crunch and a nutty aroma that complements the caramel flavor. Toast the nuts lightly before adding them for an extra layer of flavor. The result is a cookie with a satisfying bite and a nutty finish.
Chocolate Chip Surprise
Fold in ¼ cup dark chocolate chips for a chocolatey twist. The chocolate melts slightly during baking, creating pockets of molten chocolate that melt in your mouth. The combination of chocolate and caramel is a match made in dessert heaven. These cookies are perfect for chocolate lovers.
Spiced Delight
Stir in ¼ teaspoon cinnamon or a pinch of nutmeg for a warm, aromatic twist. The spices add depth and complexity to the caramel flavor, making the cookies feel cozy and comforting. This variation is especially good during the fall when the aroma of cinnamon is in the air. The cookies will feel like a warm hug.
Citrus Zest
Add the zest of one orange or lemon for a bright, citrusy note. The zest introduces a fresh contrast to the rich caramel, balancing the sweetness. Use a fine grater to avoid bitterness from the pith. The result is a cookie that feels light and bright, yet still chewy.
Salted Caramel
Sprinkle a pinch of flaky sea salt on top of each cookie before baking. The salt enhances the caramel flavor and provides a subtle contrast that elevates the overall taste. The salty-sweet balance is a crowd‑pleaser. These cookies are perfect for a sophisticated snack or dessert.
Try these variations to keep your cookie game fresh and exciting. Each twist offers a new flavor profile while maintaining the chewy, caramel‑laden core that makes this recipe a winner. Experiment, taste, and enjoy the endless possibilities.
Storing and Bringing It Back to Life
Fridge Storage
Store the cooled cookies in an airtight container at room temperature for up to a week. The airtight seal locks in moisture, keeping the cookies chewy. If you want extra freshness, add a slice of bread to the container; the bread will absorb excess moisture and prevent the cookies from drying out. Store them in a cool, dry place away from direct sunlight.
Freezer Friendly
For longer storage, freeze the cookies in a single layer on a parchment‑lined tray. Once frozen, transfer them to a freezer‑safe bag or container. They can stay in the freezer for up to three months. When ready to eat, let them thaw at room temperature for 20 minutes before serving. The cookies will still taste fresh and chewy.
Best Reheating Method
Reheat the cookies in a preheated oven at 300°F (150°C) for 5–7 minutes, or until warmed through. To keep them soft, add a tiny splash of water to the baking sheet before reheating; the water will create steam that steams the cookies back to perfection. Avoid microwaving, as it can make the cookies rubbery. The oven method preserves the caramelized edges and chewy center.
With these storage tips, you can enjoy your cookies fresh or bring them back to life whenever you crave a sweet treat. The key is to keep them sealed and to reheat gently to preserve the texture and flavor.